Set up academic years and terms
An academic year is the container for everything a school does in one year: its classes, its grading periods, and its report cards. Inside a year you set up terms — your grading periods, like semesters or quarters. This guide shows you how to create a year, add its terms, set which year everyone sees by default, and use the year/term picker in the top bar to control exactly what data shows up across the whole app.
Under the hood, every class is tied to one academic year, and every assignment, grade, and attendance record "belongs" to a term based on its date. That date rule is the single most important idea in this whole feature, so we'll come back to it.
Who can do this
Only an admin can manage academic years and terms (a teacher can too, but only if you've granted them the calendar permission). Students and parents can never reach these pages — they only ride along with whatever year is current.
Step 1 — Open the Academic Calendar
- Go to Settings.
- Find the Academic Years & Terms card ("Manage academic years, semesters, and term structures.") and click Set up Academic Calendar.
- You land on the Academic Calendar page. If you've never set one up, you'll see "No academic years yet" and a Create your first year button. Otherwise you'll see a card for each year you already have.
You can also reach this from the admin dashboard's Quick Actions → Academic Years.
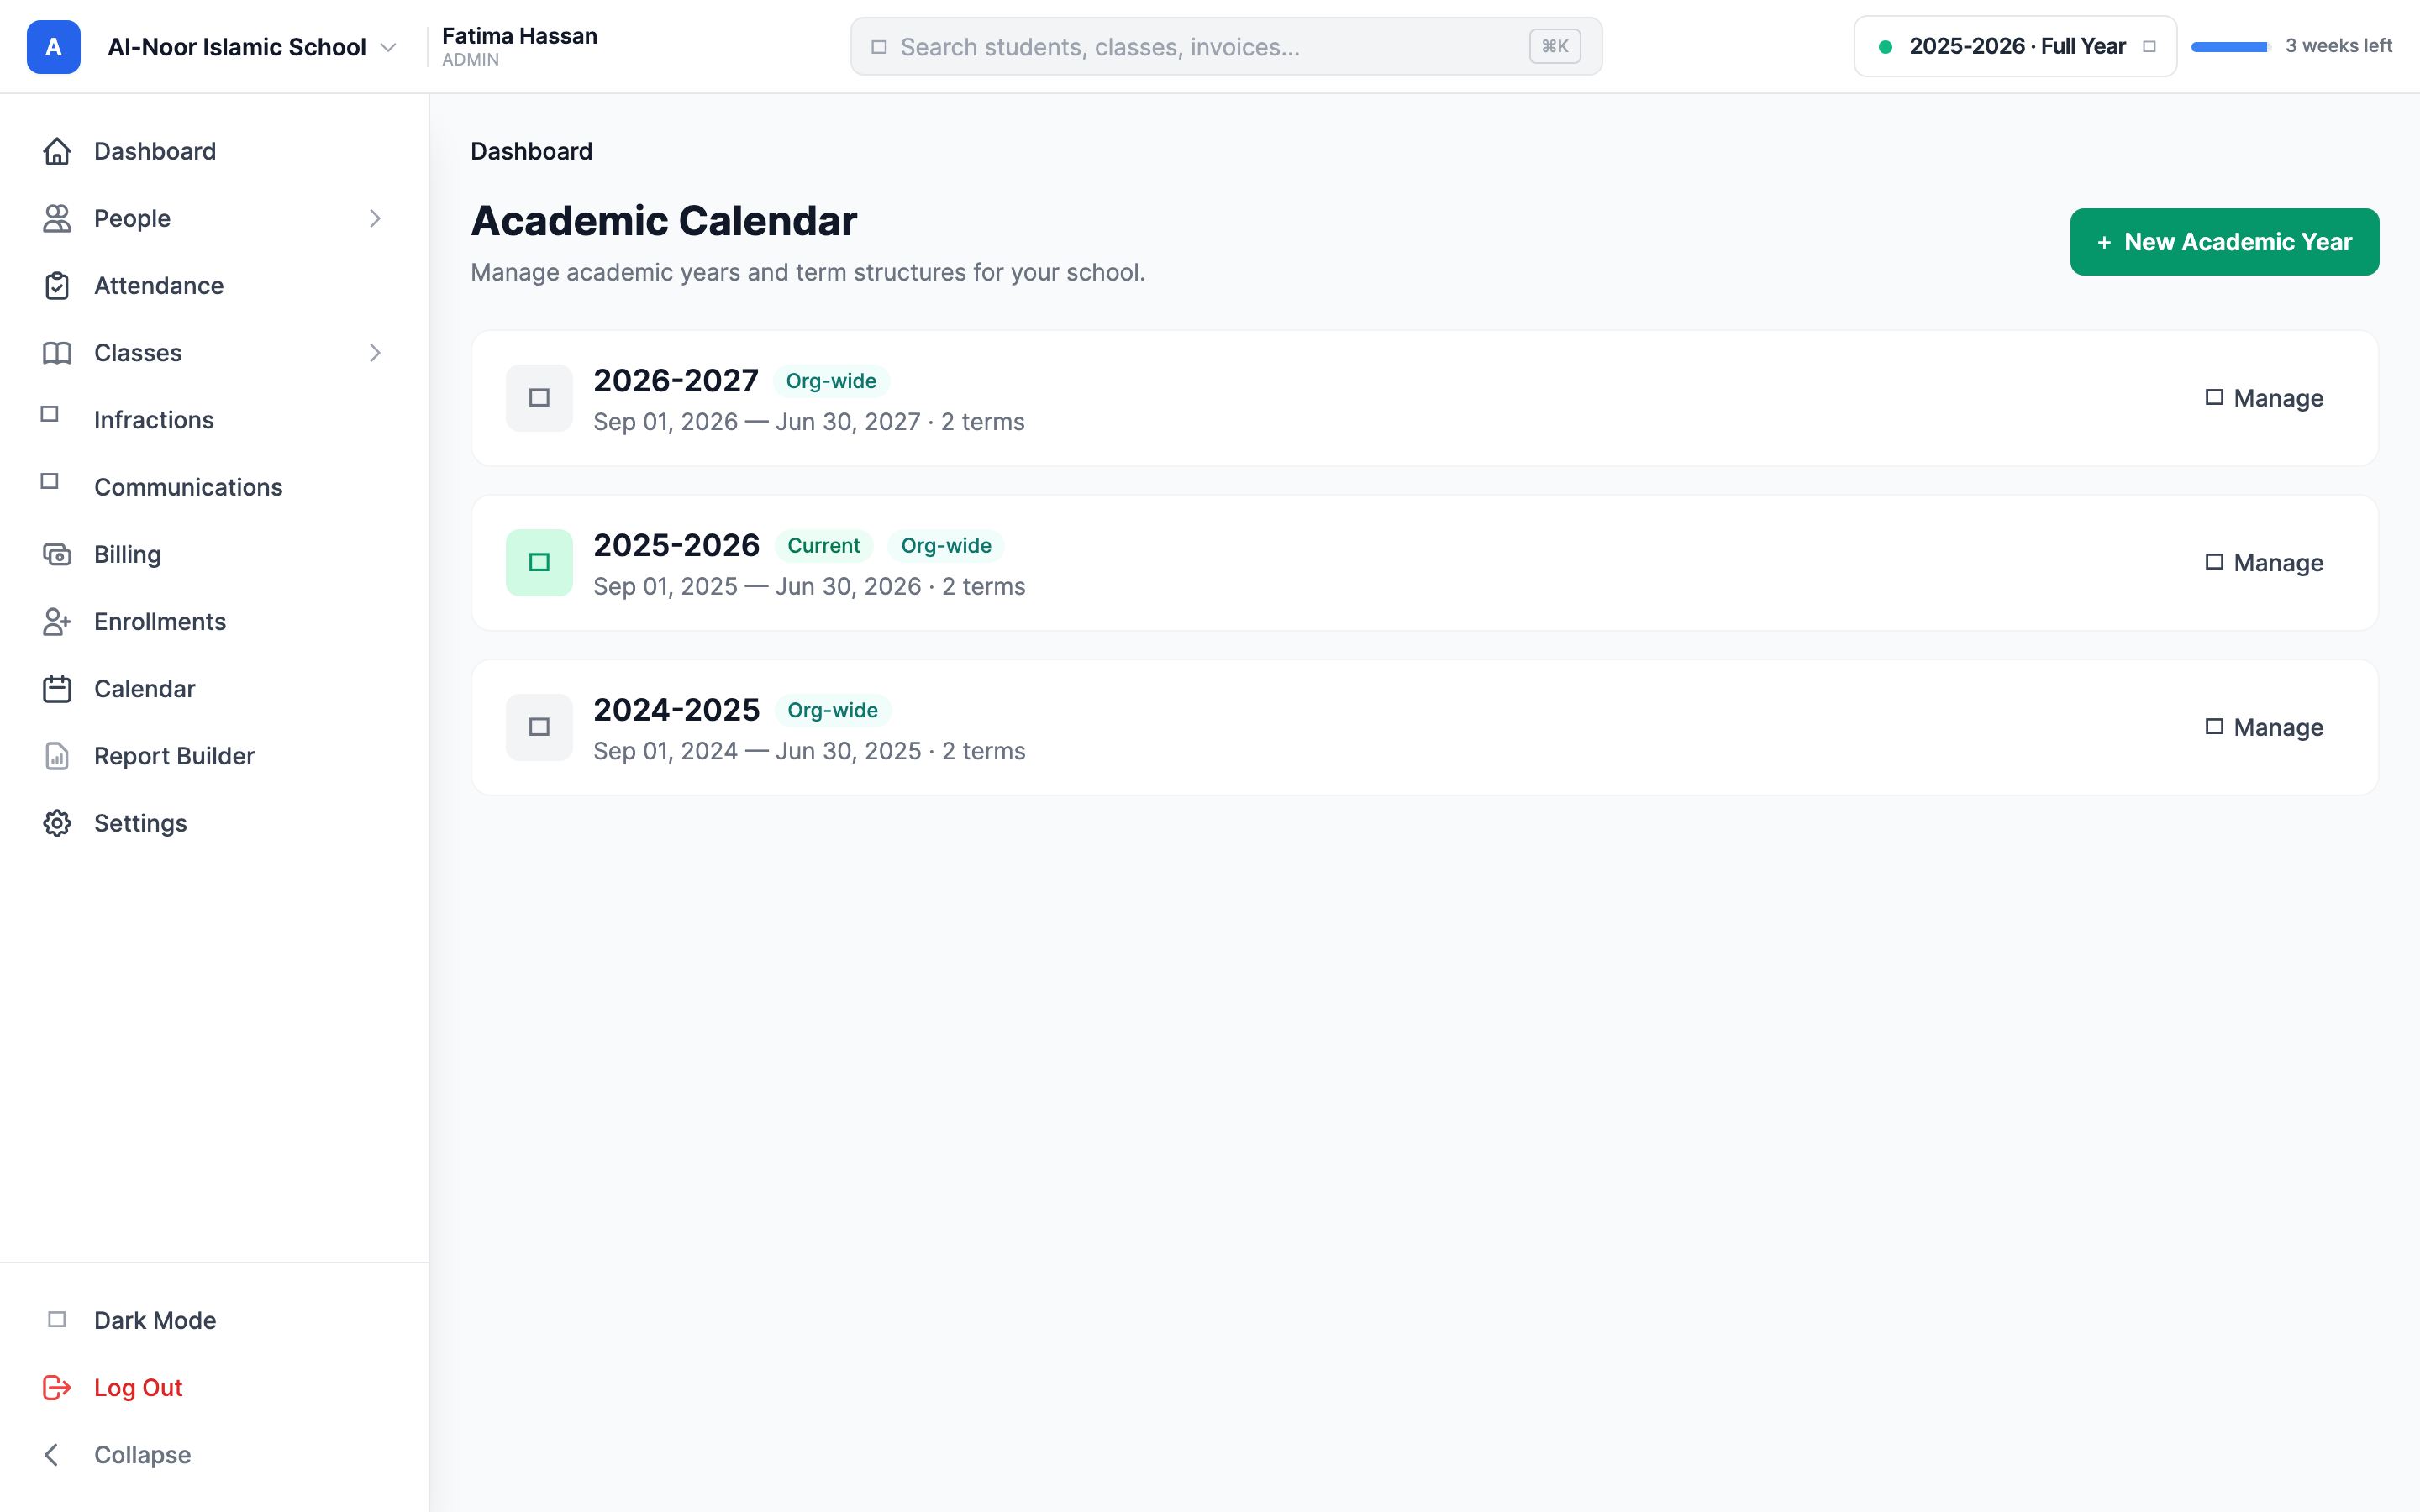
Step 2 — Create a year
- Click New Academic Year.
- Fill in the Year Name (for example,
2026-2027). - Pick a Start Date and an End Date. The end date must be after the start date.
- Under Applies to, choose one of two options (explained below), then click Create Year.
"Whole organization" vs "Just this school"
The Applies to radio decides who the year is for:
- Whole organization (all schools follow this) — the default. This is an org-wide year. Every school in your organization inherits it unless that school has its own year. Cards for these show an Org-wide badge.
- Just this school (its own dates & terms) — a year that belongs only to the school you're currently in, with its own start/end and its own terms. Cards for these show the school's name. Use this when one program (say, a weekend school) runs on a different calendar than the rest.
Years can't overlap (with one exception)
Two years in the same bucket can't have overlapping dates. If you try, you'll see "'2026-2027' overlaps with existing year '2025-2026'." The one exception: a school-specific year is allowed to overlap the org-wide default, because they're in different buckets — the school's own year simply takes priority for that school.
Your very first year adopts your existing classes
The first year you ever create automatically claims all of your existing classes that weren't tied to any year. This is on purpose — otherwise your class lists would suddenly look empty once the app starts filtering by year. The first year you create also becomes the Current year automatically.
Step 3 — Add terms (your grading periods)
Open a year by clicking Manage on its card. This is the year's detail page. Scroll to the Term Structure section ("Defines grading periods within this year."). You have two ways to build it.
The fast way — Apply a Template
- Click Apply Template (or Choose a Template if the year has no terms yet).
- Pick one of the four standard layouts. MarkTrack splits the year's dates for you:
- 2 Semesters — "Fall and Spring — most common for Islamic schools."
- 3 Trimesters — "Three equal terms."
- 4 Quarters — "Four marking periods."
- 2 Semesters + 4 Quarters — quarters nested inside semesters; the most detailed.

Applying a template deletes every existing term — with no undo
A template rebuilds the term structure from scratch, so it erases the terms you already have and the report-card weights attached to them. If the year already has recorded grades, the app stops you and asks: "This year already has recorded grades. Applying a template will reset all terms and any term weights. Continue?" Only apply a template on a fresh year, or when you truly want to start the period structure over.
The manual way — Add Term
- Click Add Term.
- Enter a Name (for example,
Semester 1). - Choose a Type:
- Semester (auto, has dates) — a normal grading period with a start and end date. Its grade is computed automatically from the assignments due inside its dates.
- Item (typed, no dates) — a thing you type a grade for by hand, like a Final, a Midterm, or a Capstone. It has no dates and no auto-calculation.
- For a semester, set the Start and End dates (these fields disappear for an item).
- Optionally set a Parent Term to nest this term inside another (for example, quarters inside a semester). Leave it on — None (top-level) — for a top-level term.
- Click to save.
Each term shows a badge so you can tell them apart at a glance: Graded (blue) for a leaf term where grades are entered, Aggregate (gray) for a parent term whose grade is rolled up from its children, and Item (amber) for a typed component.
Top-level terms can't overlap
Two top-level terms in the same year can't have overlapping dates ("Top-level terms must not overlap."). Sub-terms (like quarters) are allowed to sit inside their parent's dates. An Item must always be top-level — it can't have a parent term.
Step 4 — Understand "Current" vs the picker you're viewing
Two different ideas decide which year matters, and mixing them up causes a lot of confusion:
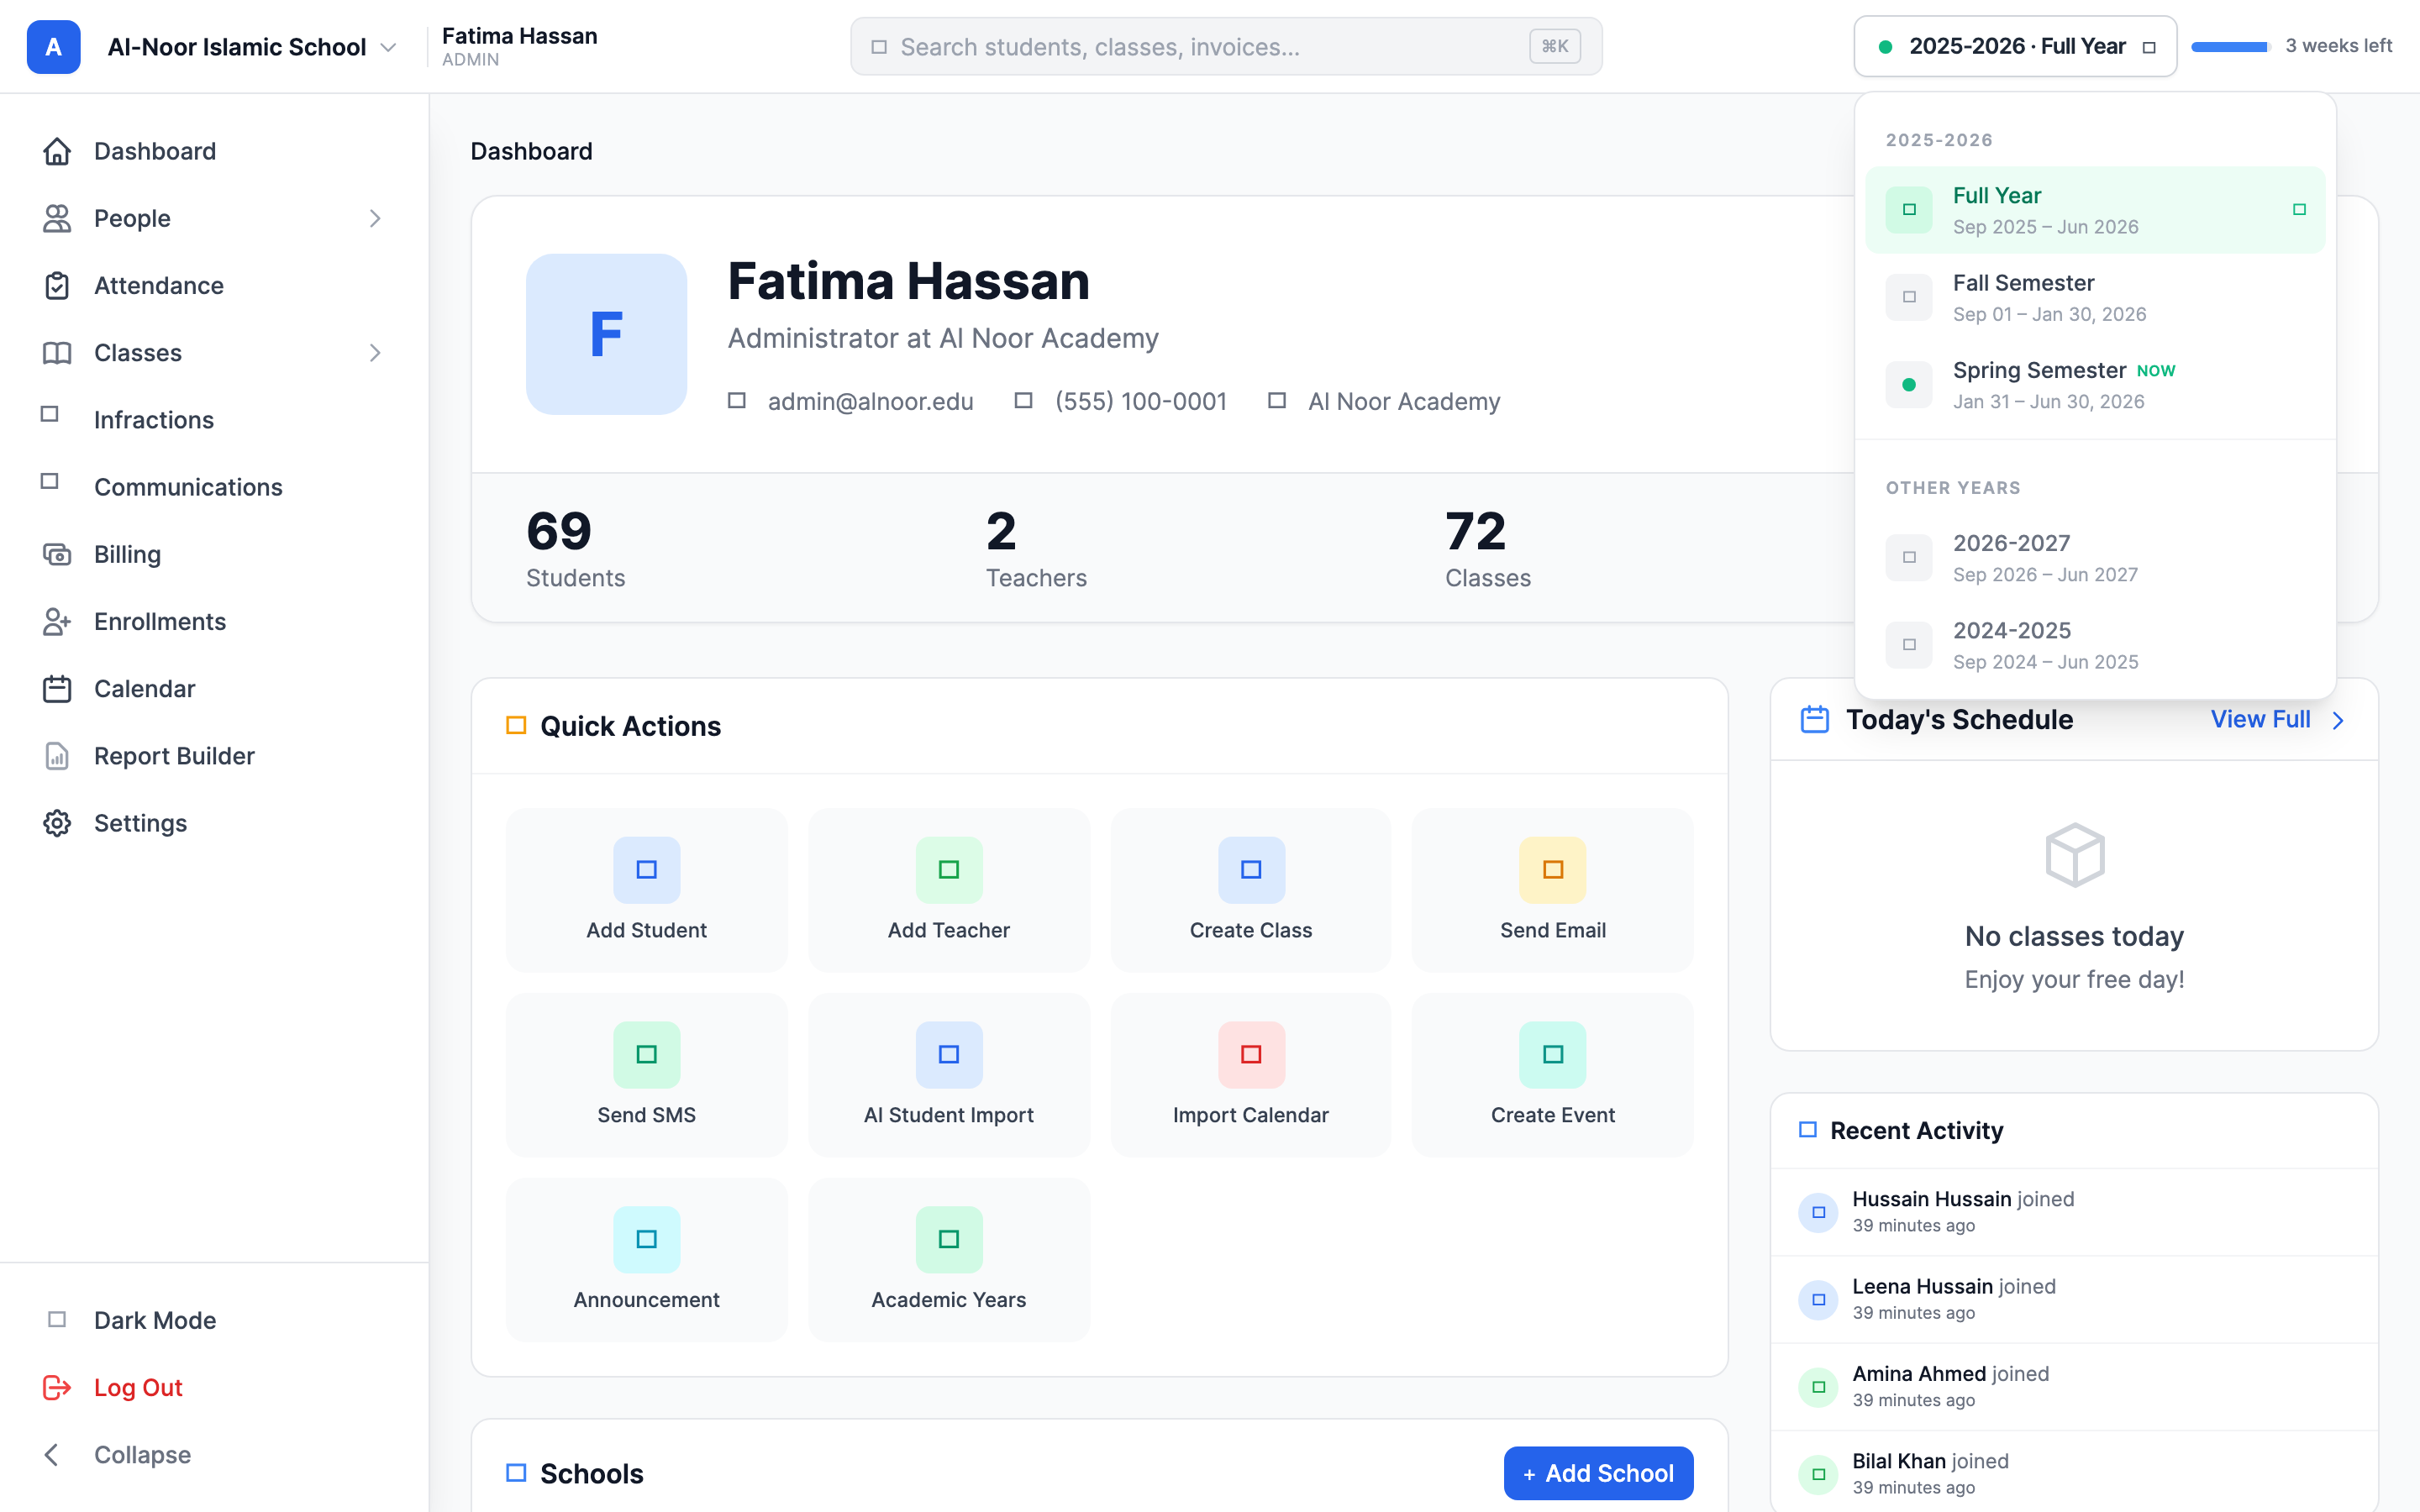
- Current (the badge on a year card) is the default year everyone lands on. There is exactly one current year per school. You don't set this with a button — it flips automatically when you create your first year and when you roll over to a new year (see Roll over to a new year).
- What you're viewing is controlled by the year/term picker in the top bar. This only changes your own session — it never changes which year is Current, and it never affects what other people see.
Step 5 — Use the year/term picker in the top bar
At the right of the top bar is a small button showing the year and term you're currently looking at, like 2026-2027 · Full Year or 2026-2027 · Semester 1. Click it to open the picker.
- The dropdown lists Full Year plus each dated term (the one covering today is tagged Now).
- An Other Years section lets you jump to a different year.
- Pick a term to scope the whole app to that grading period; pick Full Year to remove the term filter.
What the picker actually filters
This is the payoff. When you switch the year, you change which set of classes the app shows — class lists, gradebooks, assignments, and Hifz all switch to that year's classes (plus any old classes that were never assigned a year, so nothing disappears).
When you switch the term, the app filters by date. It shows only the records whose date falls inside that term's start and end:
- Assignments and grades due inside the term's dates.
- Attendance taken on dates inside the term.
- Hifz entries inside the term.
- Per-term GPA on dashboards and the parent portal.
So if you flip from Semester 1 to Semester 2, a class's gradebook stops showing the fall assignments and shows the spring ones instead — the numbers on the page really change, because you've changed the date window. Choose Full Year to see everything at once.
Terms attach by date, not by name
An assignment counts toward whichever term its due date lands in — the term you happen to be viewing doesn't matter. If an assignment is due during a gap between terms (say, winter break), it belongs to no term: it shows up under Full Year but in no term view. Set your due dates carefully so work lands in the term you expect.
Each school remembers its own pick
The picker remembers your selection per school. If your organization runs several schools, you can sit on a different year in each one at the same time — switching schools won't reset what you were looking at in the other.
Next, learn how grades flow into report cards in How grades and report cards are calculated, or browse all guides in Classes & Grades.
More in Classes & Grades
Still stuck?
Our team is happy to walk you through it.