Use the gradebook
Every class with a gradebook has a grid: students down the left side as rows, assignments across the top as columns, and a running Final Grade for each student on the far right. This guide is the practical tour of that grid — how to read it, how to type and edit scores right in the cells, how extra credit works, how to narrow the view to one student or one term, and how to download the whole thing as a spreadsheet.
The gradebook is created automatically for a regular class. (Hifz classes are the exception — they use the Hifz Tracker instead and have no gradebook.) Each column is one assignment, and assignments come from the class's quizzes and file submissions — see Create quizzes and file assignments. How those columns roll up into the Final Grade is governed by your category weights, covered in Grading scheme and weights.
Who can open a gradebook
Admins can open any class's gradebook in the school they're viewing. Teachers see and edit only the gradebooks for classes they teach. Students and parents never see the grid — they see finished grades in their own portal.
Step 1 — Open a class gradebook
- In the left sidebar, open Gradebooks. As an admin this page is titled All Gradebooks; as a teacher it's My Gradebooks.
- Gradebooks are grouped by level, and under each level you'll see the subjects (one row per class). Click the class you want.
- The grid opens. The header shows the class name, the number of Students, and the number of Assignments.
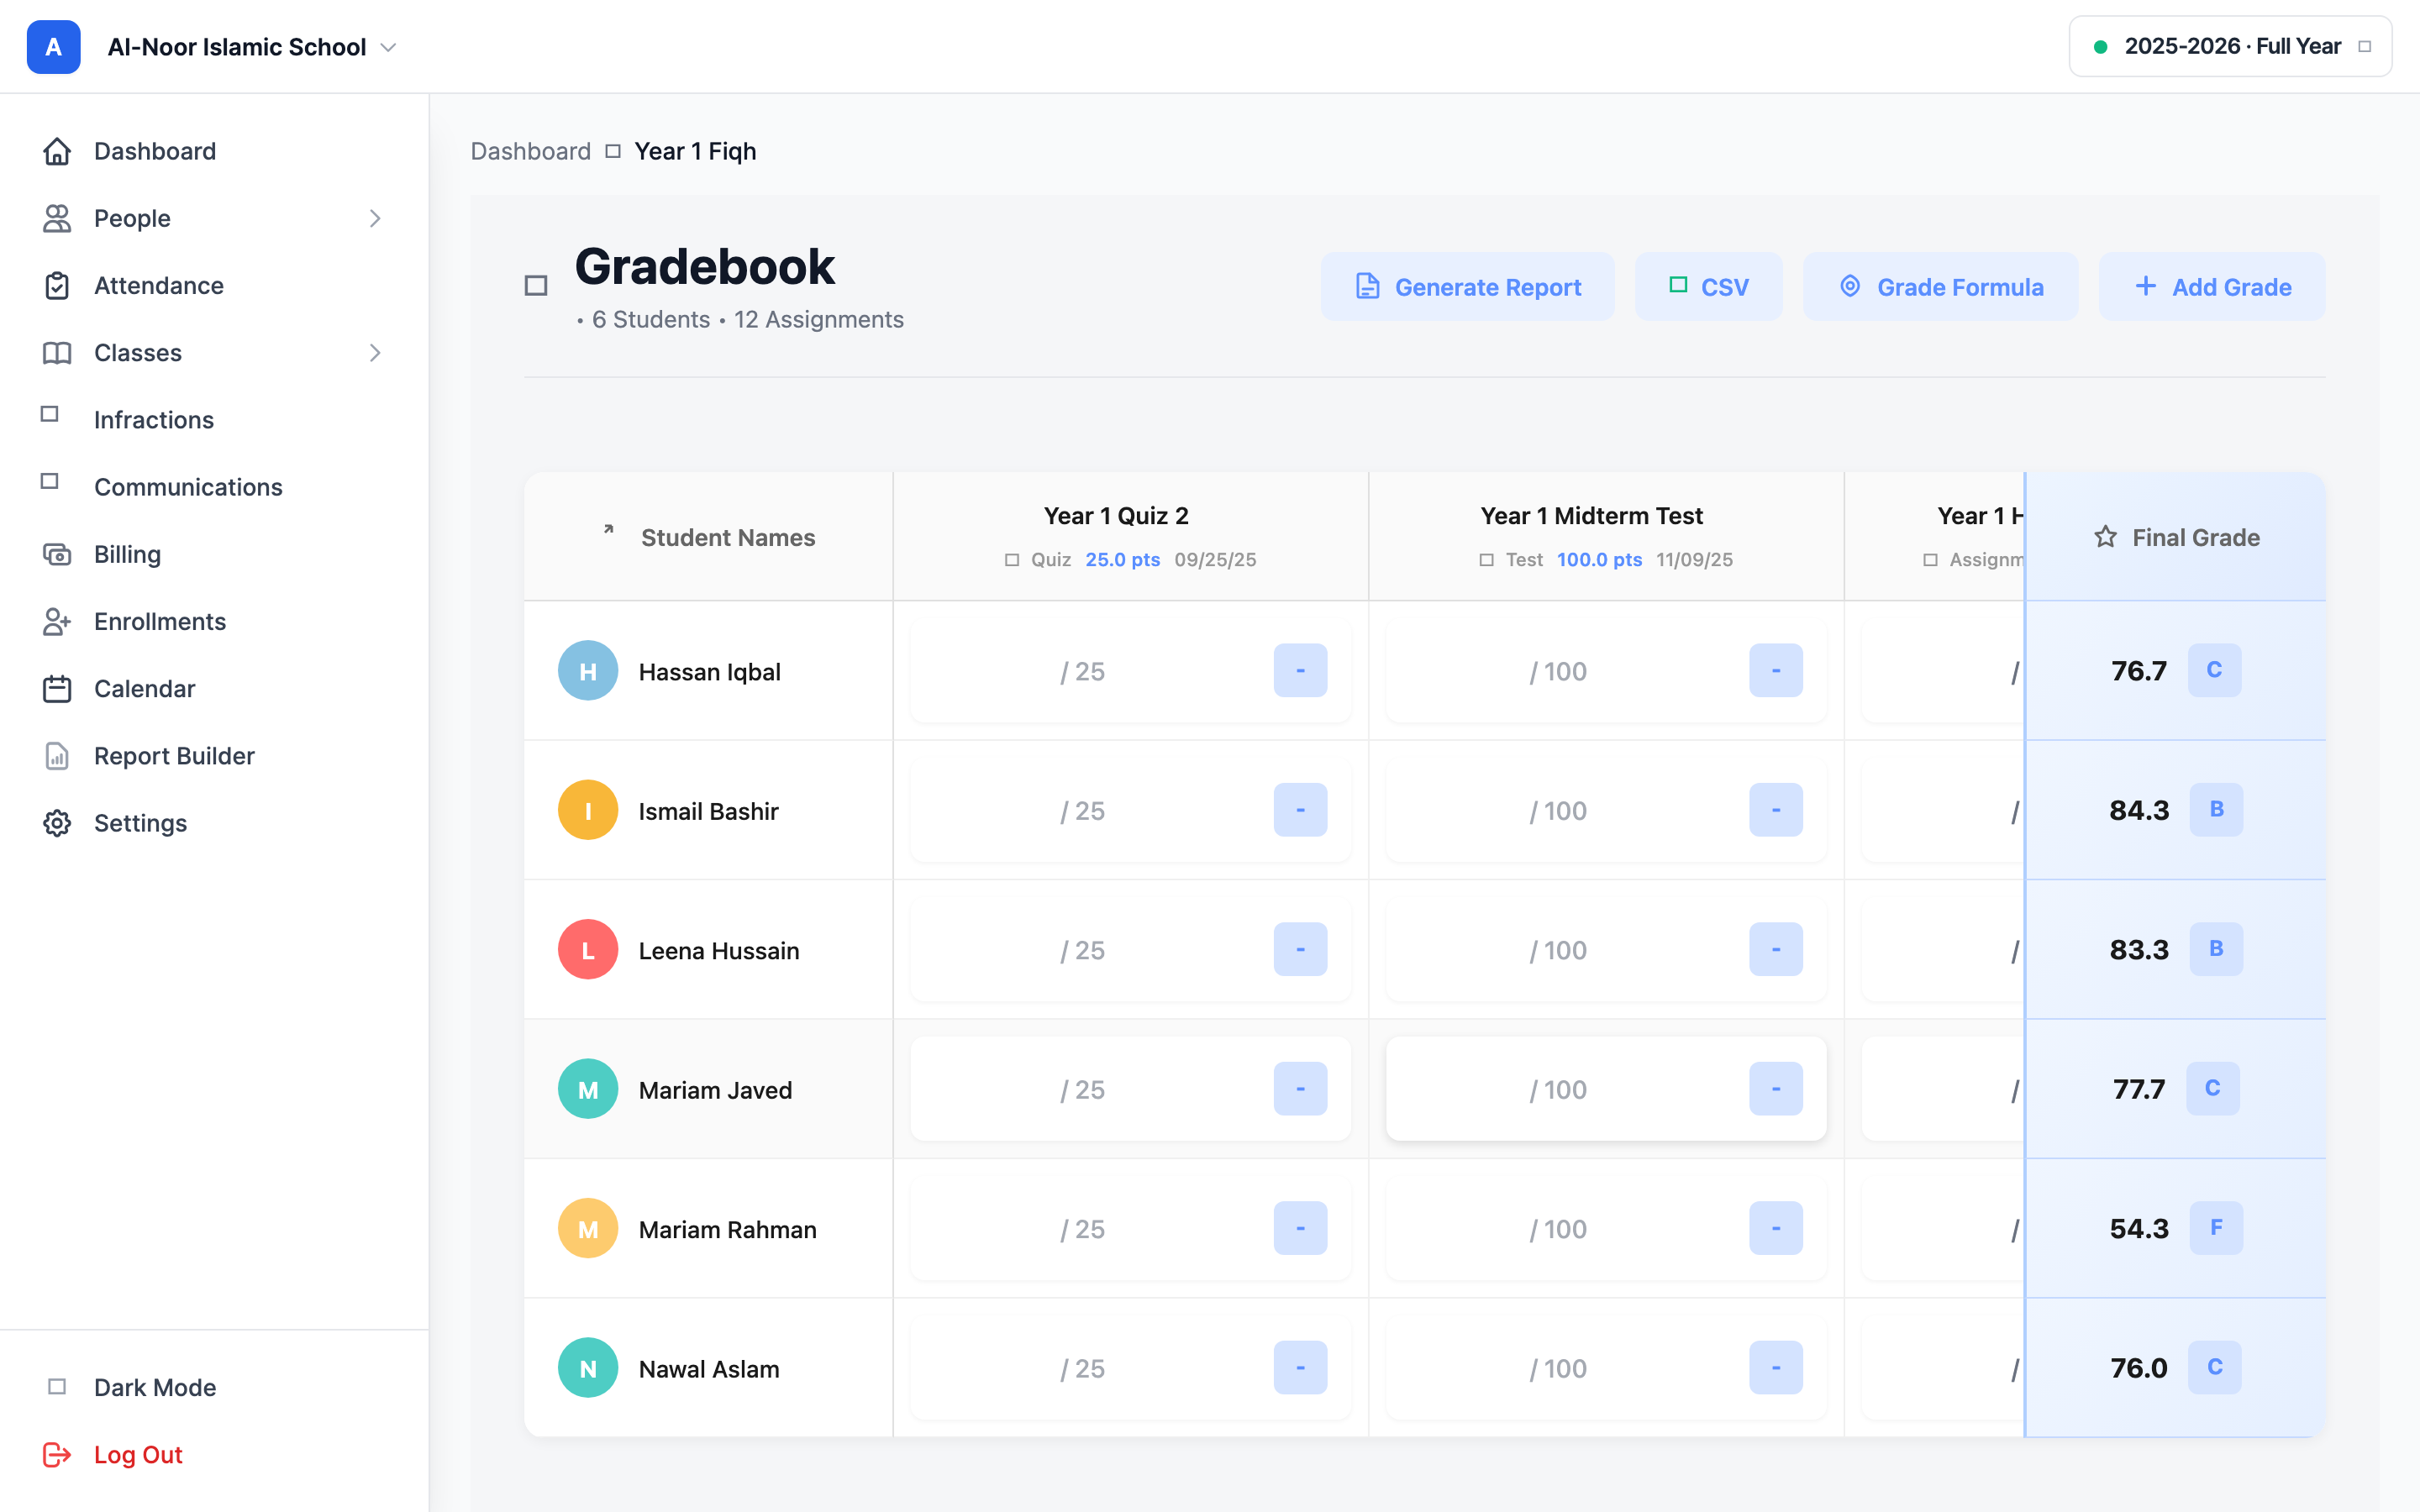
Step 2 — Read the grid
Each part of the grid tells you something:
- Student Names (left column) stays pinned as you scroll sideways. Each student has a colored avatar with their first initial. As an admin, a student's name is a link to their profile.
- Each assignment column header shows the assignment title, its category (with a small icon, e.g. "Homework" or "Exam"), the points it's out of (e.g. 100 pts), and its due date.
- The cells are where scores live. An empty cell shows a placeholder like / 100 reminding you what the assignment is out of. A scored cell shows the number you typed plus a small letter-grade badge next to it.
- Final Grade (right column, also pinned) shows each student's overall percentage and letter grade for the class, recalculated instantly every time you change a cell.
Cell color coding
A scored cell's letter badge is color-coded to your school's grading scale — high grades show green/blue, lower grades show yellow, orange, or red. Cells that carry a status instead of a number (Missing, Excused, and so on) show a colored status badge instead of an input. Those statuses, and exactly what each does to the Final Grade, are covered in Grade statuses and comments.
Step 3 — Enter and edit a grade inline
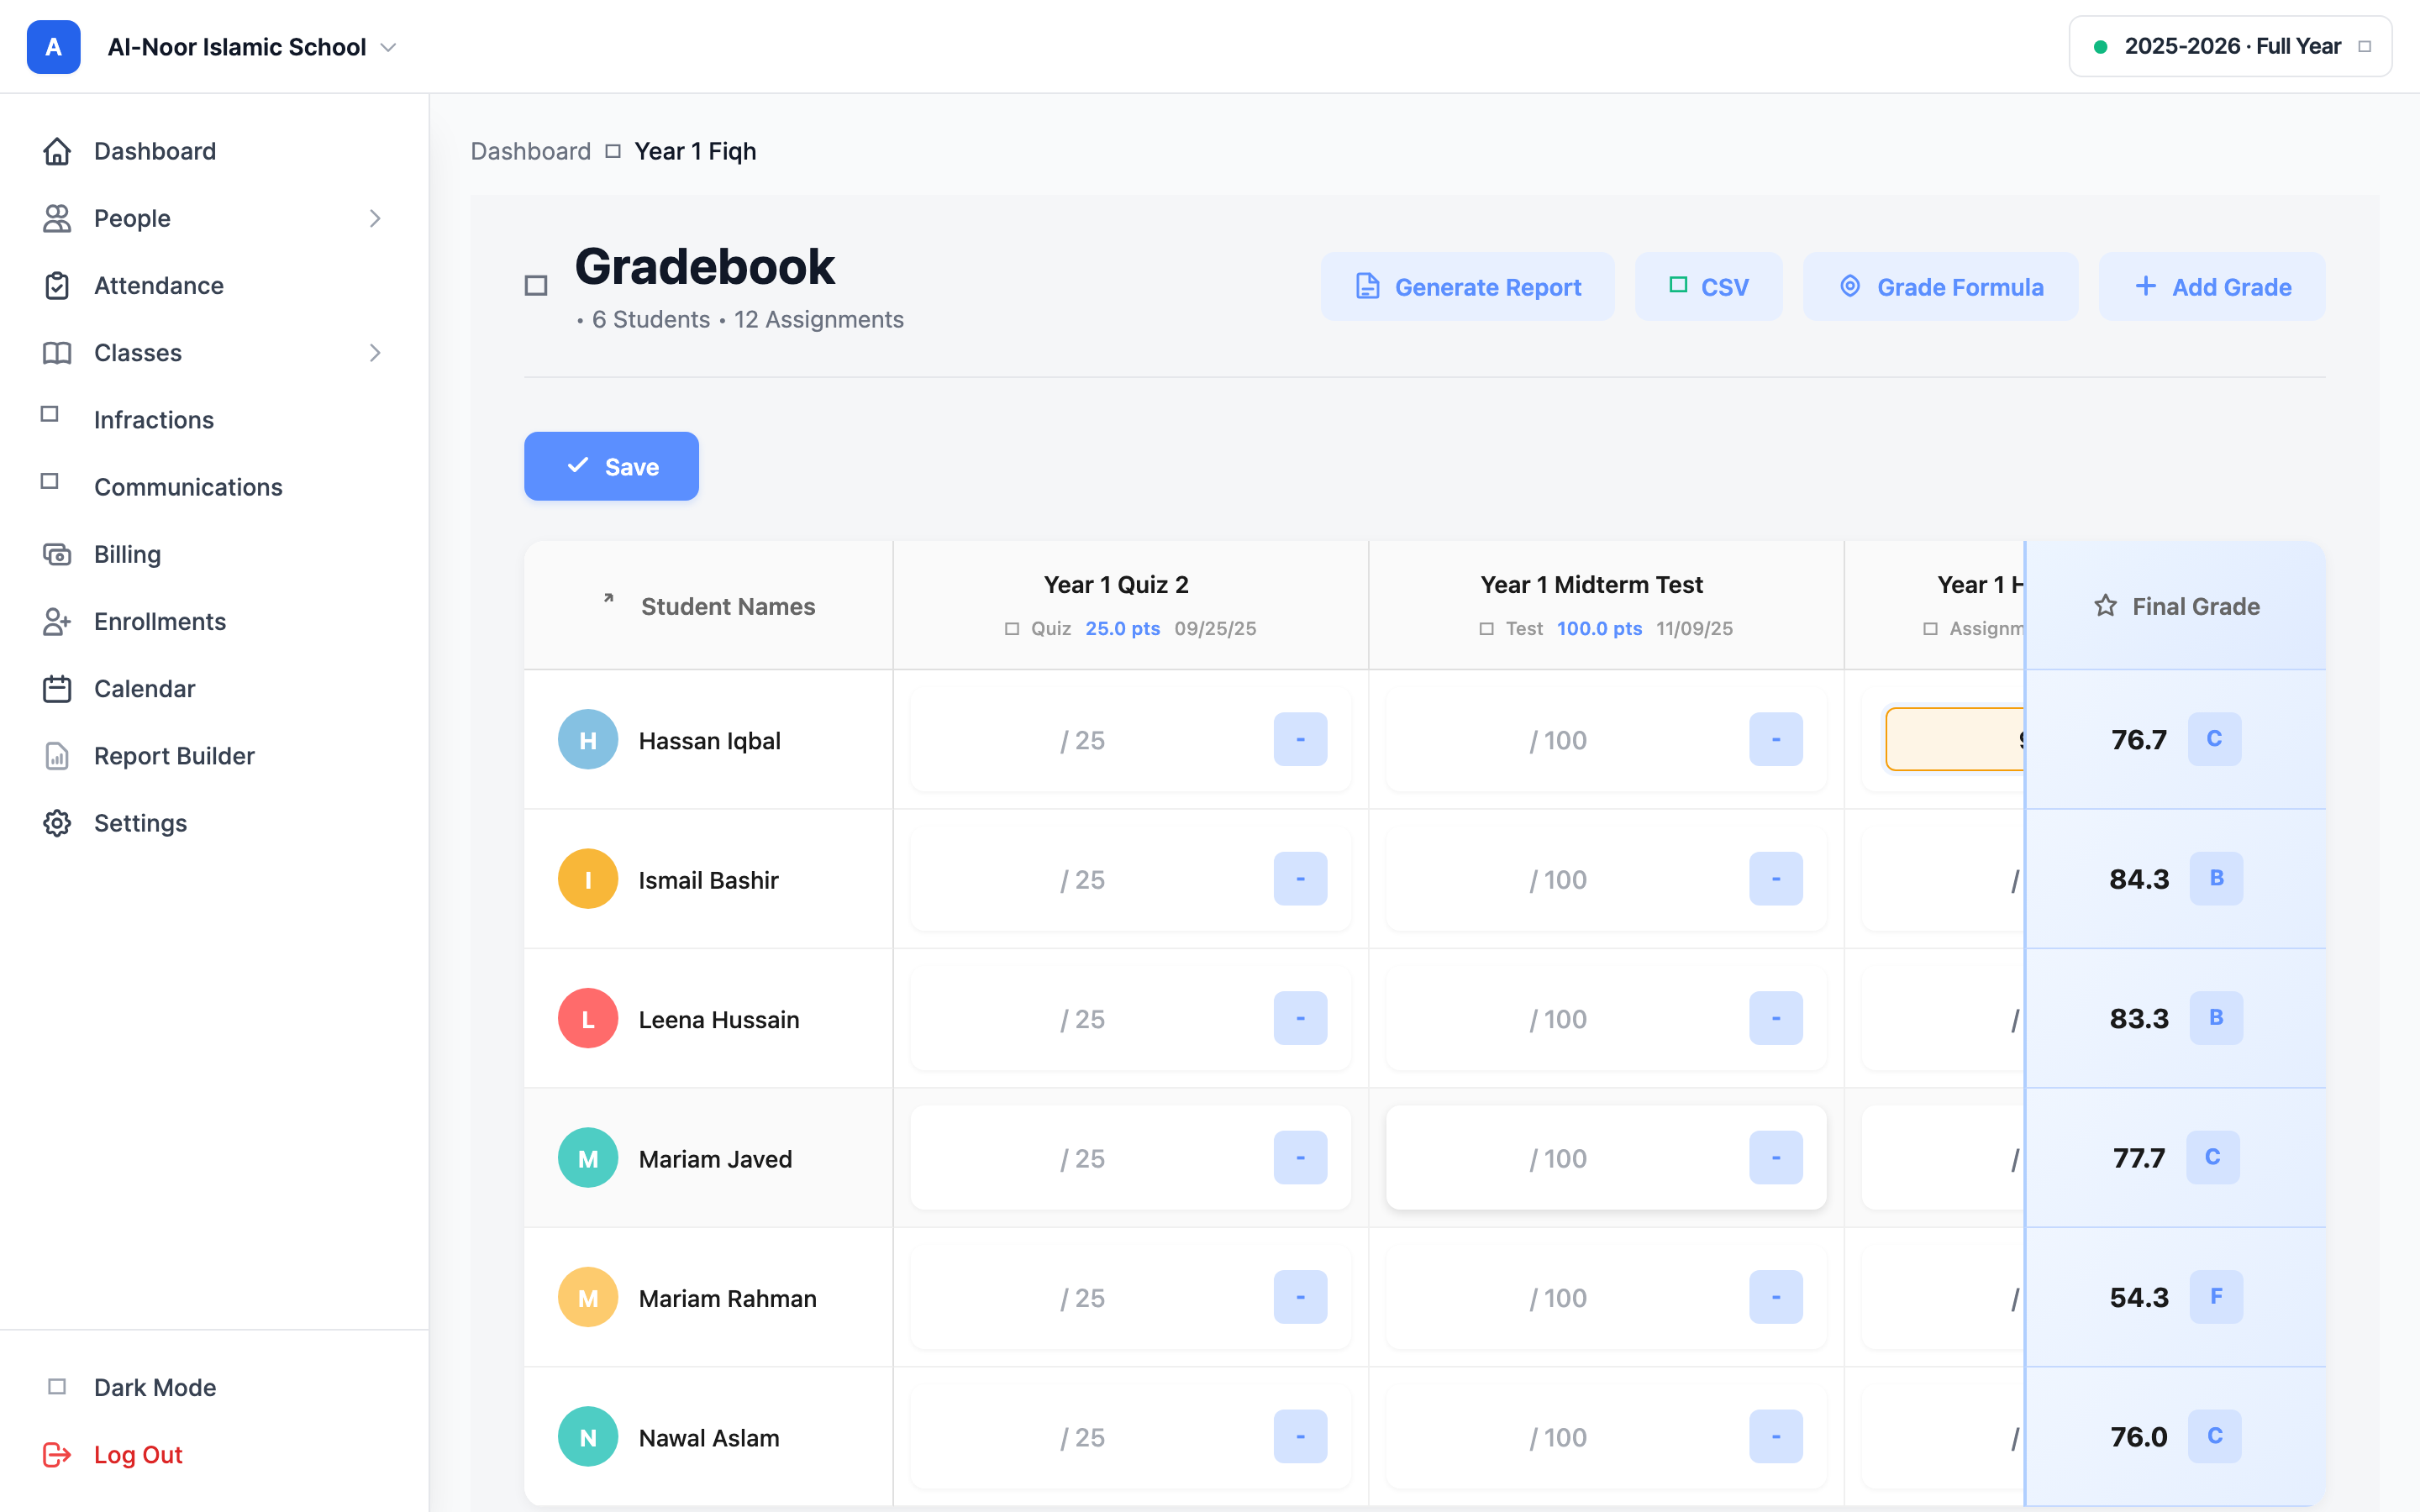
You type grades directly into the cells — there's no separate "edit grade" page.
- Click the cell where the student's row meets the assignment's column.
- Type the score (a number of points, e.g. 85). The cell turns amber while it's an unsaved change.
- Click out of the cell (or press Tab / Enter) and the grade saves automatically. The letter badge and the student's Final Grade update right away.
- To change a grade, click back into the cell and type a new number. To clear a grade entirely, delete the number so the cell is empty — that sets the cell back to ungraded and it stops counting.
Scores are points, shown as a percentage
You enter the raw points the student earned. MarkTrack converts that to a percentage against the assignment's total points — 18 out of a 20-point quiz shows as 90%. Change an assignment's Total Points (click its column header to edit it) and every score in that column re-grades against the new total.
Extra credit (scores over 100%)
There is no upper cap on a score. You can give more points than the assignment is worth — type 105 on a 100-point assignment and MarkTrack records it as 105% and briefly shows an "Extra credit recorded" note. That above-100% percentage flows into the student's average, so extra credit can pull a Final Grade up. For the letter-grade badge, anything over 100% still just shows as the top grade (an A).
Step 4 — Add an assignment column
Need a column that isn't there yet? You can add one without leaving the grid.
- Click Add Grade in the top-right. The Add Assignment window opens.
- Fill in the Assignment Title (required), an optional Description, the Type (its grading category, e.g. Homework or Exam), a Due Date, and the Total Points (defaults to 100).
- Click Create Assignment. A new column appears, with empty cells ready for every student in the class.
To change a column later — its title, category, due date, or points — click the assignment's name in the header to open the Edit Assignment window. That same window has a Delete button if you need to remove the column entirely.
Deleting a column deletes its grades
Removing an assignment also removes every score that was entered in that column for every student. There's no undo. If you only want to stop a column from counting, give those grades the Exempt status instead of deleting the assignment.
Step 5 — See class averages
The grid itself shows a Final Grade per student, not a running average per assignment column. To see class-wide numbers — the class average, highest and lowest grade, and pass rate — generate the class report card:
- Click Generate Report in the top-right.
- Choose Class Report Card (the "Overview of all students' grades" option). A PDF downloads.
- At the bottom of that PDF, the Class Statistics block lists Class Average, Highest Grade, Lowest Grade, Passing Students, and Pass Rate.
The same Generate Report window also lets you download a one-page Student Transcript PDF for any single student, pulling that student's grades from every class they're enrolled in.
Step 6 — Filter the view by student or term
When a class is large, narrow the grid down to just what you need.
By student
To focus on one student, add ?student_id= with the student's ID to the gradebook URL, or use a student-search entry point where available. The grid then shows that single student's row across every assignment — handy for a parent meeting or a quick check. Remove the filter (reload the plain gradebook URL) to bring everyone back.
By term
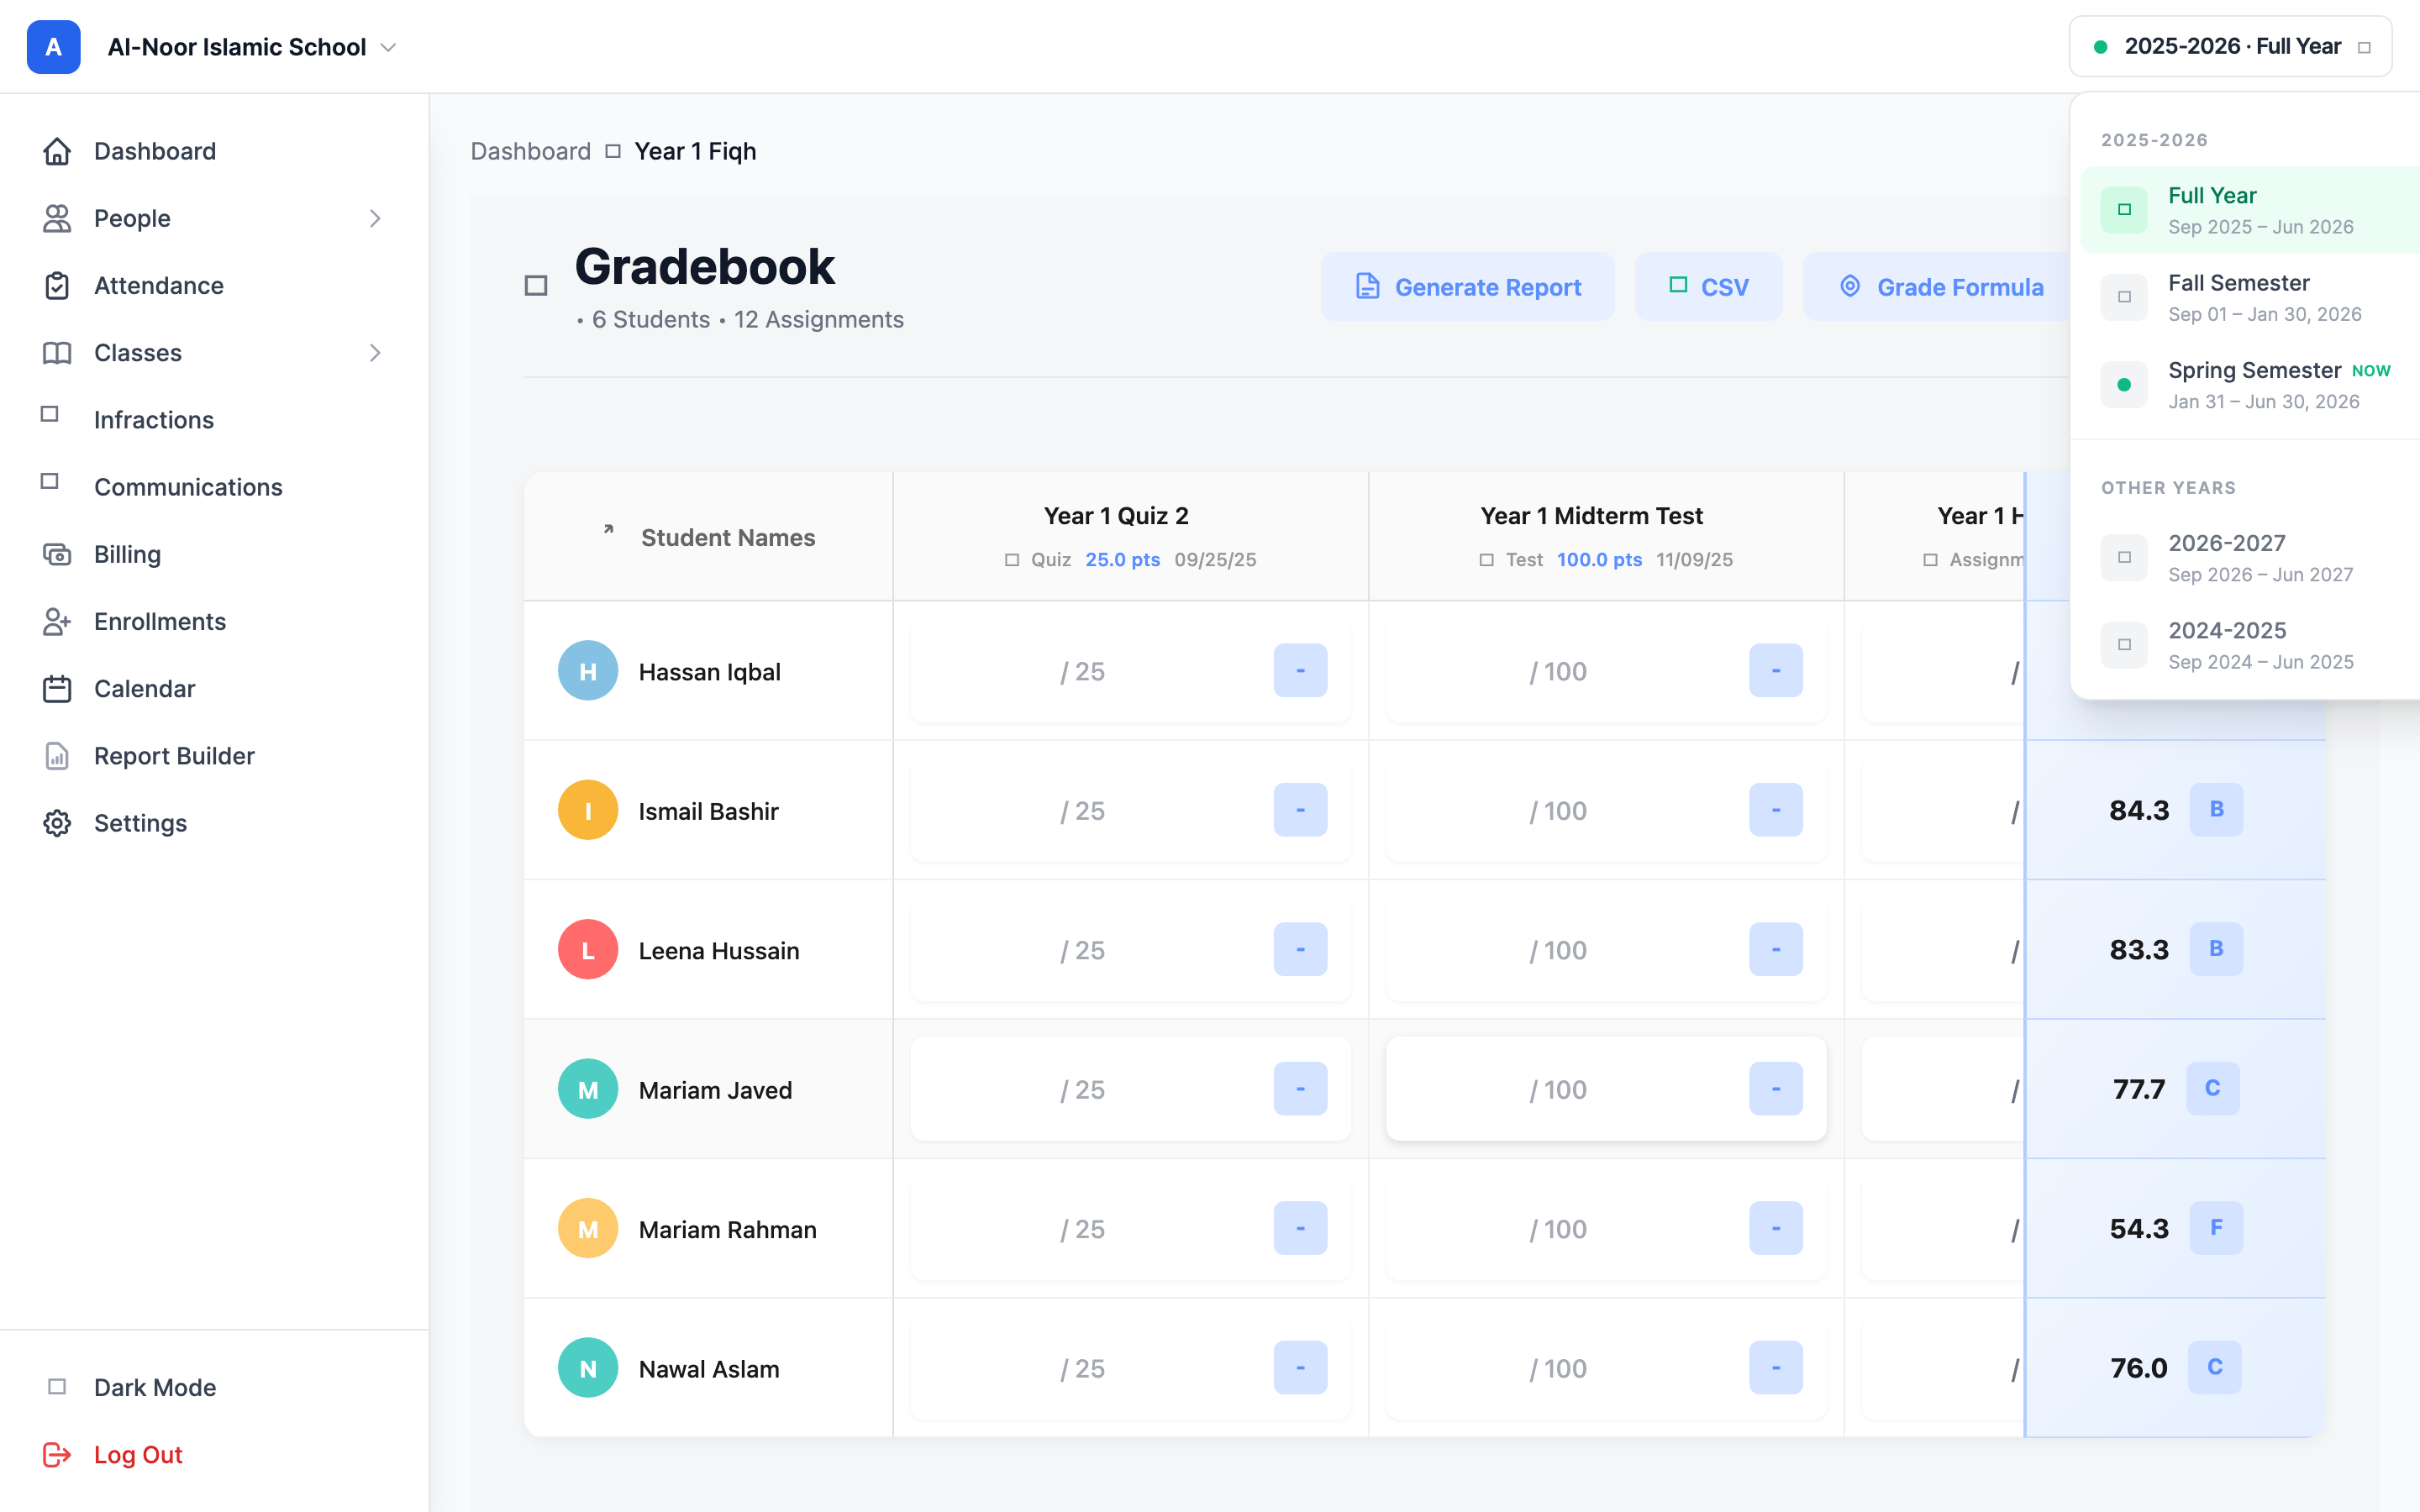
If your school uses academic years with terms, the term picker in the top bar controls which assignments the grid shows. It reads like "2025–2026 · Fall" with a green pulsing dot on the term that's active right now.
- Click the term picker button in the top bar.
- Pick Full Year to see every assignment, or pick a specific term (e.g. Fall, Spring) to show only assignments whose due dates fall inside that term.
- The grid reloads filtered to that term, and the Final Grade column recalculates from just the assignments in view.
Closed and concluded terms are read-only
Cells for assignments dated in a closed-past term or a concluded year are locked — the input is greyed out and a note explains the period is read-only. You can still look, but you can't edit. This is per-assignment by its due date, so editing a current-term assignment keeps working even while you're viewing a past term.
Step 7 — Export the gradebook to CSV
Download the whole grid as a spreadsheet to keep records or open in Excel or Google Sheets.
- Click CSV in the top-right of the gradebook.
- A file named like gradebook_[class-name]_[date].csv downloads.
The CSV has one row per student. The columns are the student's name, one column per assignment, and two summary columns: Final Grade % and Letter Grade. Status cells export as short codes — M for Missing, EXC for Excused, EXM for Exempt, and INC for Incomplete — while scored and late cells export their number.
The CSV respects the term filter
If you've selected a term in the term picker, the export only includes assignments from that term. Switch to Full Year first if you want every assignment in the file.
That's the day-to-day gradebook. To control how those columns are weighted into the Final Grade, see Grading scheme and weights. To handle missing work, excused students, and written feedback, read Grade statuses and comments. Stuck on something? Contact us and we'll help.
More in Classes & Grades
Still stuck?
Our team is happy to walk you through it.