Share resources and files with a class
A resource is any file or link you share with a class — a syllabus PDF, a worksheet, a slide deck, a reference image, or a YouTube link. This guide covers uploading a resource, who can see it, previewing and marking up files right inside the app, downloading, replacing a file with a newer version, notifying the class, and deleting a resource.
Resources live inside a single class. Each class has its own Class Resources page, and everything you add there belongs to that class only. There is no separate "share with the whole school" switch — to give the same file to another class, you add it to that class too.
Who can see a class resource
Admins can see and manage resources for every class. A teacher can manage resources only for the classes they teach. Students see the resources for classes they're enrolled in, and a parent sees the resources for any class their child is in. People outside the class never see it. So "visibility" follows class membership automatically — you don't set it per resource.
Step 1 — Open a class's Resources page
- Go to Classes and click the class you want.
- On the class page, click the Resources button. The number badge next to it shows how many resources the class already has.
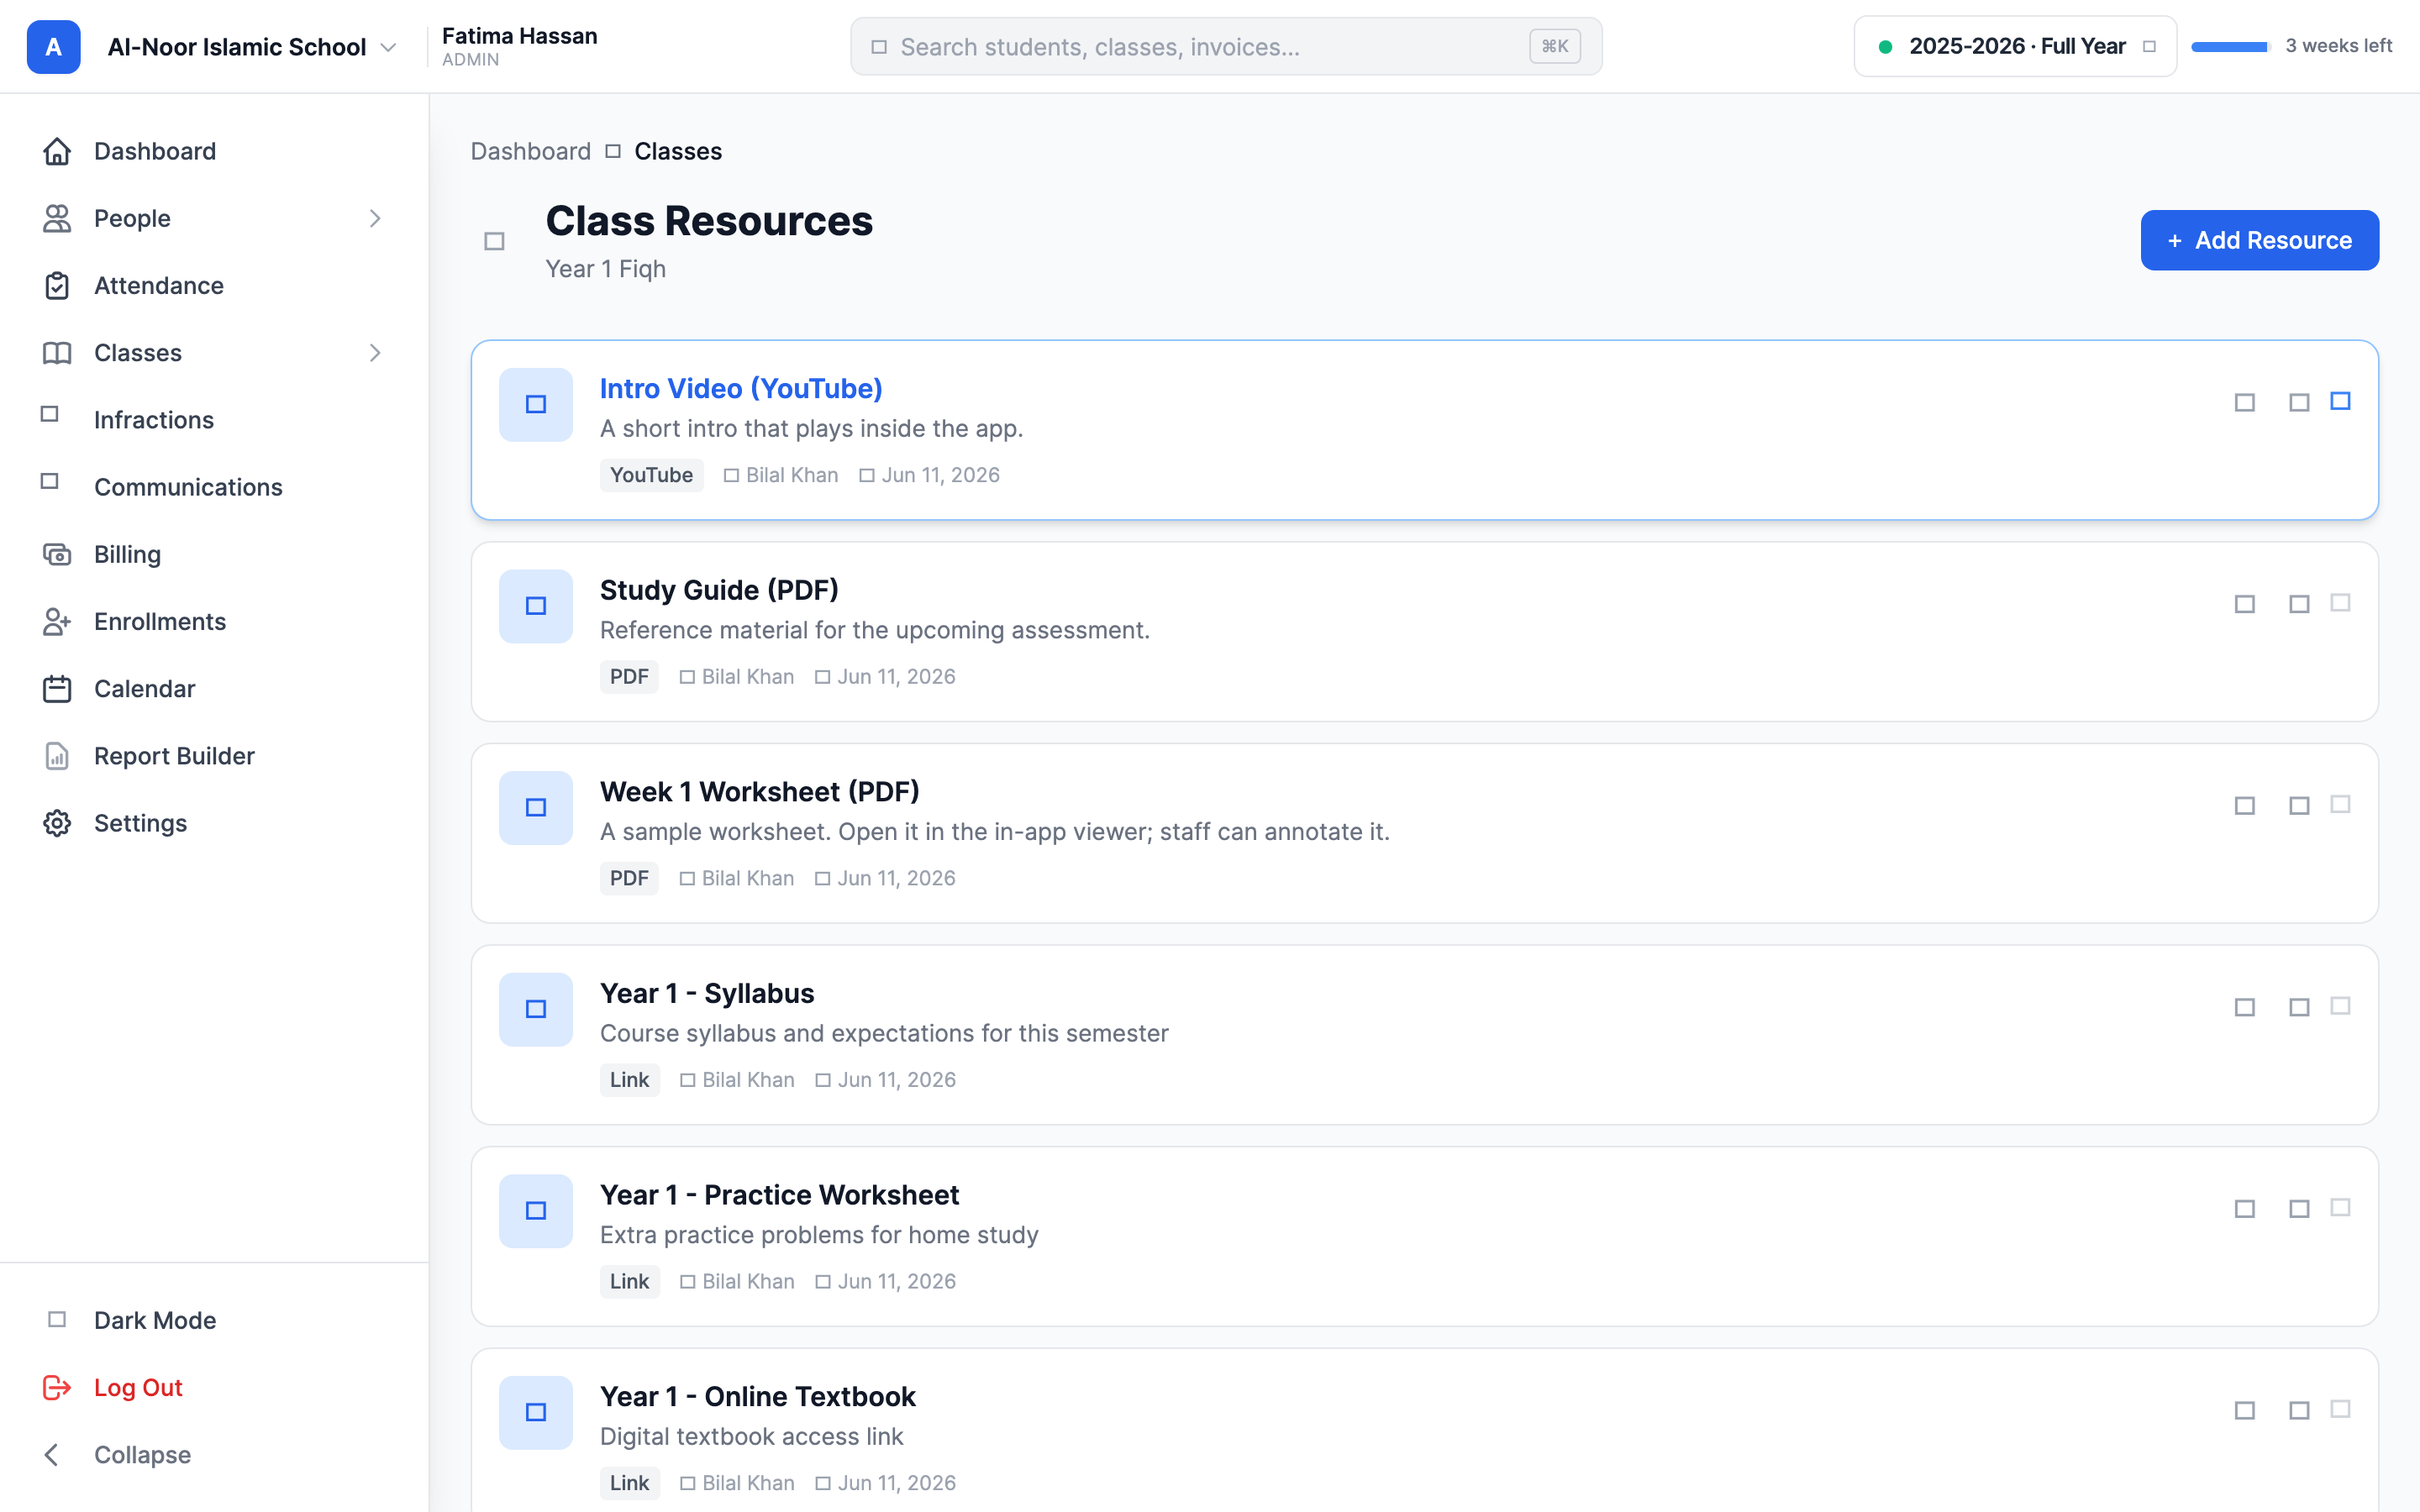
- You land on the Class Resources page, which lists every resource for that class, newest first. Each row shows the title, a type tag (PDF, Image, Video, Document, Link, and so on), who shared it, and when.
Step 2 — Add a resource
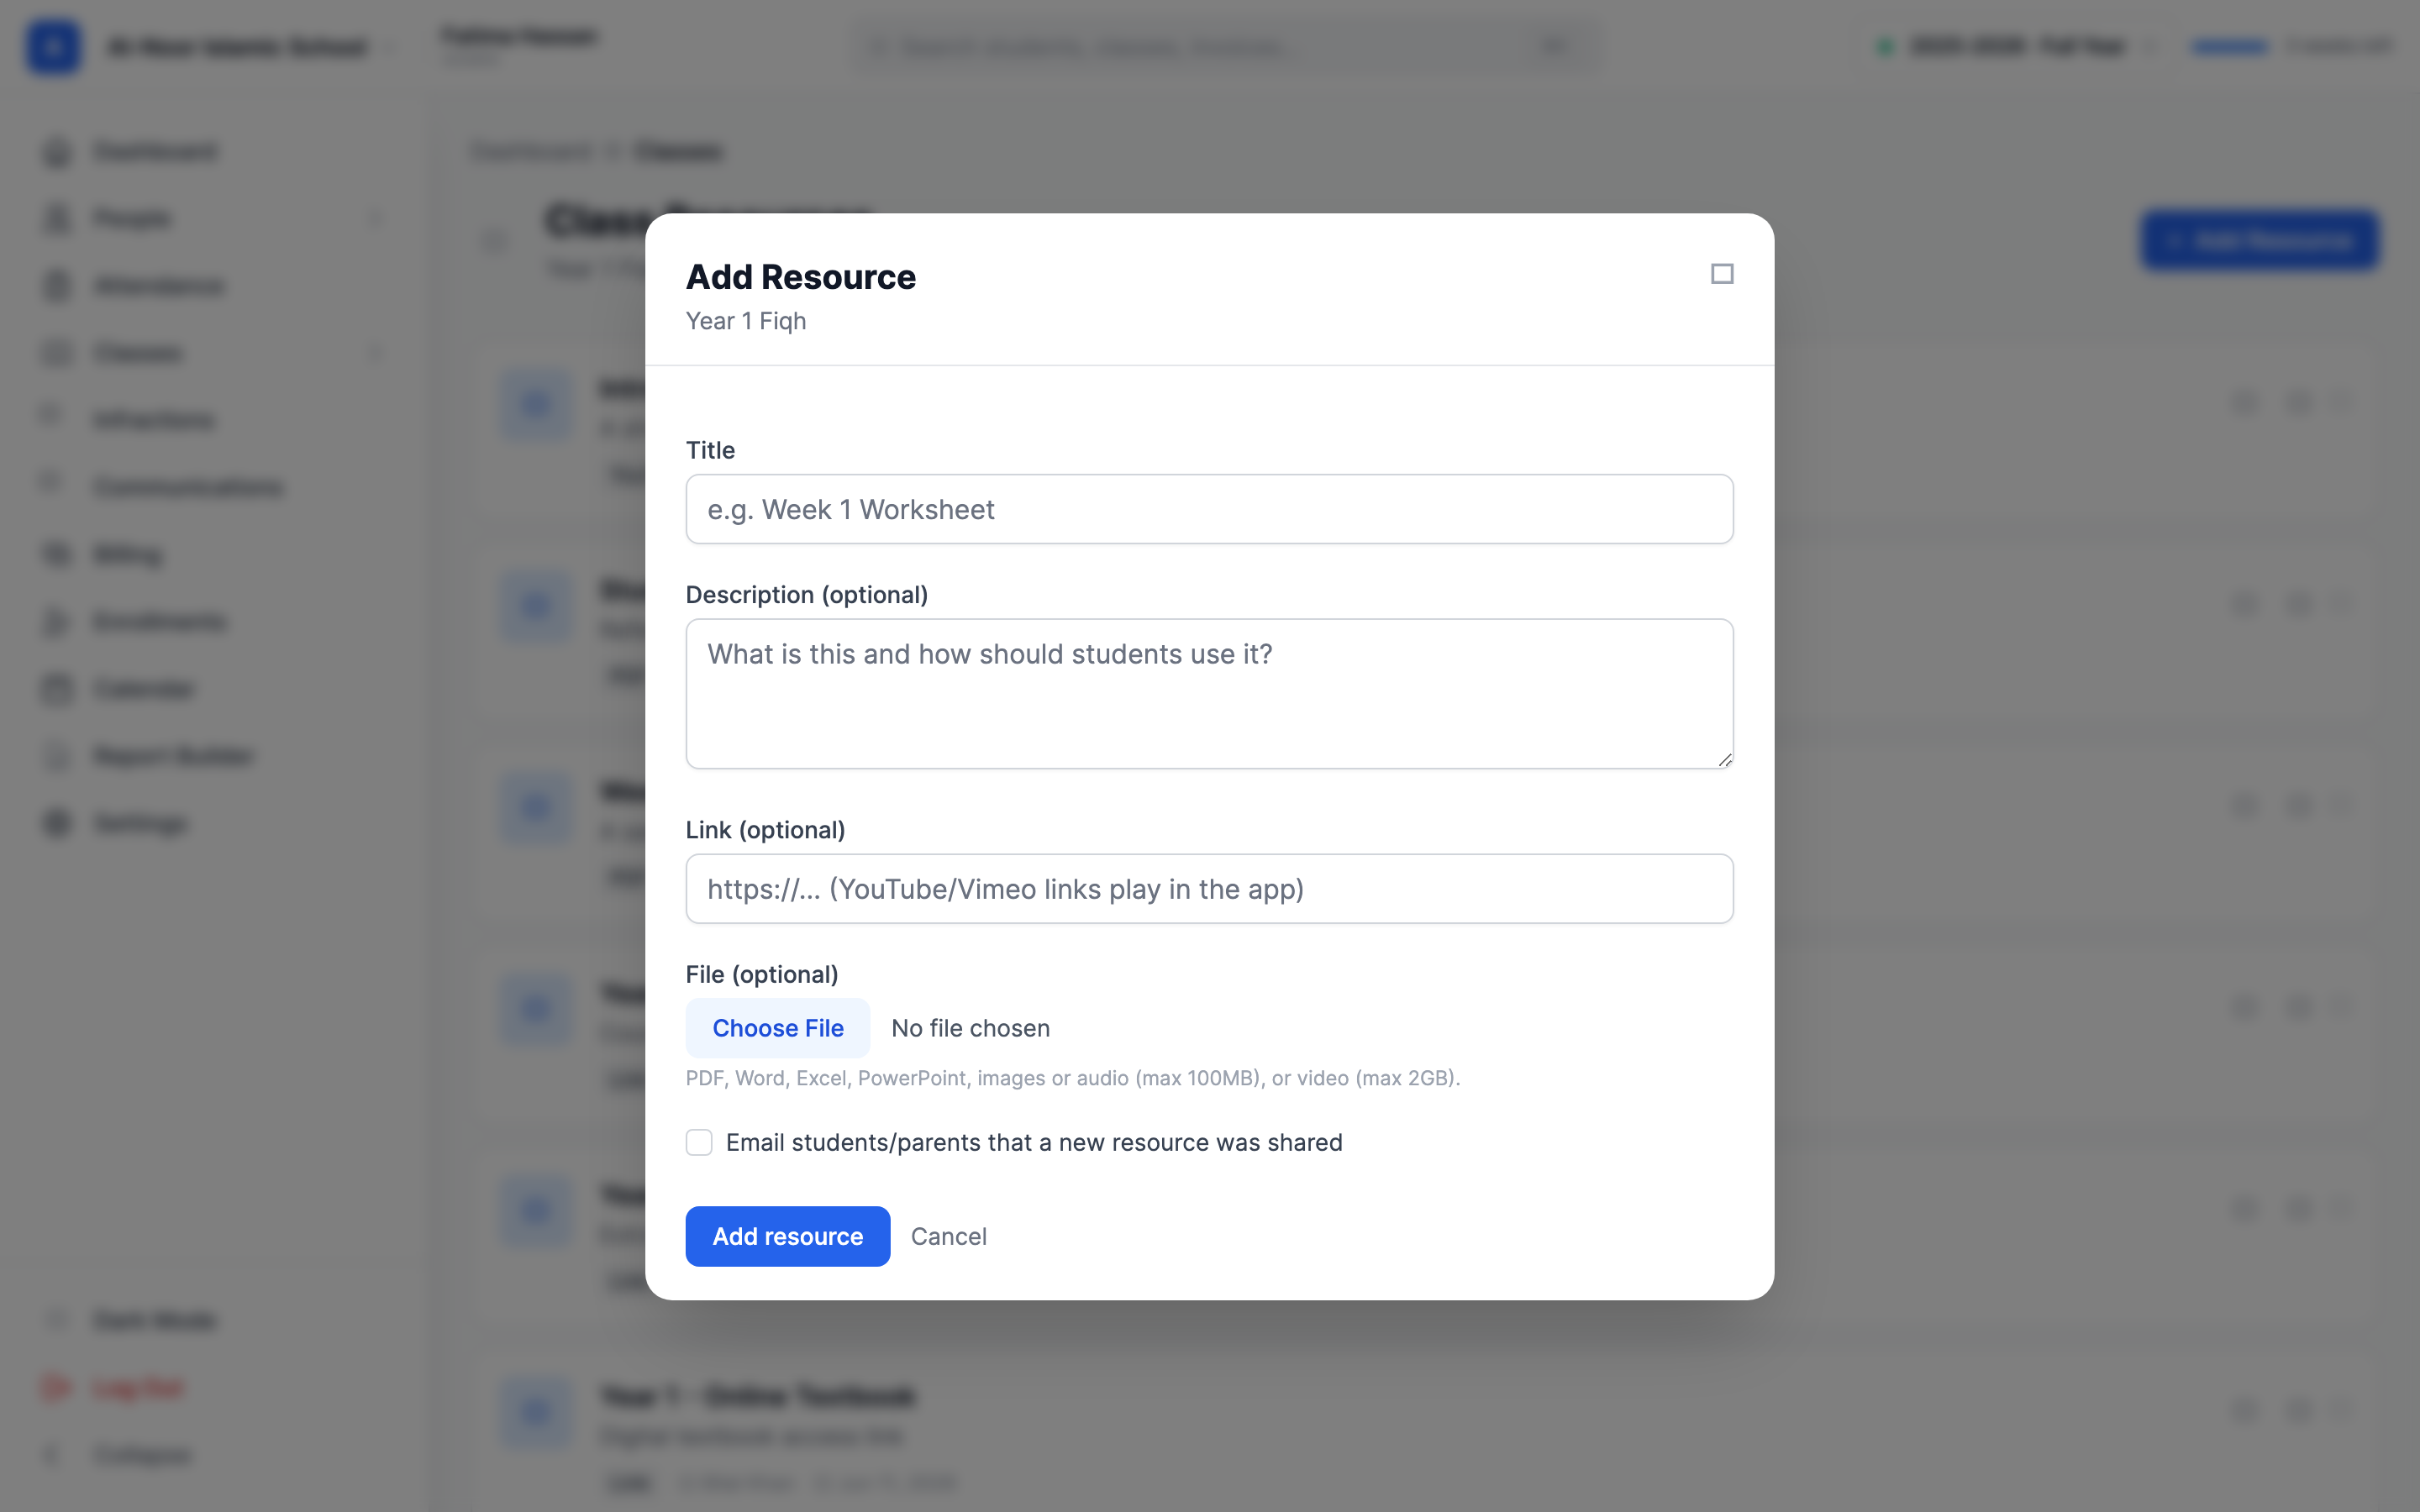
Click Add Resource (top right of the Class Resources page). A form opens with these fields:
- Title — required. This is the name students see in the list (for example, "Week 1 Worksheet").
- Description (optional) — a short note on what it is and how to use it.
- Link (optional) — paste an external URL here. YouTube and Vimeo links play right inside the app; other links open in a new tab.
- File (optional) — upload a file from your computer.
You can upload almost any common school file. Allowed types are:
- Documents: PDF, Word, Excel, PowerPoint, plain text, and CSV.
- Images: JPEG, PNG, GIF, and WebP.
- Video: MP4, WebM, and QuickTime (.mov).
- Audio: MP3, WAV, and OGG.
File size limits
Most files (documents, images, audio) can be up to 100 MB. Video files get a larger ceiling of 2 GB so you can post lecture recordings. A file that's too big, or a type that isn't on the list above, is rejected with a message — nothing is saved.
A resource can have a file, a link, or both. Title is the only required field — but a resource with no file and no link just shows "This resource has no content yet," so always add at least one. When you're done, click Add resource.
Step 3 — Notify the class (optional)
At the bottom of the Add Resource form is a checkbox: Email students/parents that a new resource was shared. Tick it before saving and MarkTrack emails every student in the class (or their parent, if the student has a parent linked) a "New Class Resource Available" message with the title, description, who shared it, and a button to open it.
The notification only sends on the first upload
The "email the class" checkbox appears only when you add a resource — not when you edit one later. Anyone without an email address on file is quietly skipped. If you forget to tick it, there's no "resend" button; you'd have to delete and re-add the resource.
Step 4 — Open and preview a resource
Click any resource in the list to open its own page. MarkTrack previews the content right inside the app — no download needed:
- PDFs and images render inline on the page.
- Video and audio play in a built-in player.
- Office documents (Word, Excel, PowerPoint) are automatically converted to a PDF so they preview cleanly in the app. Right after you upload one you may see "Preparing preview…" with a spinner for a few seconds while it converts; the page updates itself when it's ready.
- YouTube and Vimeo links embed and play on the page. Any other external link shows an Open link button that opens it in a new tab.
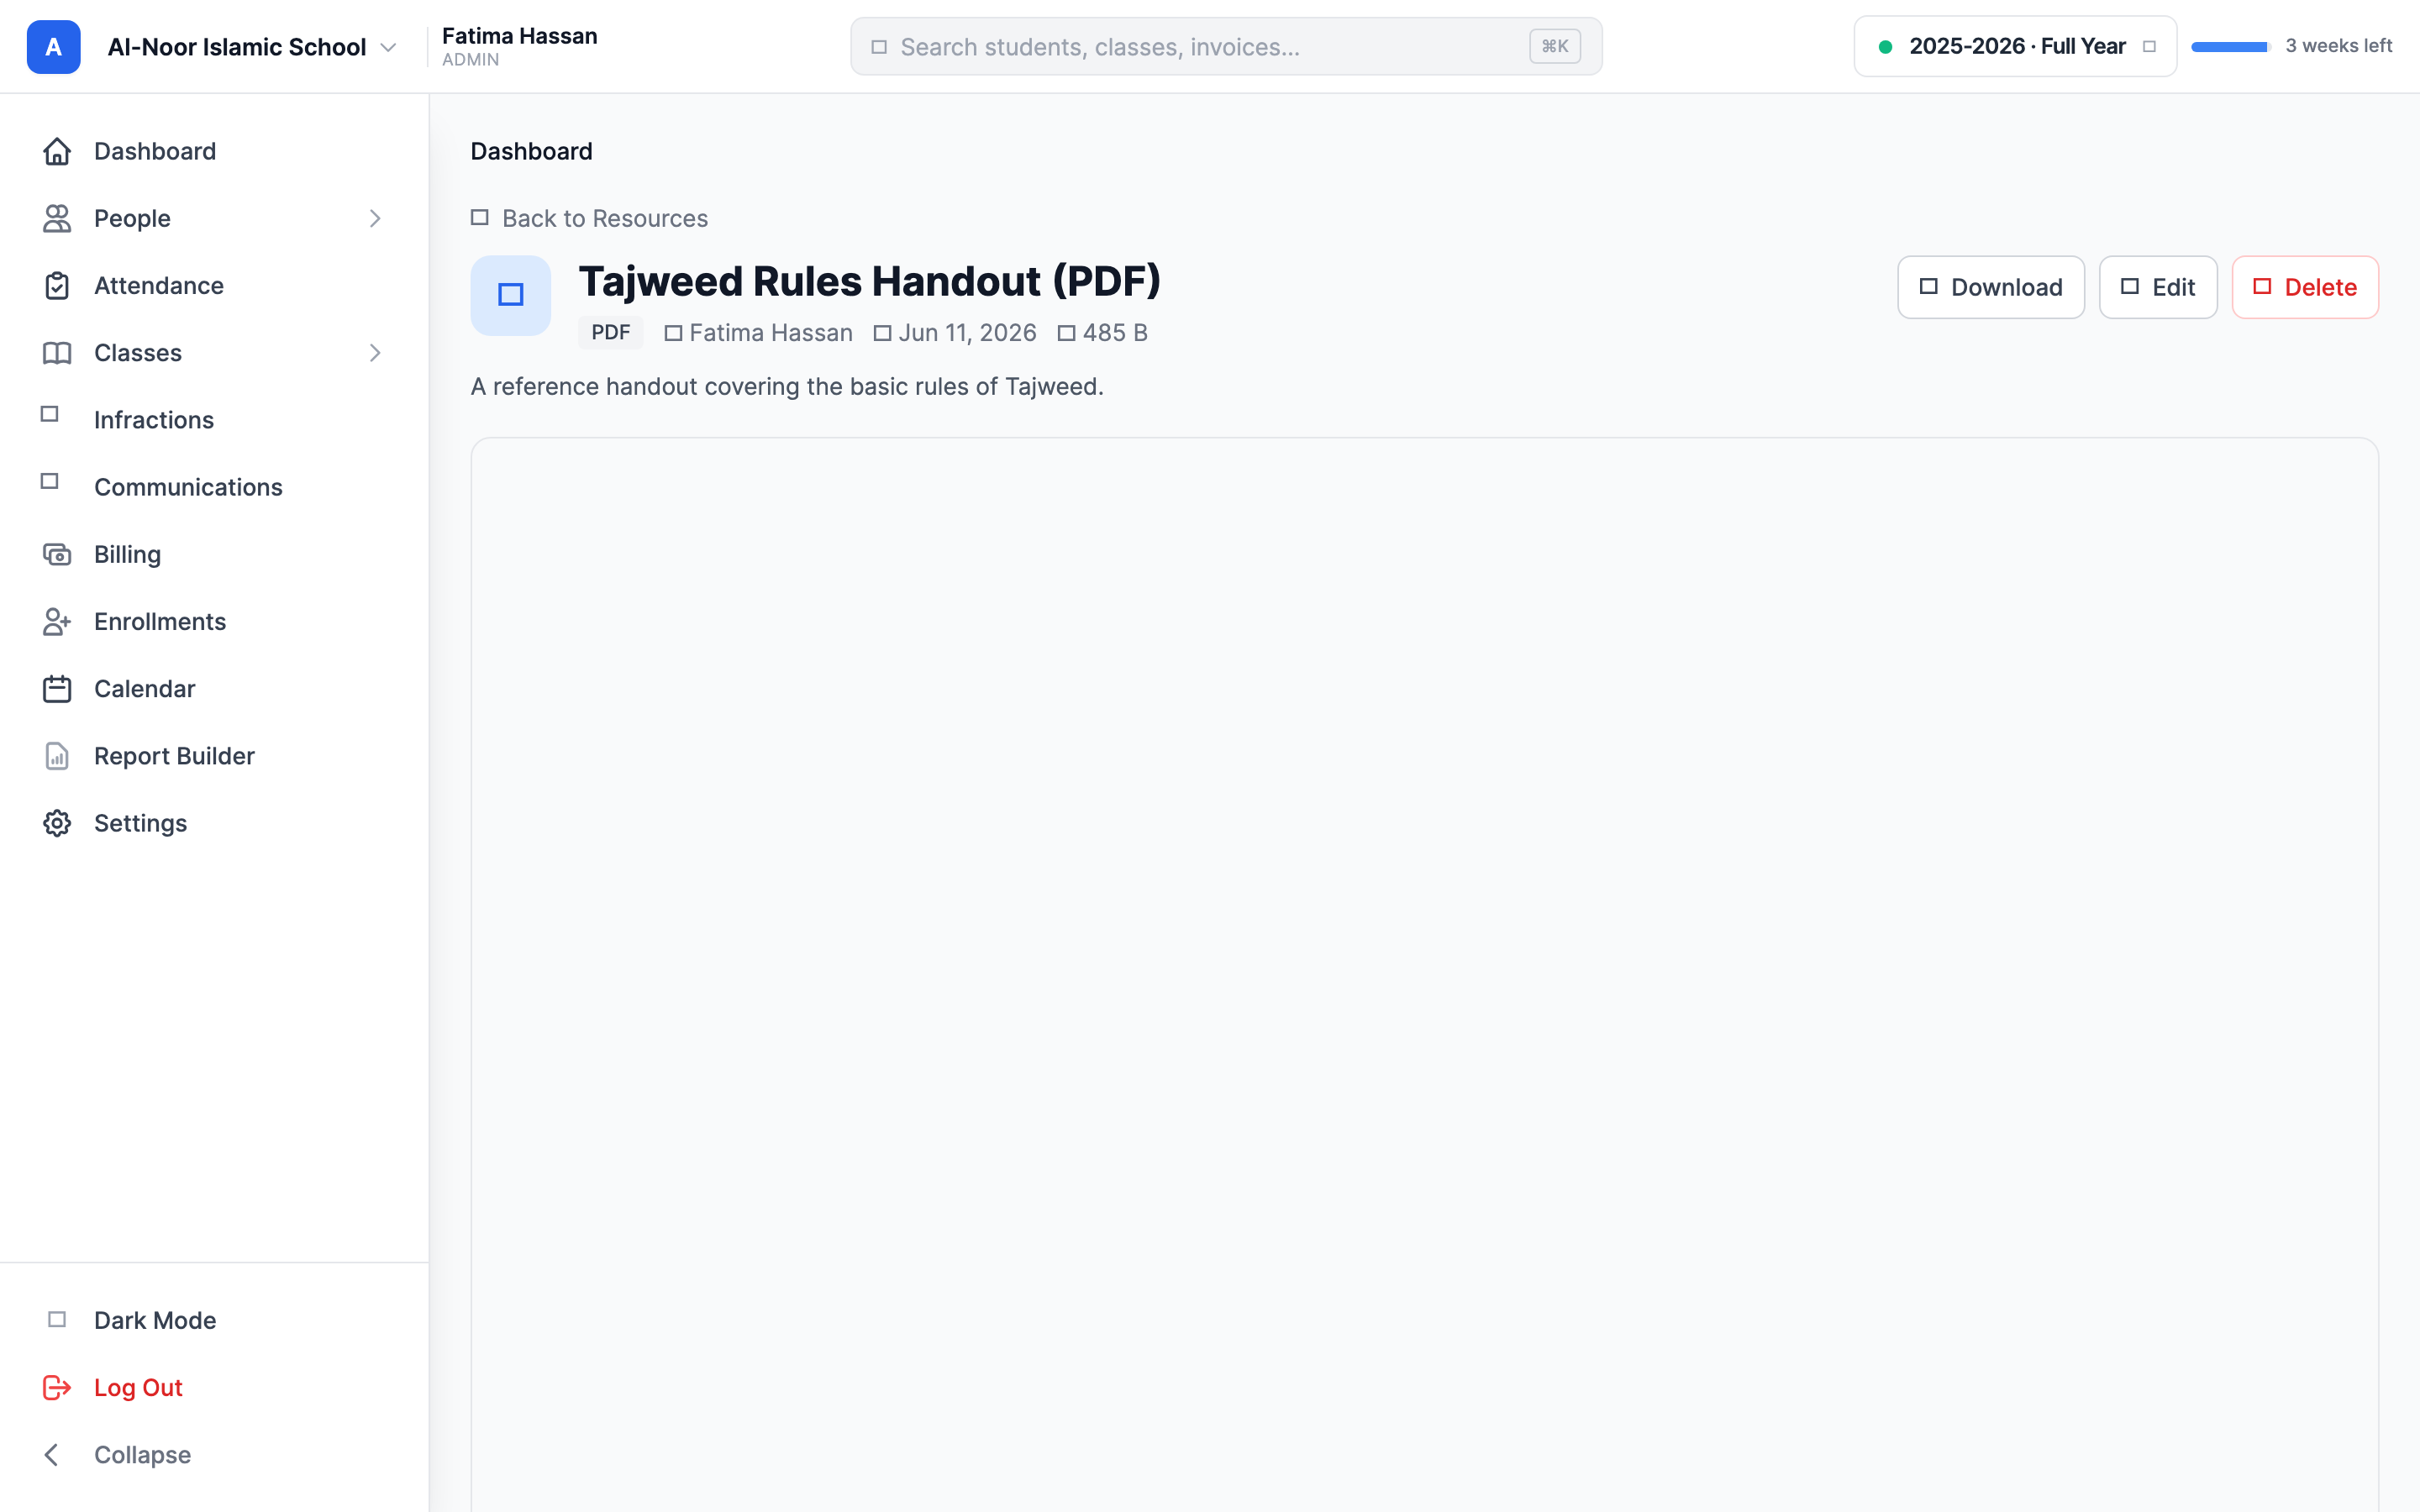
Downloading always gives the original
The Download button gives everyone the original file you uploaded. For an Office document, that means the real .docx / .xlsx / .pptx — the PDF preview is only for viewing in the app, never the download.
Step 5 — Highlight and annotate a PDF
When a resource is a PDF and you're staff (an admin, or the teacher of that class), the in-app viewer adds a markup toolbar across the top. You can:
- Highlight — drag over text to highlight it.
- Draw — freehand pen marks.
- Text — drop a typed note anywhere on the page.
- Pick a tool from the Markup: toolbar and mark up the PDF.
- Click Save markup. The button shows "Saving…" then "Saved."
Your markup becomes what everyone sees
Saving markup creates a saved, annotated version of that PDF. From then on, everyone in the class opens the marked-up copy by default — your highlights and notes are shared, not private. The original upload is never changed, so downloads still give the clean file. Saving again replaces the shared version with your latest markup. Only PDFs can be annotated, and only staff see the markup tools.
Step 6 — Replace a resource file with a new version
To swap in a newer file (a corrected worksheet, an updated syllabus) without losing the resource's place in the list:
- Open the resource and click Edit (or use the pencil icon on the resource's row).
- The form shows Current: filename — choose a new file to replace it. Pick the new file in the File field.
- Click Save changes.
The new file takes the old one's place. If you replace an Office document, MarkTrack re-generates the PDF preview for the new file automatically.
Replacing a file does not re-notify the class
Editing a resource never sends an email — the notify checkbox only exists on the first upload. If students need to know the file changed, tell them another way. Title-only edits (fixing a typo, adding a description) don't touch the file or its preview at all.
Step 7 — Delete a resource
Click Delete on the resource's page, or the trash icon on its row in the list. You'll be asked to confirm. Deleting removes the resource, its file, and any saved markup, and it disappears from the class for everyone.
Deleting is permanent
There's no undo and no archive for resources — once deleted, the file is gone. If the resource was placed inside a course module, deleting it also removes it from that module.
Resources and course modules
Resources can also be organized into modules — week-by-week or unit-by-unit folders that walk students through your material in order. A resource you've added to a class can be dropped straight into a module, and students can mark it complete as they go. See Build course modules for the full walkthrough.
You're set
You can now share files and links with a class, preview and mark up PDFs in the app, replace files cleanly, and notify families. Next, group your resources into course modules so students move through them in order.
More guides in Classes & Gradebook. Stuck on something? Contact us.
More in Classes & Grades
Still stuck?
Our team is happy to walk you through it.