
The MarkTrack parent guide
MarkTrack is the system your school uses to run the day-to-day: who's in class, what work has been set, how each child is doing, and what you owe. This guide is written for parents. It walks the whole journey in order — from the application you fill in before you have a login, all the way to paying an invoice — and links out to a detailed guide for each step.
You don't need to read it end to end. If you already have an account and just want to do one thing, jump to the section you need.
Every school sets MarkTrack up differently
Your school chooses which parts to switch on. If something in this guide isn't in your menu, your school either hasn't enabled it or handles it another way — that's normal, and not a fault with your account.
The short version: what parents can do
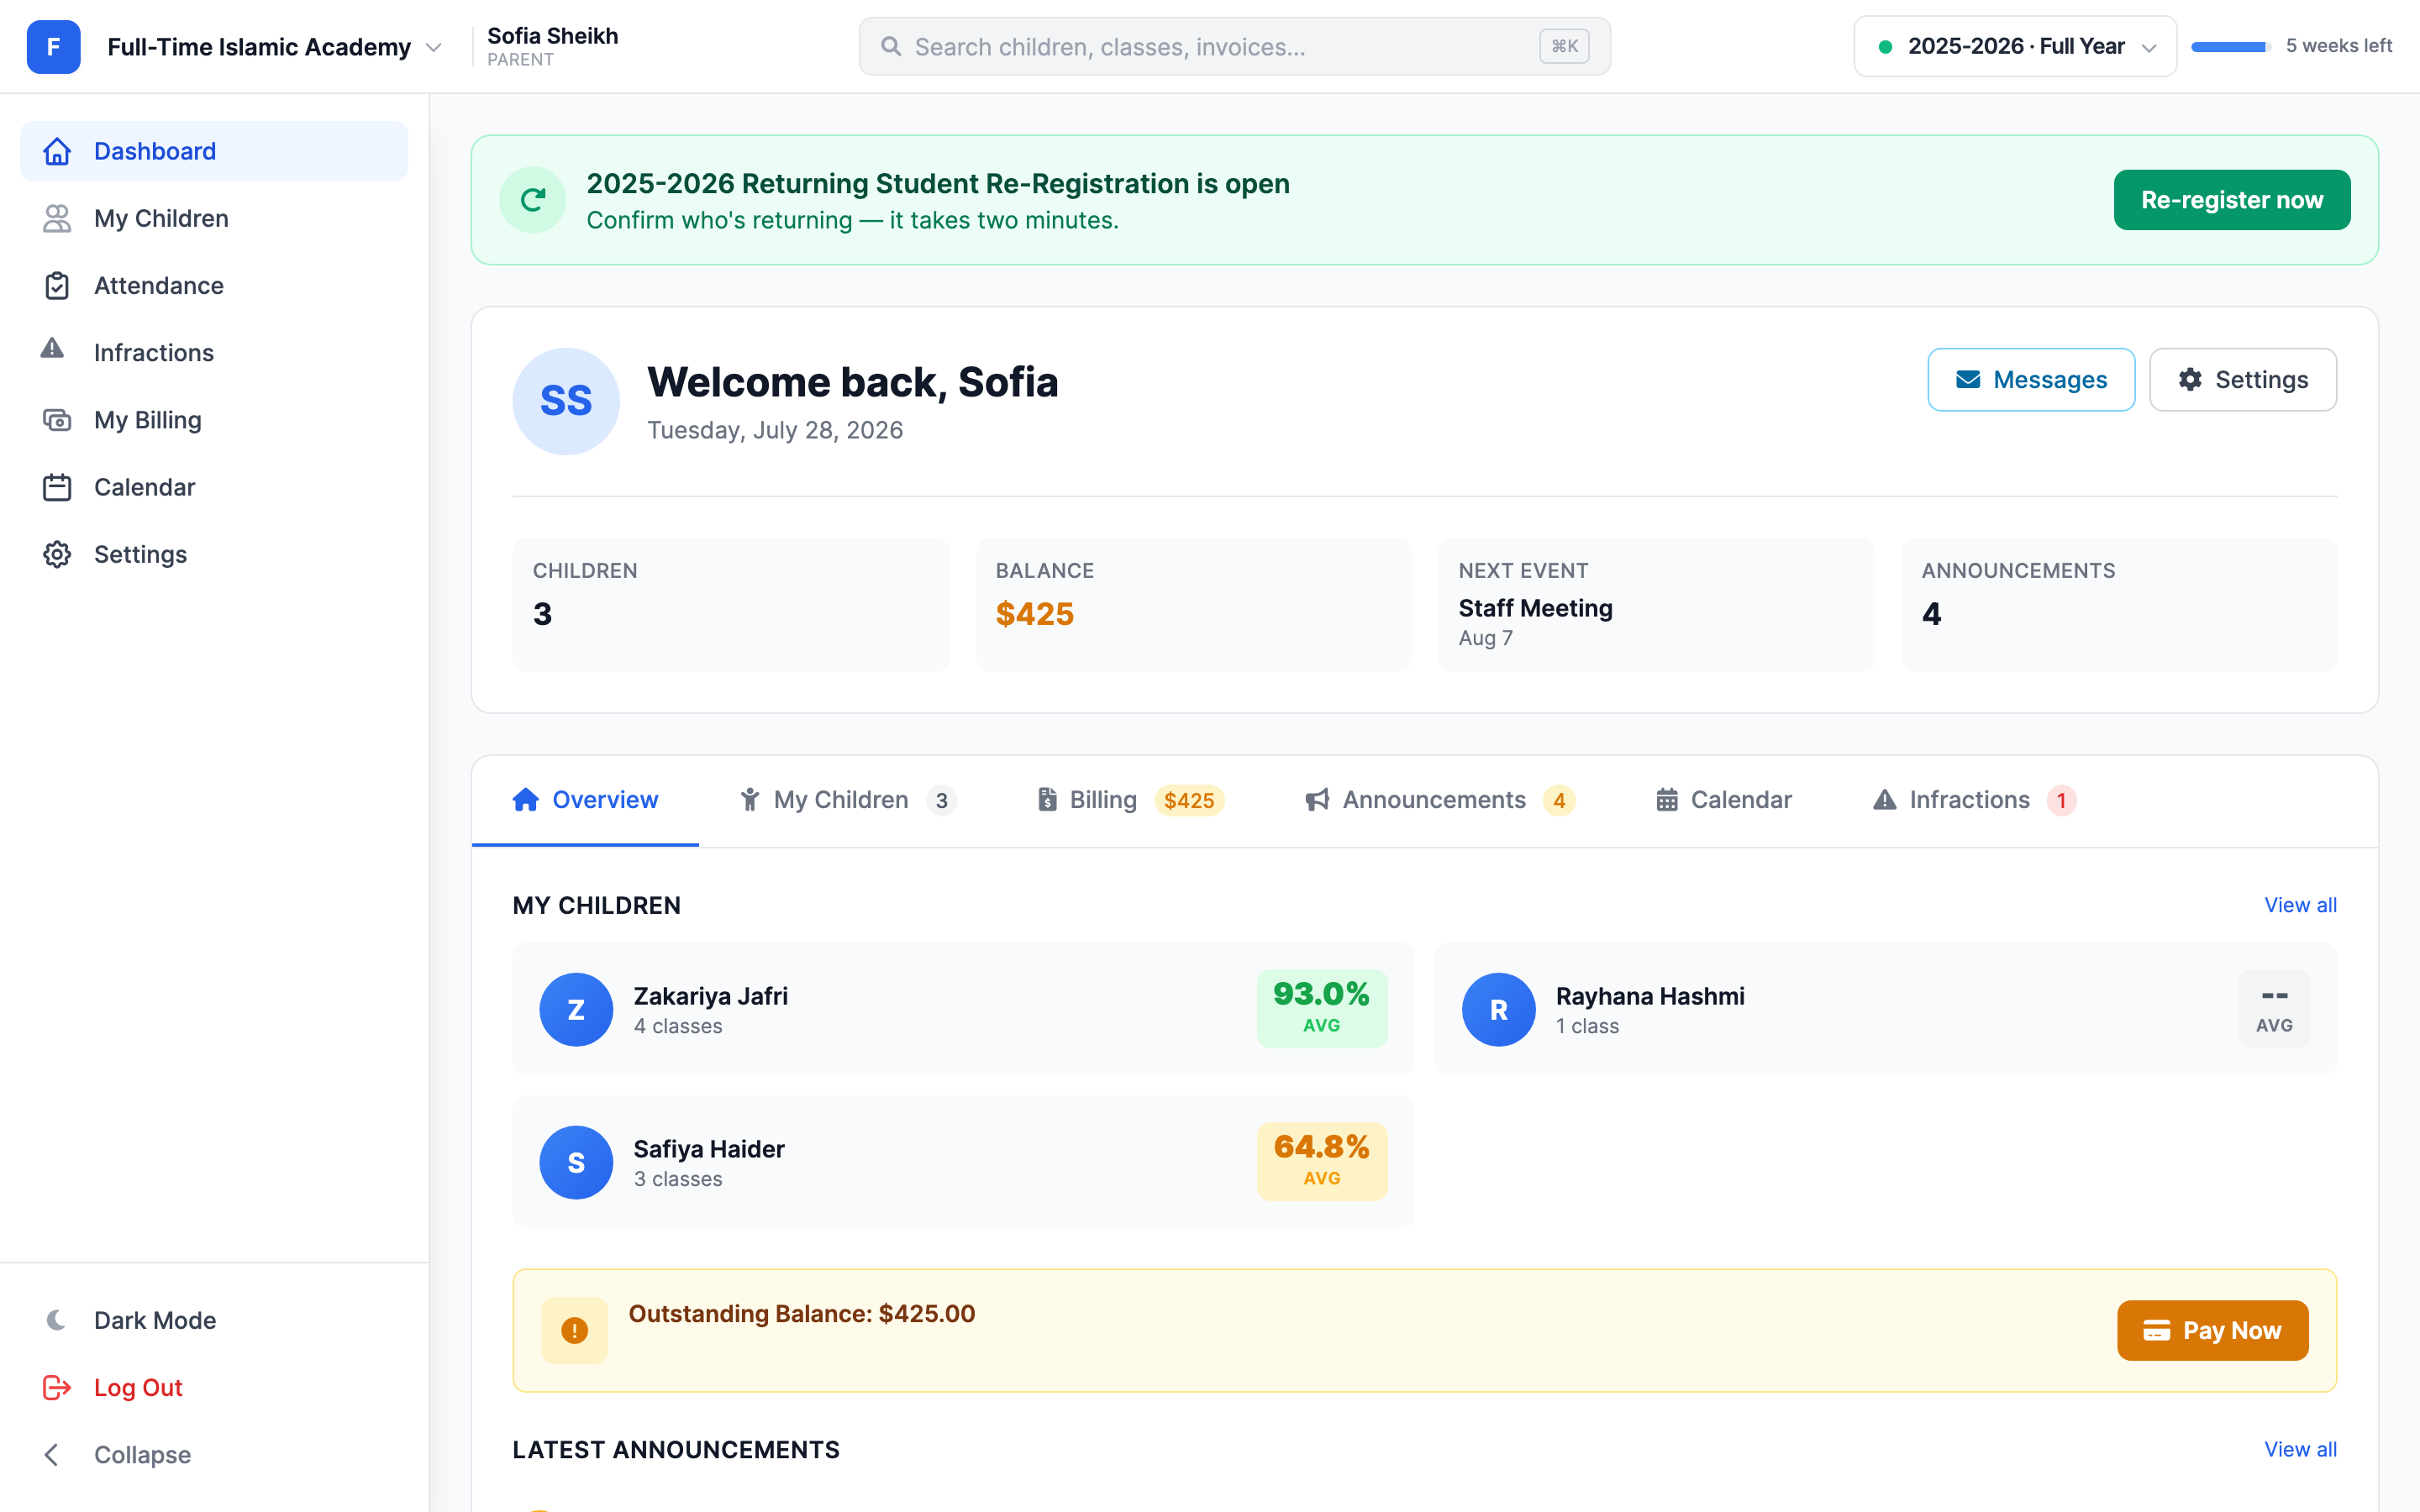
Once you're signed in, everything lives behind a short menu down the left-hand side:
- Dashboard — your home screen: how many children you have, what you owe, the next school event, and the latest announcements.
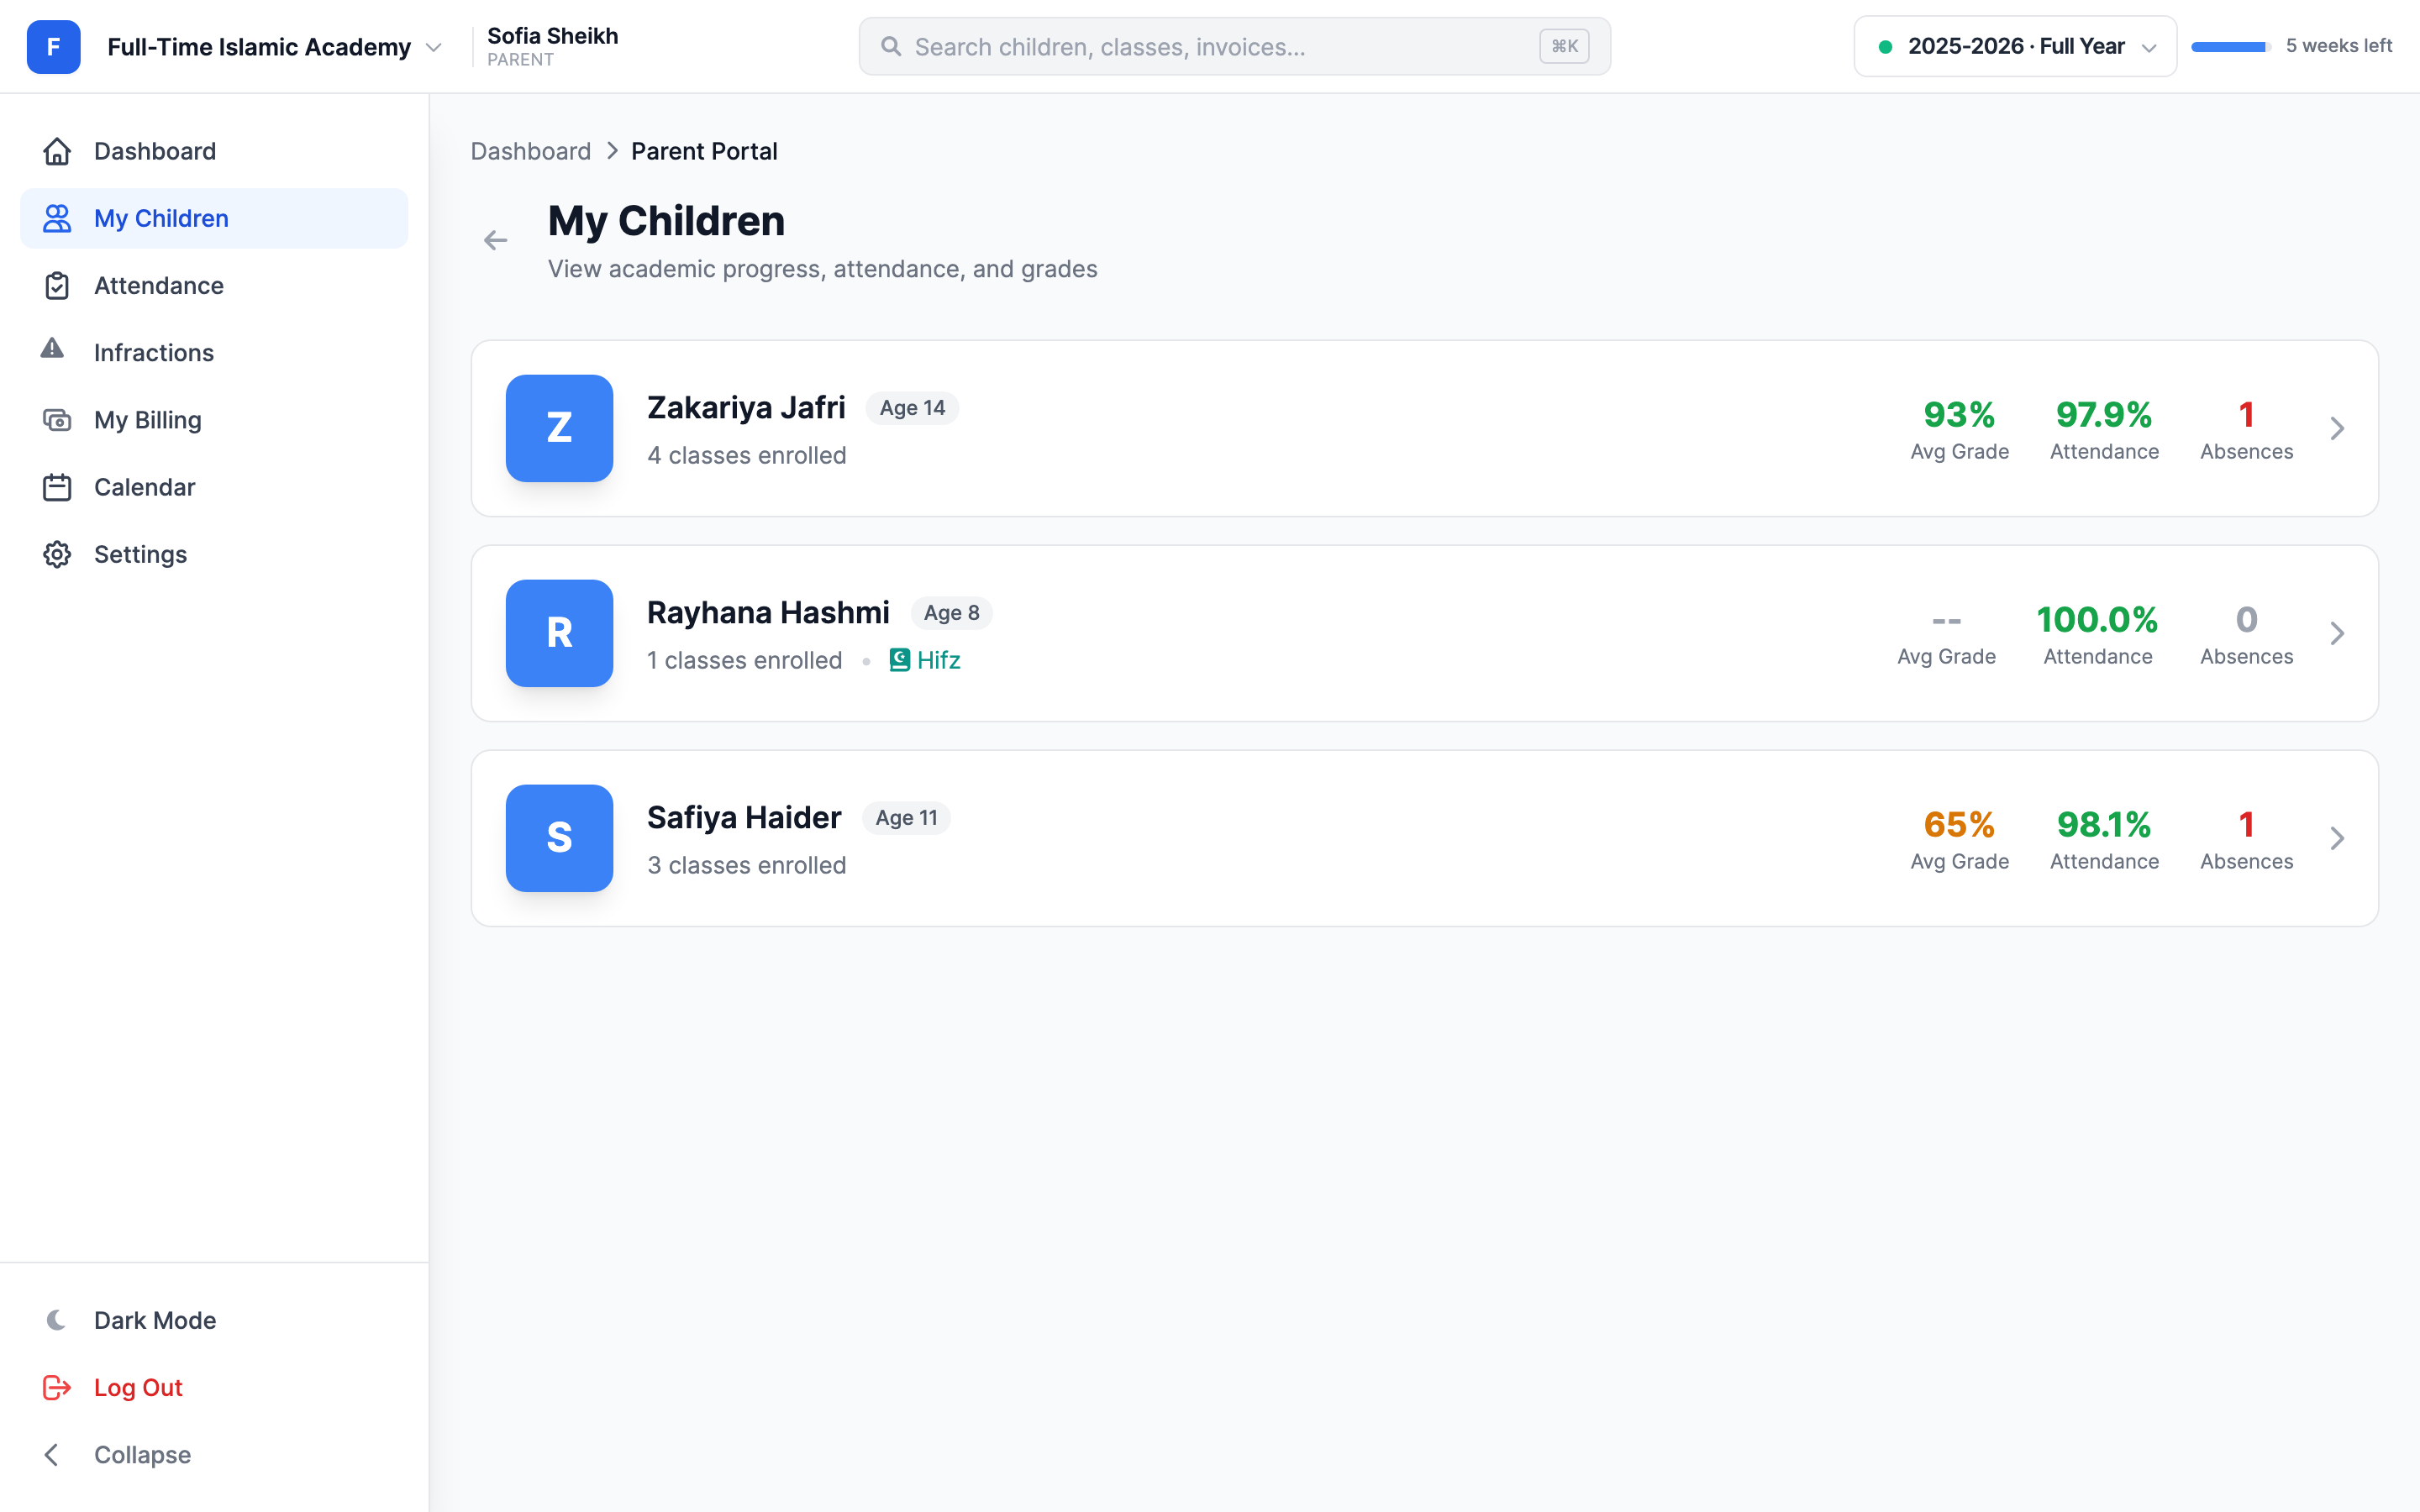
- My Children — one page per child: grades, attendance, assignments, and Hifz progress.
- Attendance — your children's attendance record, and where you request an absence.
- Infractions — behaviour records, if your school uses them, and where you acknowledge one.
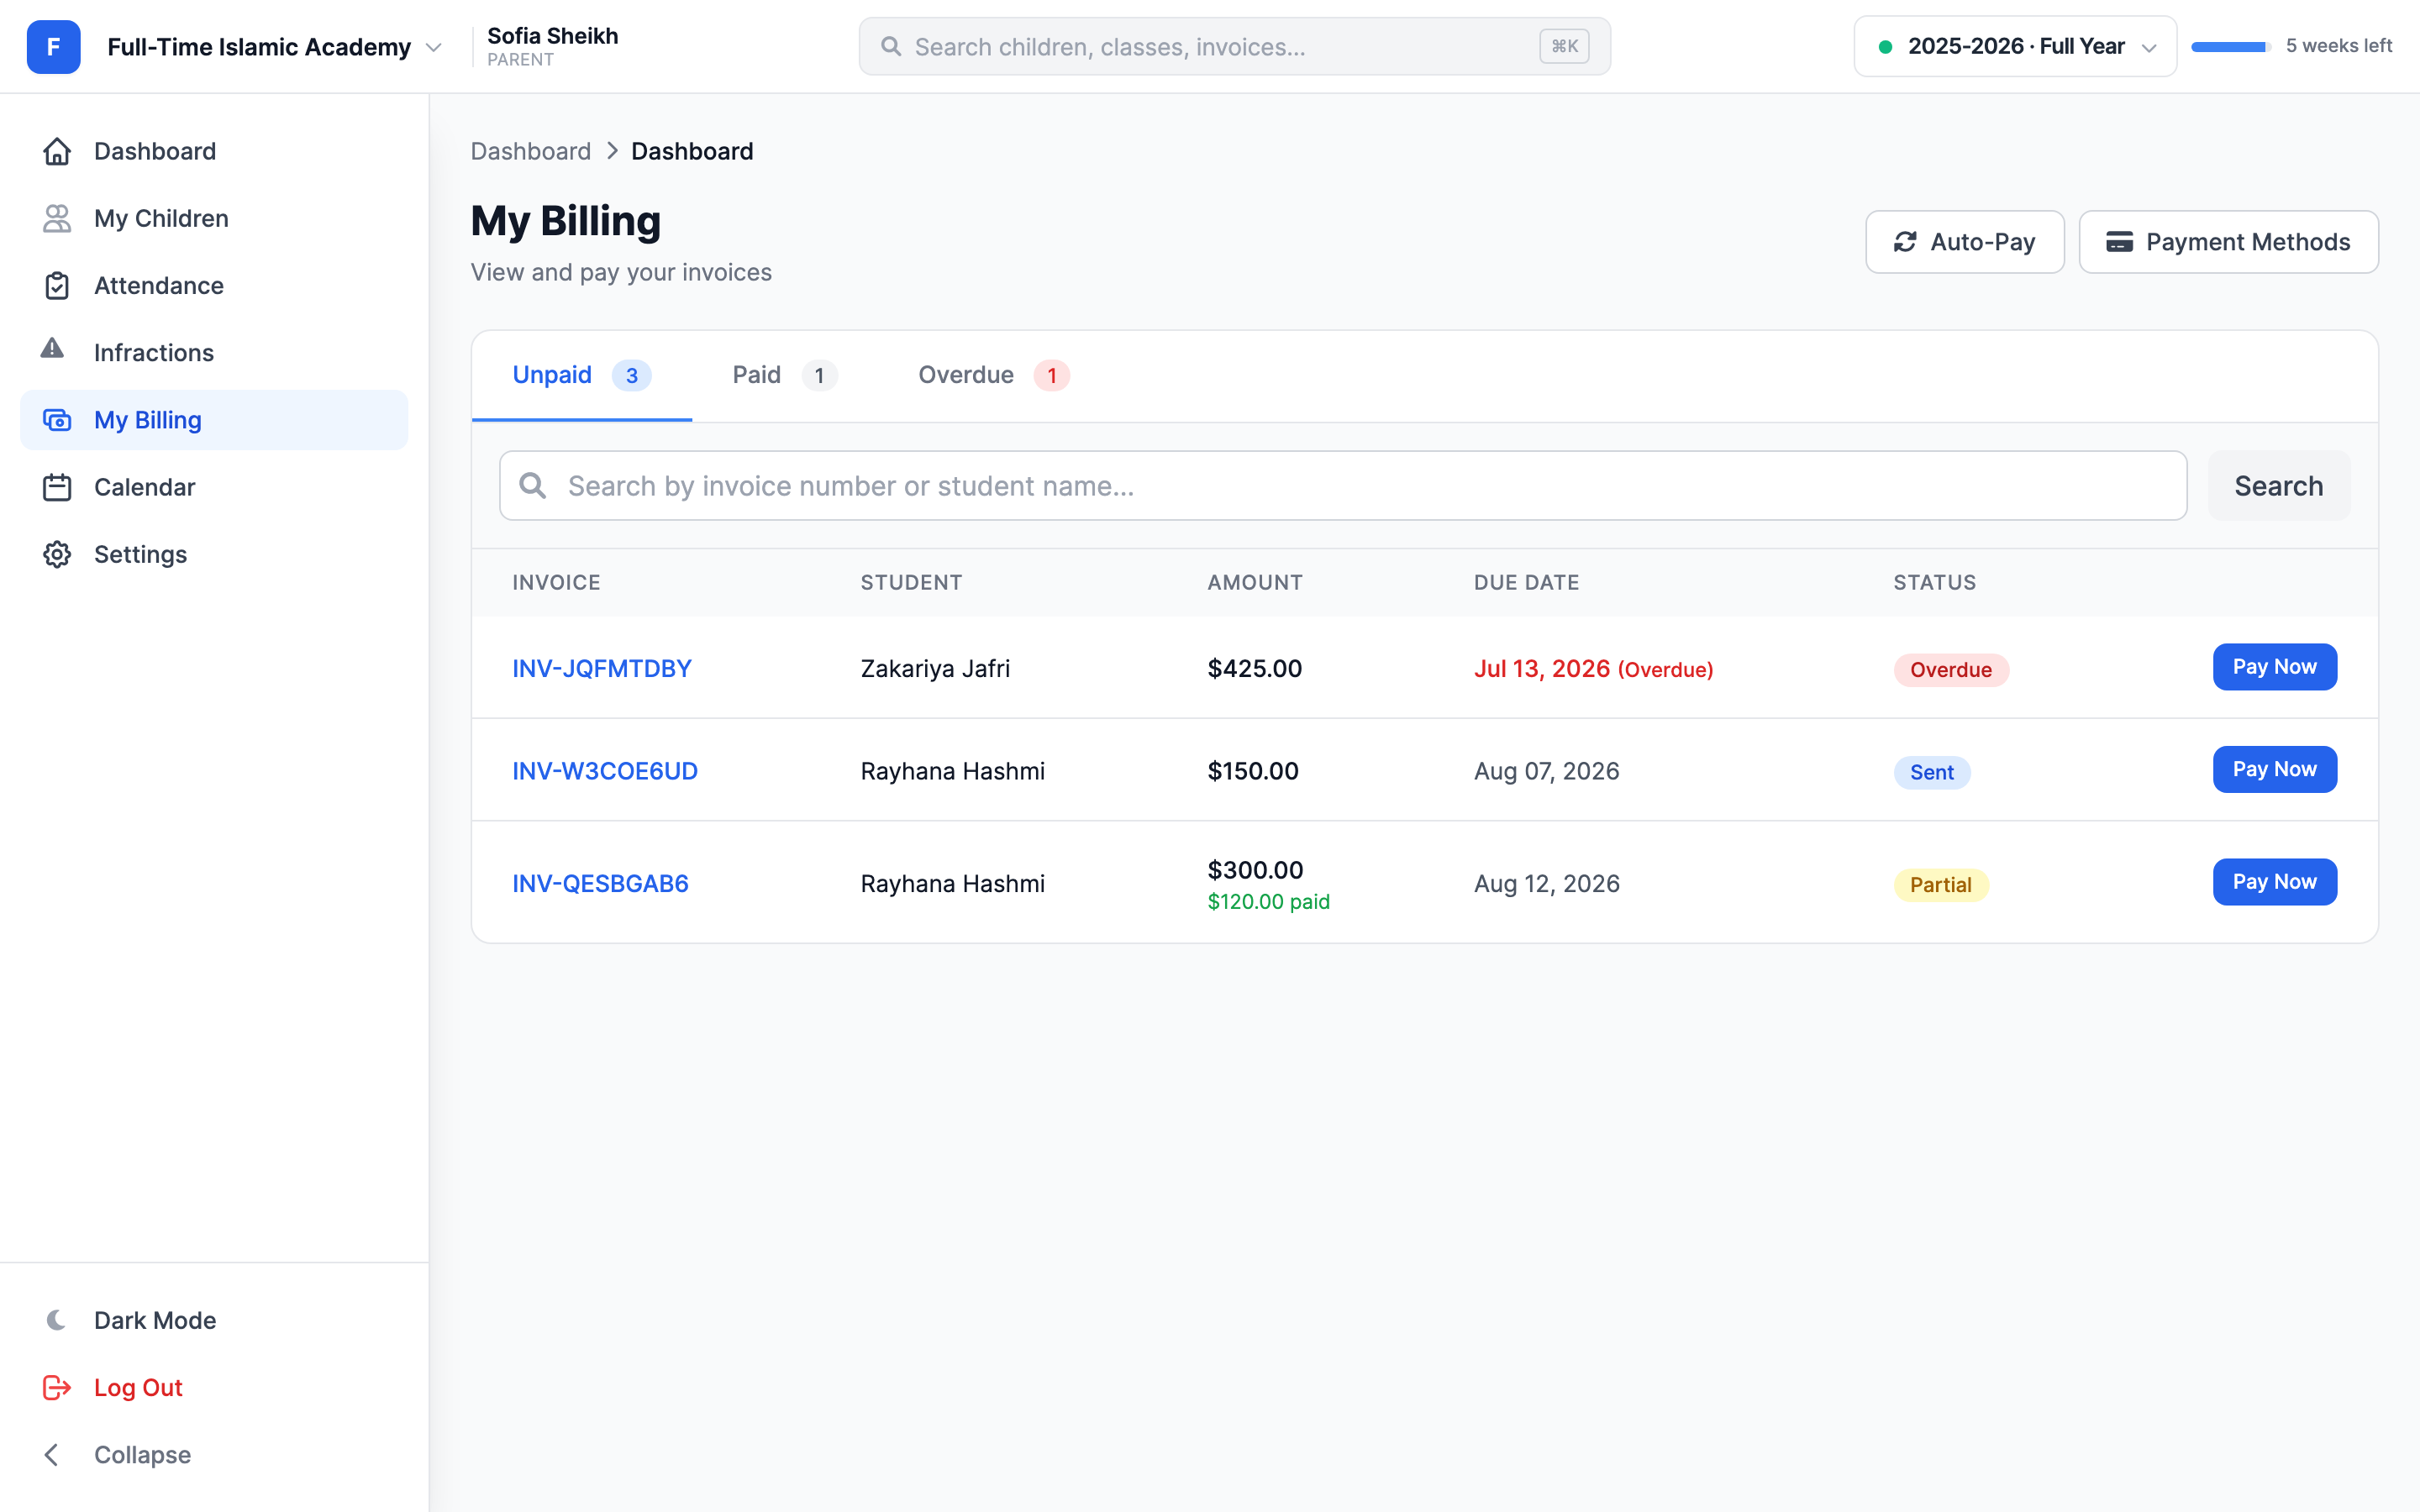
- My Billing — your invoices, payments, saved cards and auto-pay.
- Calendar — holidays, school events and assignment due dates.
- Settings — your account details and your password.
Step 1 — Apply to the school
Most families meet MarkTrack for the first time as an application form. Your school sends you a link; you fill it in without needing a login, add each child you're applying for, upload any documents they ask for, and submit. If the school charges a registration fee, you pay it as part of the same form.
Full walkthrough: Apply and enroll your child.
Step 2 — Get your account
You don't create a MarkTrack parent account yourself — the school creates it for you. That happens when they accept your application, or when the office adds you directly. Either way you get an email with a link, and the first time you sign in you choose your own password.
Full walkthrough: Get your account and sign in.
Step 3 — Find your way around
Your dashboard summarises the whole family; My Children drills into one child at a time. Each child's page has tabs for Grades, Attendance, Assignments and — if they're in a Hifz class — Hifz.
Full walkthrough: Your dashboard and My Children.
Step 4 — Tell the school about an absence
If your child will be out — a doctor's appointment, travel, illness — you can tell the school in advance instead of phoning. An absence request goes to the office, who approve or decline it. An approved request marks that day excused on your child's record.
Full walkthrough: Attendance and absence requests.
Step 5 — Follow how they're doing
Grades, assignments, memorisation progress and behaviour records all sit under your child's page. Report cards are produced by the school and emailed to you when they're ready.
Full walkthrough: Grades, assignments, Hifz and report cards.
Step 6 — Stay in touch
Announcements from the school appear on your dashboard (and by email or text if your school sends them that way). You can also message your children's teachers or the office from inside MarkTrack, and attach a file.
Full walkthrough: Announcements, calendar and messaging your school.
Step 7 — Pay tuition
Invoices from your school arrive in My Billing. You can pay by card or bank transfer, pay part of a balance, download receipts, and save a card so recurring tuition pays itself.
Things parents often ask
Do I need a separate login for each child?
No. One parent account covers every child you're linked to, even if they're in different programs at the same school. If both parents need access, the school can link a second guardian, who gets their own login.
Can I edit my child's details myself?
No — your child's profile and your own contact details are read-only for parents. If a phone number, address or spelling is wrong, ask the school office to change it. This is deliberate: it keeps the school's records the single source of truth.
Why can't I see a grade my child says they got?
Parents only ever see published work. Until a teacher publishes an assignment, its scores stay hidden from the parent portal. If it's been a while, ask the teacher.
Is there an app?
Yes — MarkTrack has iOS and Android apps for parents. You sign in with the same email and password, and you can turn on push notifications so you hear about absences and announcements straight away.
Something looks wrong on my invoice.
Billing is handled entirely by your school, not by MarkTrack. Contact the school office about amounts, discounts or refunds. If you think the app itself is broken, contact us.
More in For Parents
Still stuck?
Our team is happy to walk you through it.