Find and pay your invoices (for parents)
When your school bills you for tuition or fees, the charge shows up in MarkTrack as an invoice. This guide is written for parents: it shows you how to find your invoices, pay one online with a card or bank account, pay only part of a balance, and view or download your receipts and payment history. (Admins can point families here too.)
Everything lives under My Billing. You'll find it in your menu after you sign in. Each school your children attend has its own My Billing page, so if your family is in more than one program, switch schools to see that program's invoices.
One parent, all your children
My Billing shows invoices for every child you're linked to — including invoices that cover several siblings at once. You don't need a separate login per child.
Step 1 — Find your invoices
Open My Billing. The page header reads My Billing — View and pay your invoices. Your invoices are sorted into three tabs, each with a count:
- Unpaid — invoices that still need payment (this also includes a payment that's still processing through your bank).
- Paid — invoices that are fully paid.
- Overdue — unpaid invoices whose due date has already passed. These show a red Overdue badge.
Use the Search by invoice number or student name box to jump to a specific invoice or a specific child. Click Search, or Clear to reset.
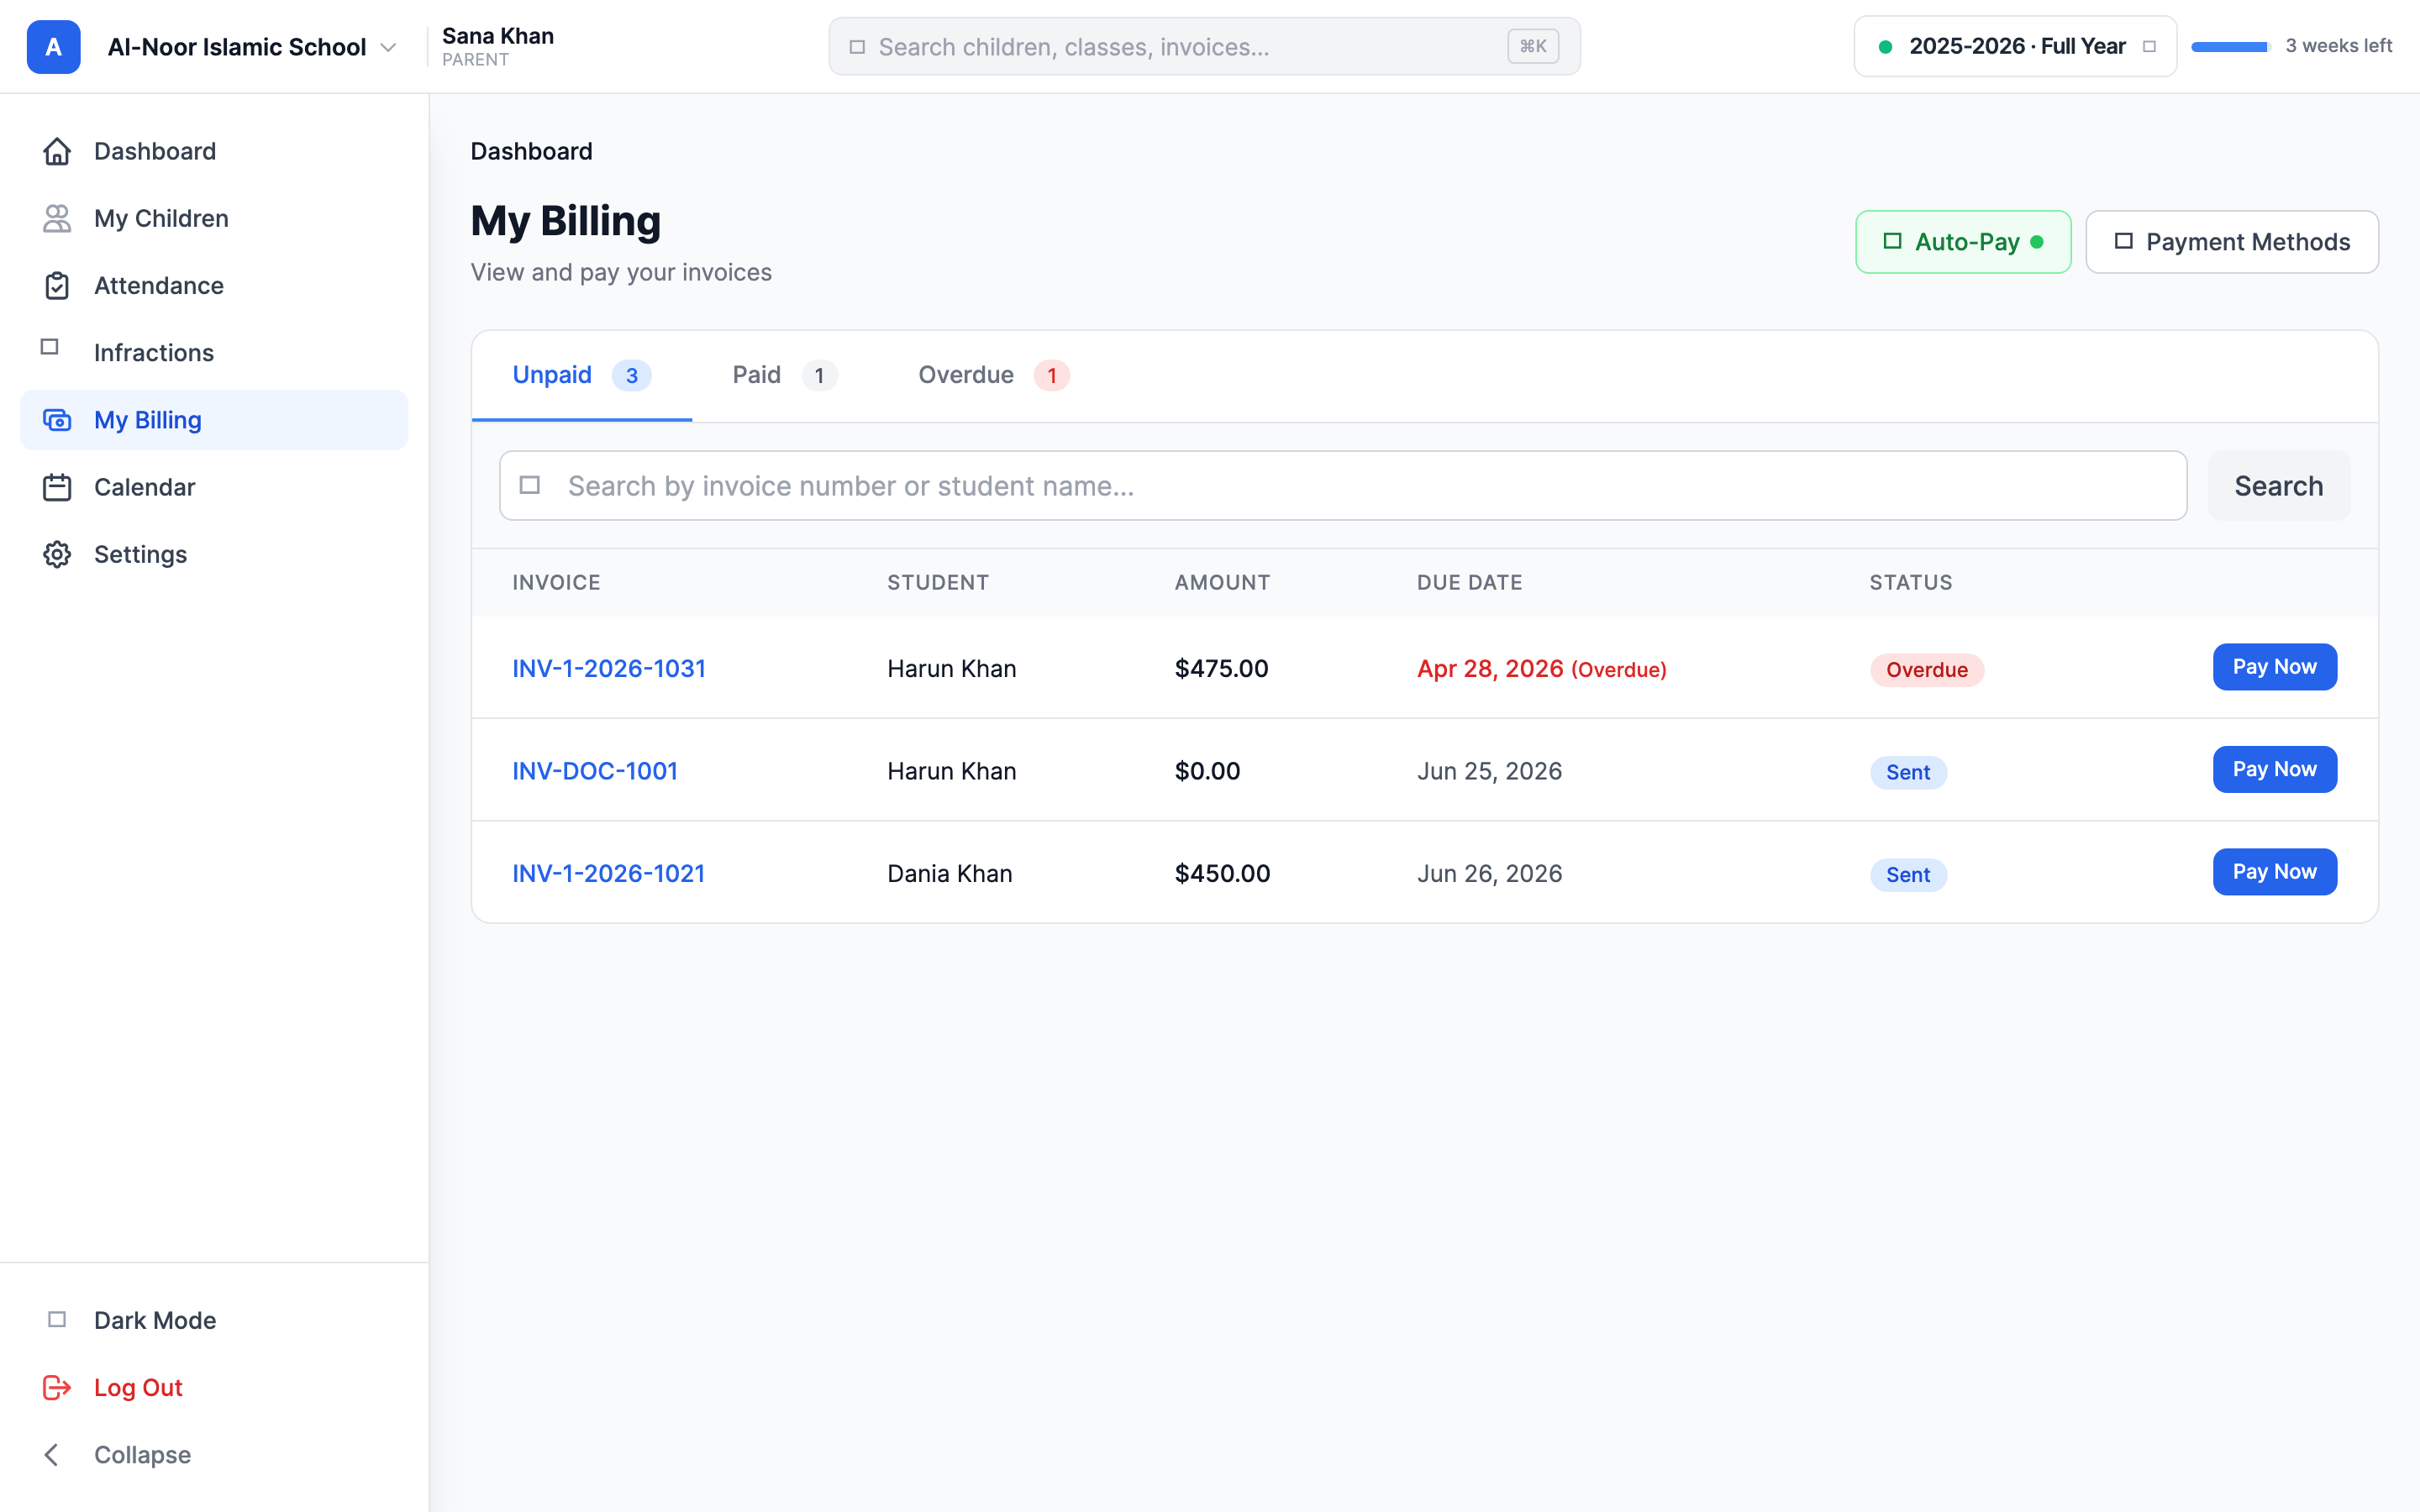
Each row shows the invoice number, the student (or a 2 Children-style badge if the invoice covers more than one child), the amount, the due date, and a status badge. Click anywhere on a row to open that invoice's detail page. Invoices that came from an automatic billing schedule carry a small Monthly / Quarterly / Yearly recurring tag.
Filtering by child
There's also a fuller My Invoices list (reachable from the back-arrow on an invoice). It adds a Status dropdown (Sent, Paid, Partial, Overdue) and — when you have more than one child — a Child dropdown so you can show one child at a time. Click Filter to apply.
Step 2 — Pay one invoice
You can pay an invoice as long as its status is Sent, Partial, or Overdue. Invoices that are already paid or cancelled don't show a Pay button.
- On the Unpaid or Overdue tab, find the invoice and click its blue Pay Now button. (You can also open the invoice first and click Pay Now at the top.)
- The Pay Invoice window opens. On the right you'll see the Invoice Summary — invoice number, student, due date, total, anything already paid, and the Amount Due.
- If you've saved a card or bank account before, pick it under Use Saved Card. Otherwise leave Use a new card selected and type your card details into the secure payment box.
- Click the Pay $… button at the bottom.

Card or bank — your choice
If your school has enabled bank payments, you can pay by bank account (ACH) right inside the payment box. Bank transfers usually have lower fees than cards but take a few business days to clear, so the invoice may sit as Processing in your Unpaid tab until the transfer completes.
When the payment goes through, MarkTrack records it against the invoice, updates the status, and the school emails you a receipt. Your card and bank details are encrypted and handled by Stripe — MarkTrack never stores your full card number.
Step 3 — Pay only part of a balance (partial payment)
You don't have to pay the whole invoice at once. In the Pay Invoice window:
- In the Payment Amount field, type the amount you want to pay now (for example, half the balance).
- Or click Pay Full Amount to put the entire balance back in the field.
- Finish paying as in Step 2.
After a partial payment, the invoice status becomes Partial, and the next time you open it the summary shows what you've Paid and the smaller Amount Due that's left. You can come back and pay the rest whenever you like.
Amount limits
The smallest payment you can make is $1.00, and you can't pay more than the balance due. If you type an amount outside that range, the window resets it for you.
Step 4 — Paying for several children
Schools often combine charges for siblings onto a single invoice. When they do, that invoice shows a 2 Children (or more) badge in your list, and its detail page groups the line items under each child's name. Paying that one invoice covers every child on it in a single payment — there's nothing extra to select.
If your children's charges are on separate invoices instead, pay them one at a time from the Unpaid tab using the steps above.
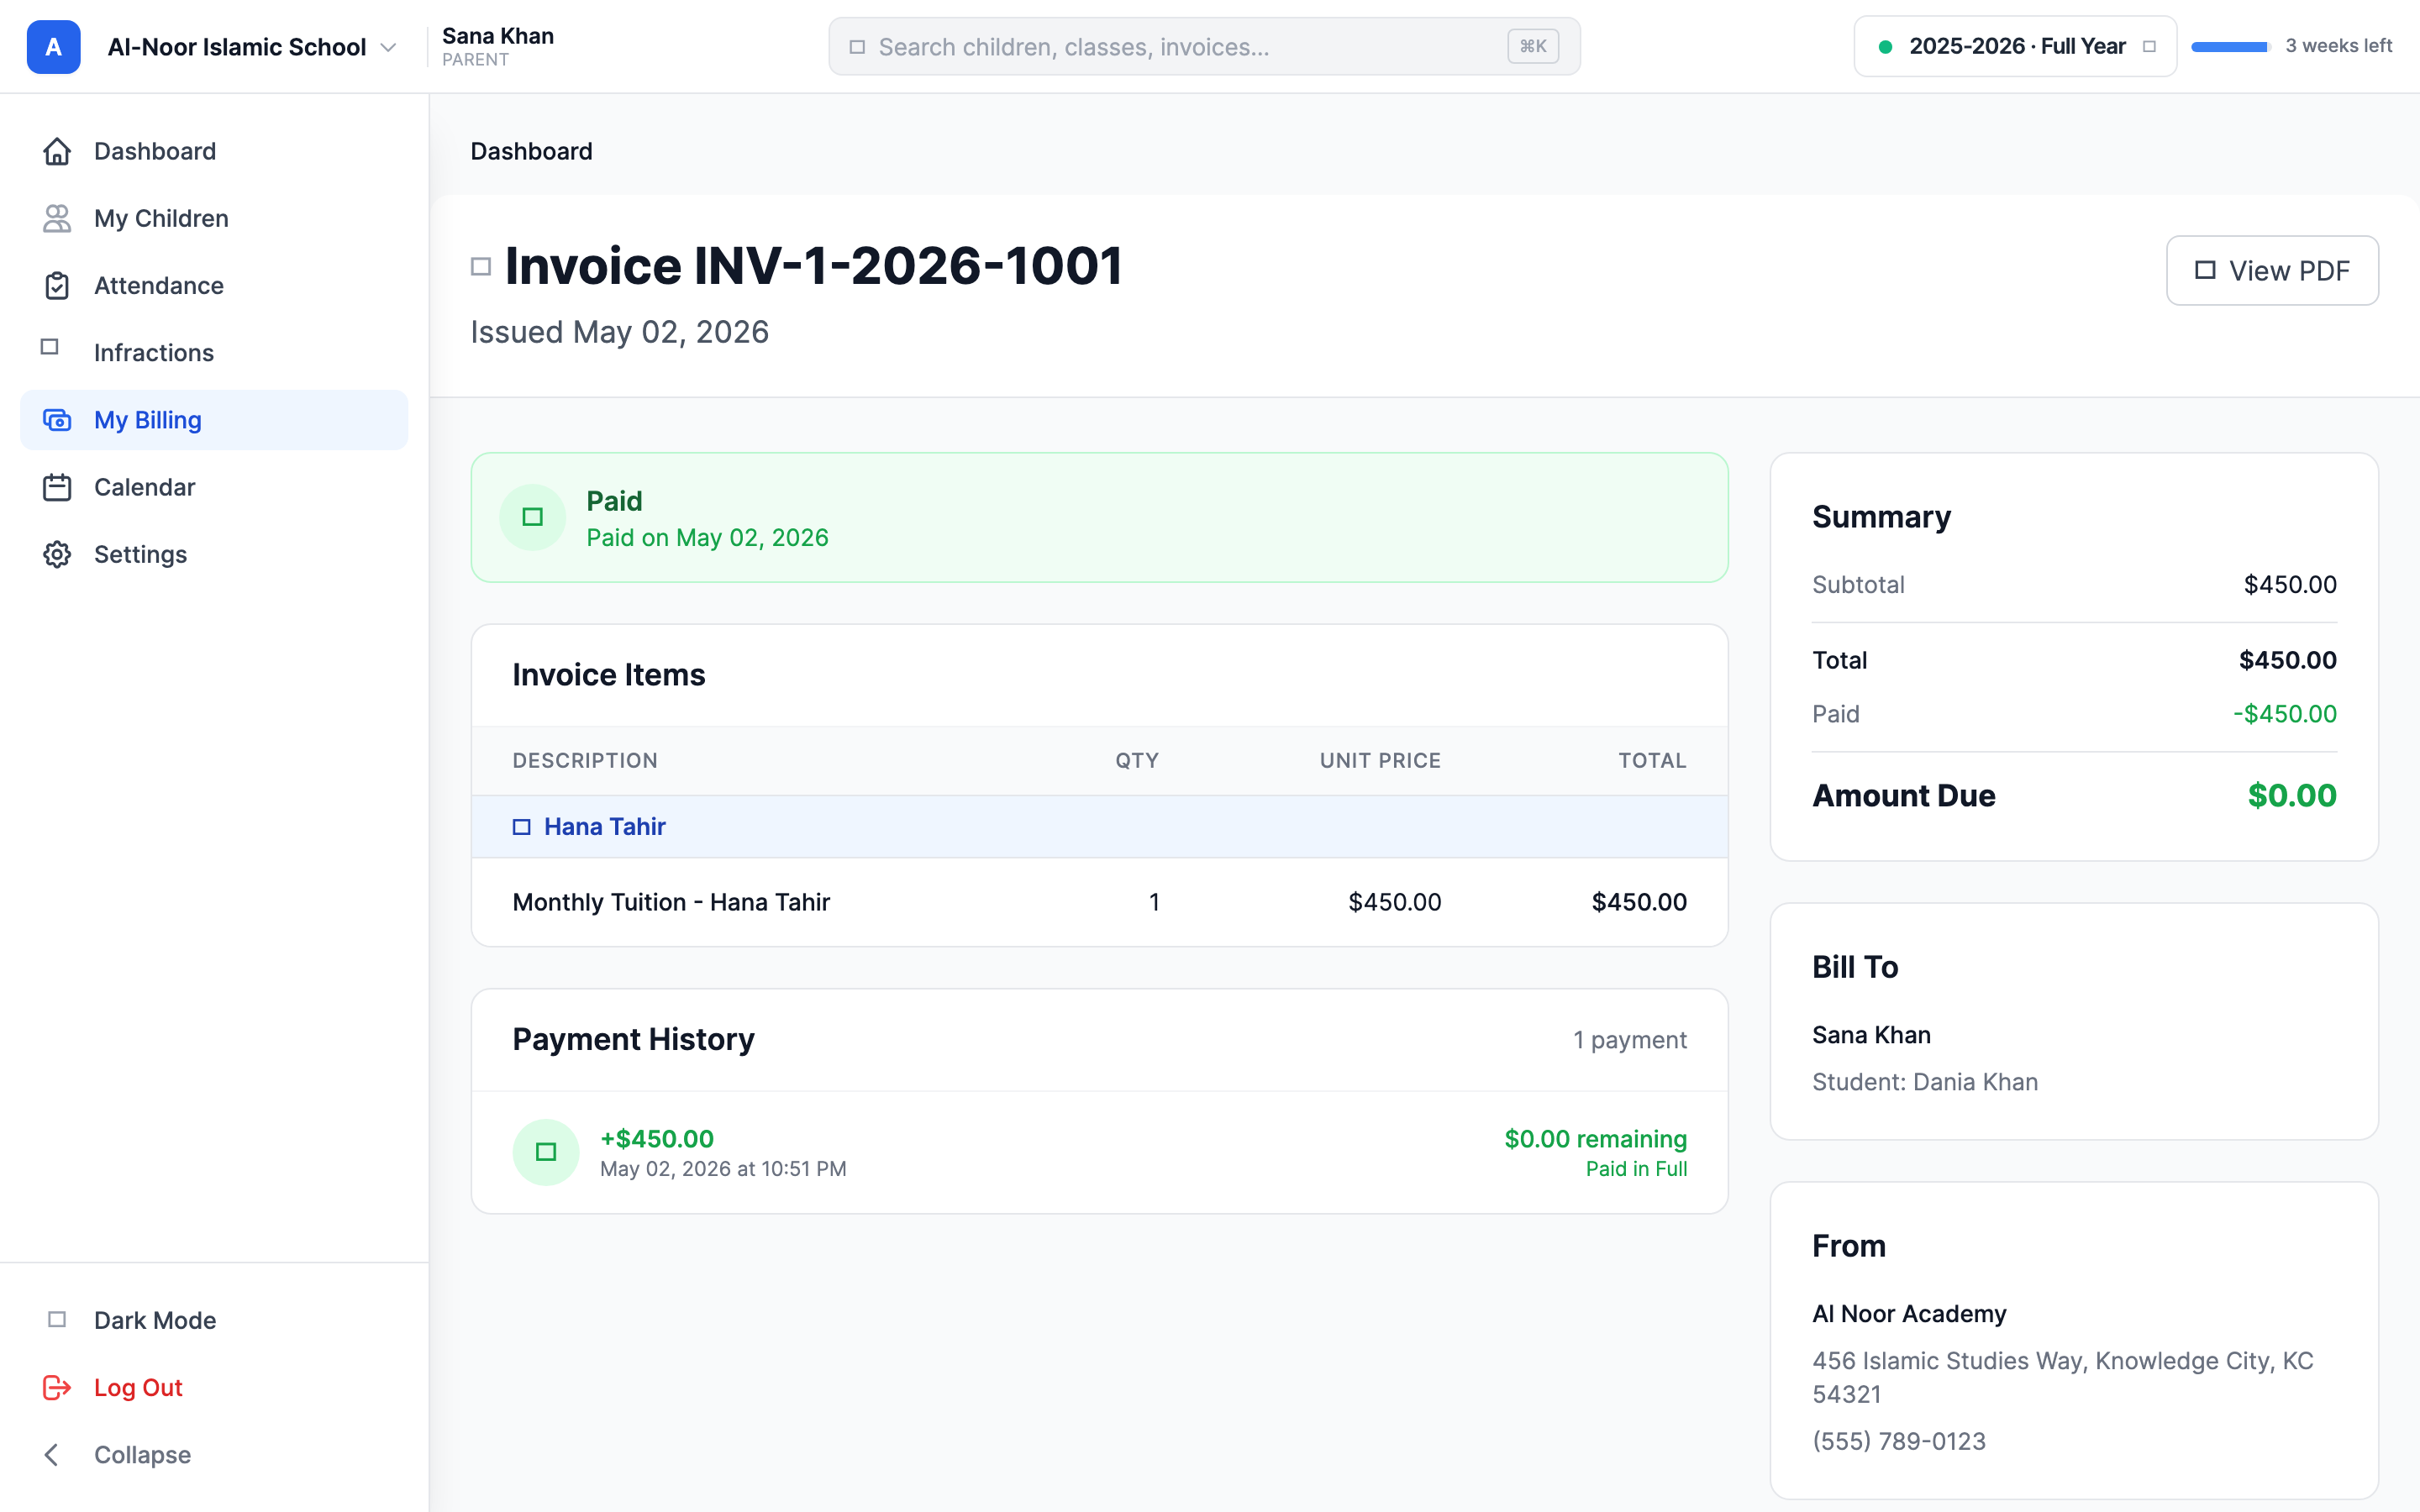
Step 5 — View an invoice and its payment history
Click any invoice to open its detail page. You'll see a colored status banner at the top, the full list of Invoice Items (grouped per child when needed), and a Summary on the right with Subtotal, any Tax, Total, Paid, and Amount Due.
If you've made any payments, a Payment History section lists each one — the amount, the date and time, the card or bank used, and the balance remaining after that payment. A payment that's still clearing shows a yellow Processing tag; a payment that didn't go through shows in red.
Step 6 — Get a receipt or PDF
There are three ways to get a record of what you've paid:
- Email receipt. Every successful payment automatically emails you a receipt — no action needed.
- Invoice PDF. On any invoice's detail page, click View PDF to open or download a printable copy.
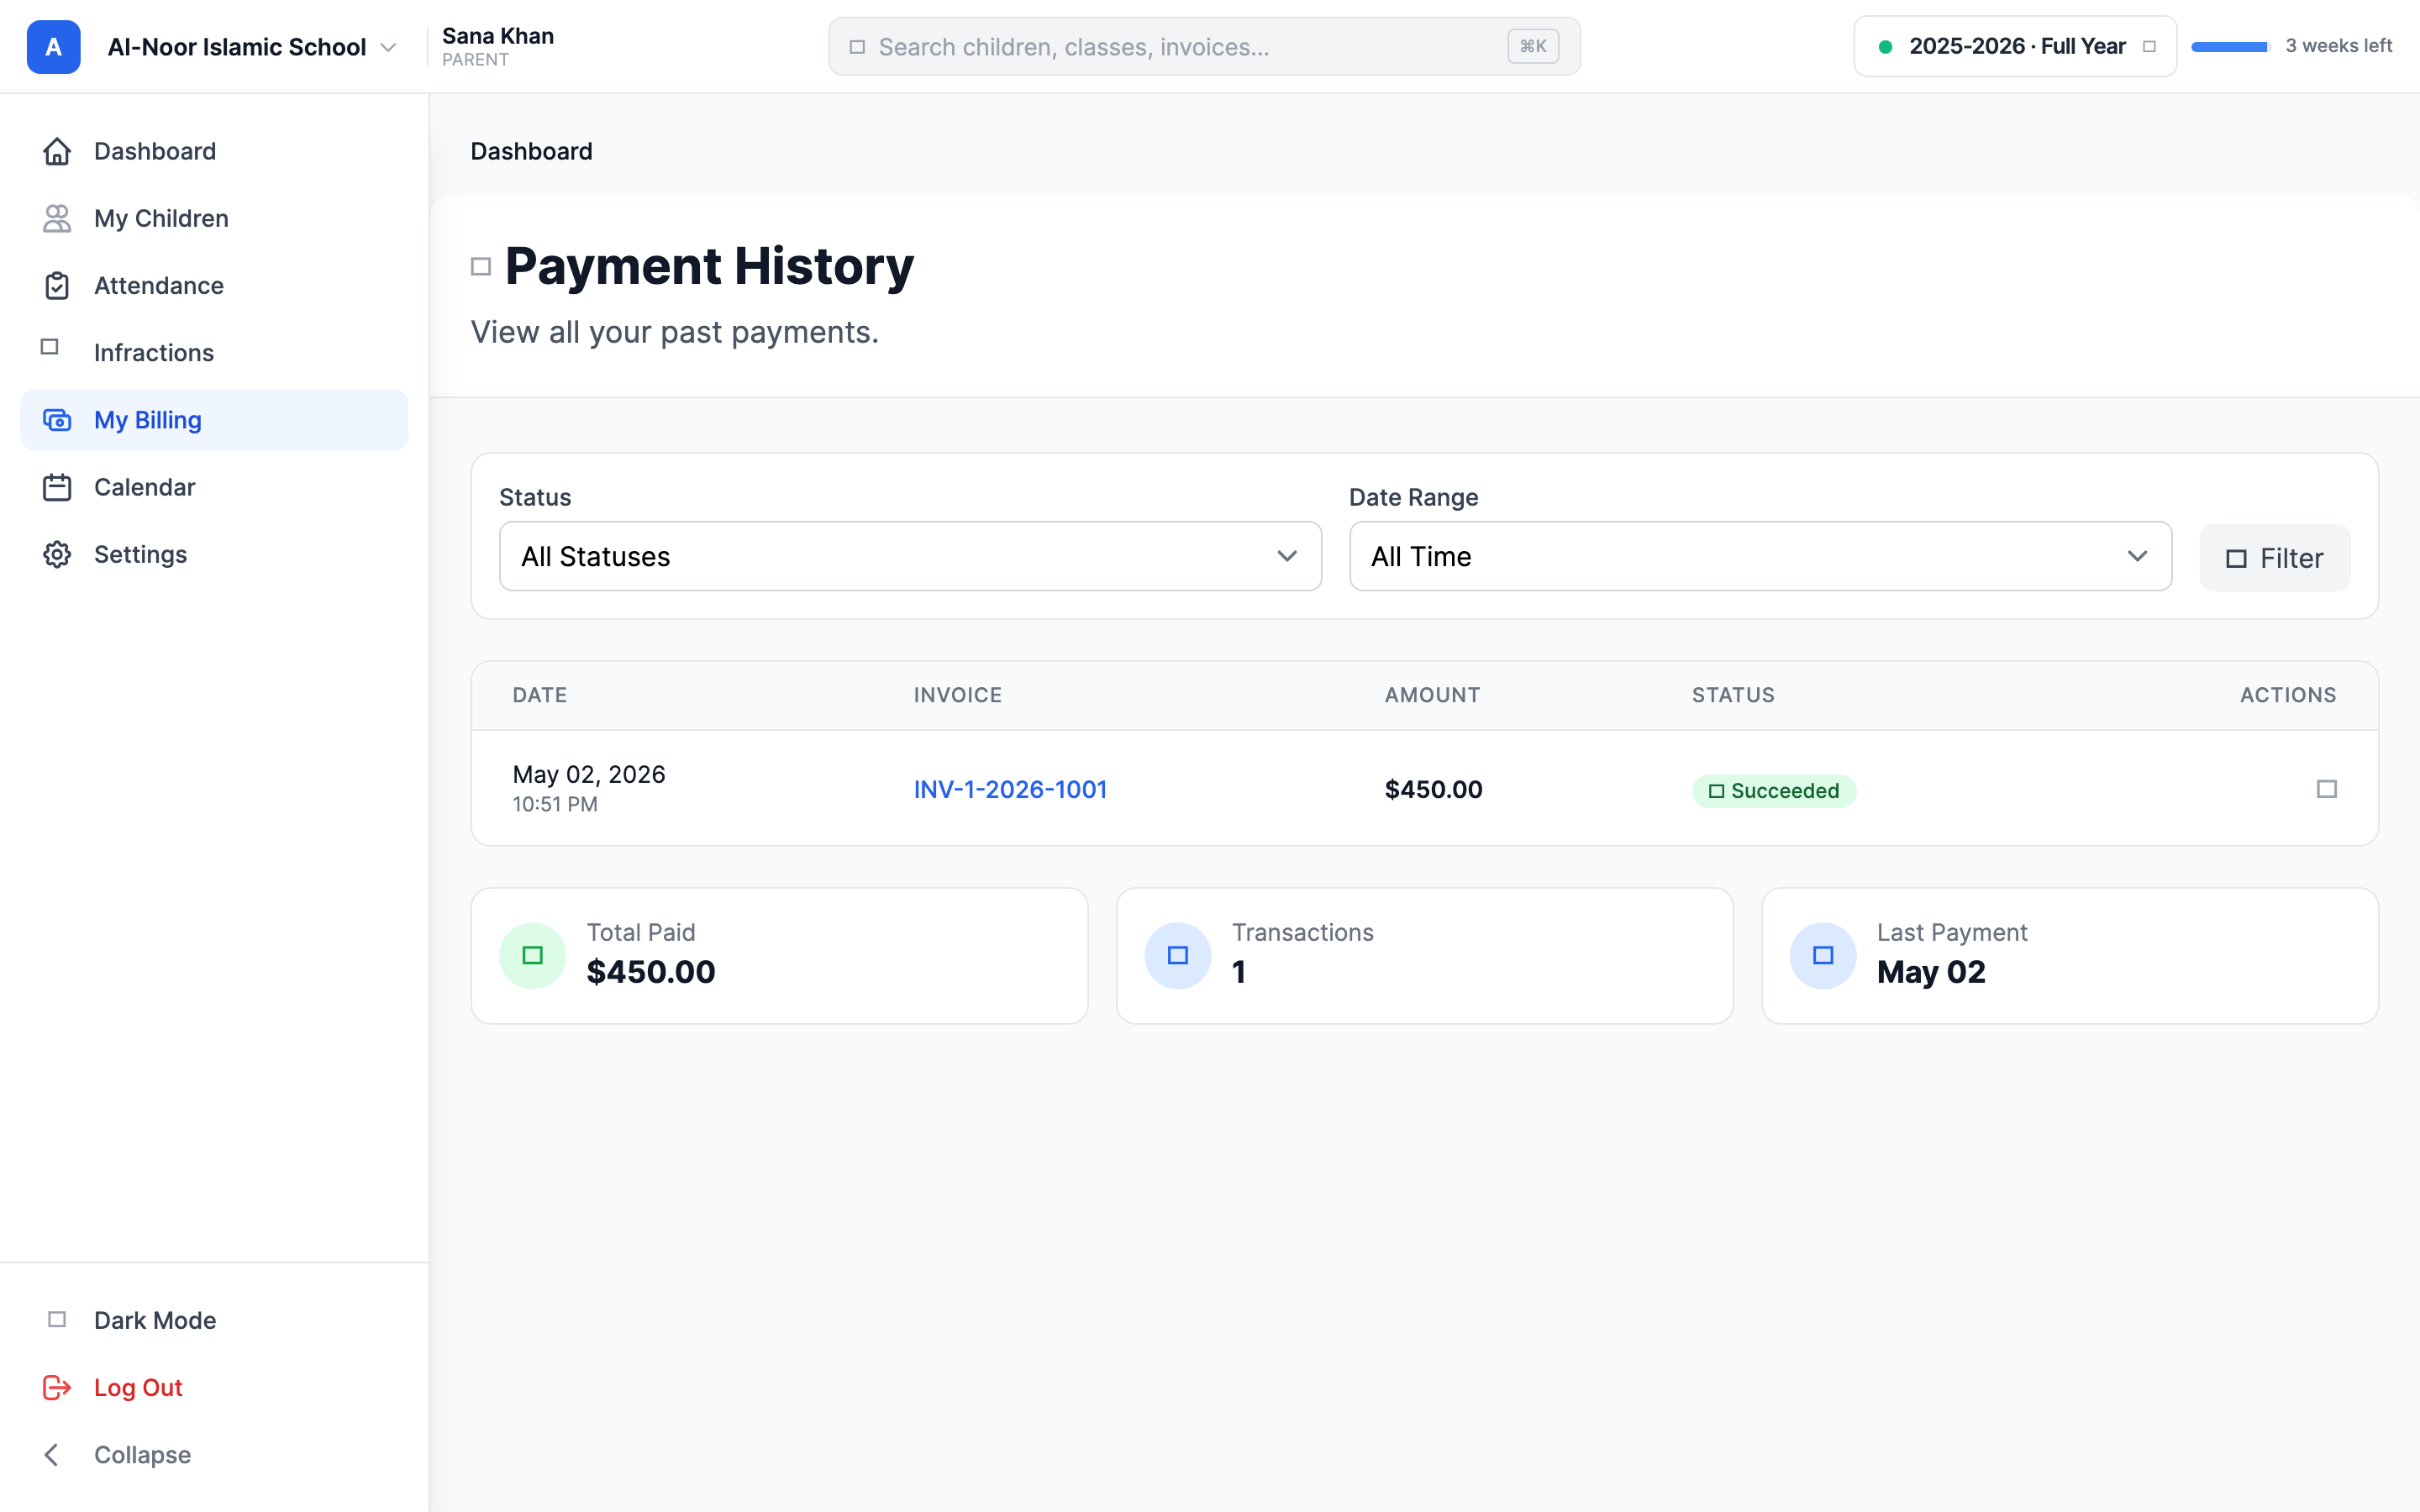
- Payment History page. Use the back-arrow to the dashboard, then open Payment History for one running list of every payment across all your children.
On the Payment History page you can filter by Status (Succeeded, Failed, Pending) and by Date Range (Last 30 Days, Last 90 Days, This Year), then click Filter. Each row links to its invoice and has a PDF icon to download that invoice. At the bottom, summary cards show your Total Paid, number of Transactions, and your Last Payment date.
Tired of paying every month?
If your school charges recurring tuition, you can save a card or bank account and turn on automatic payments so you never miss a due date. See Set up auto-pay and manage payment methods.
If a payment won't go through, an invoice looks wrong, or you were charged in error, your school handles billing directly — reach out to them, or contact us if you think something in MarkTrack isn't working.
More in Billing & Tuition
Still stuck?
Our team is happy to walk you through it.