
Set up parent sign in / sign out QR codes
Sign In / Sign Out lets parents sign children in and out by scanning a printed QR code at the door — no app to install and no password to remember. This guide covers turning the feature on (it ships off), setting the times that make "late" mean something, creating your first station, and getting a code onto a wall or an iPad.
This publishes a public page — so it is off by default
A station's scan page is deliberately reachable without logging in; a parent in a carpool queue will not type a password. Because of that, Sign In / Sign Out is off by default on every school. While it is off, the poster URL and the scan endpoint both return "not found" and the menu entry stays hidden. Only an admin can turn it on, and only one school at a time.
Step 1 — Turn it on for a school
- Go to Settings.
- Open the Sign In / Out tab.
- Find the card for the school you want and flip its toggle on.
- Fill in School starts, Dismissal, and Grace (minutes), then click Save.
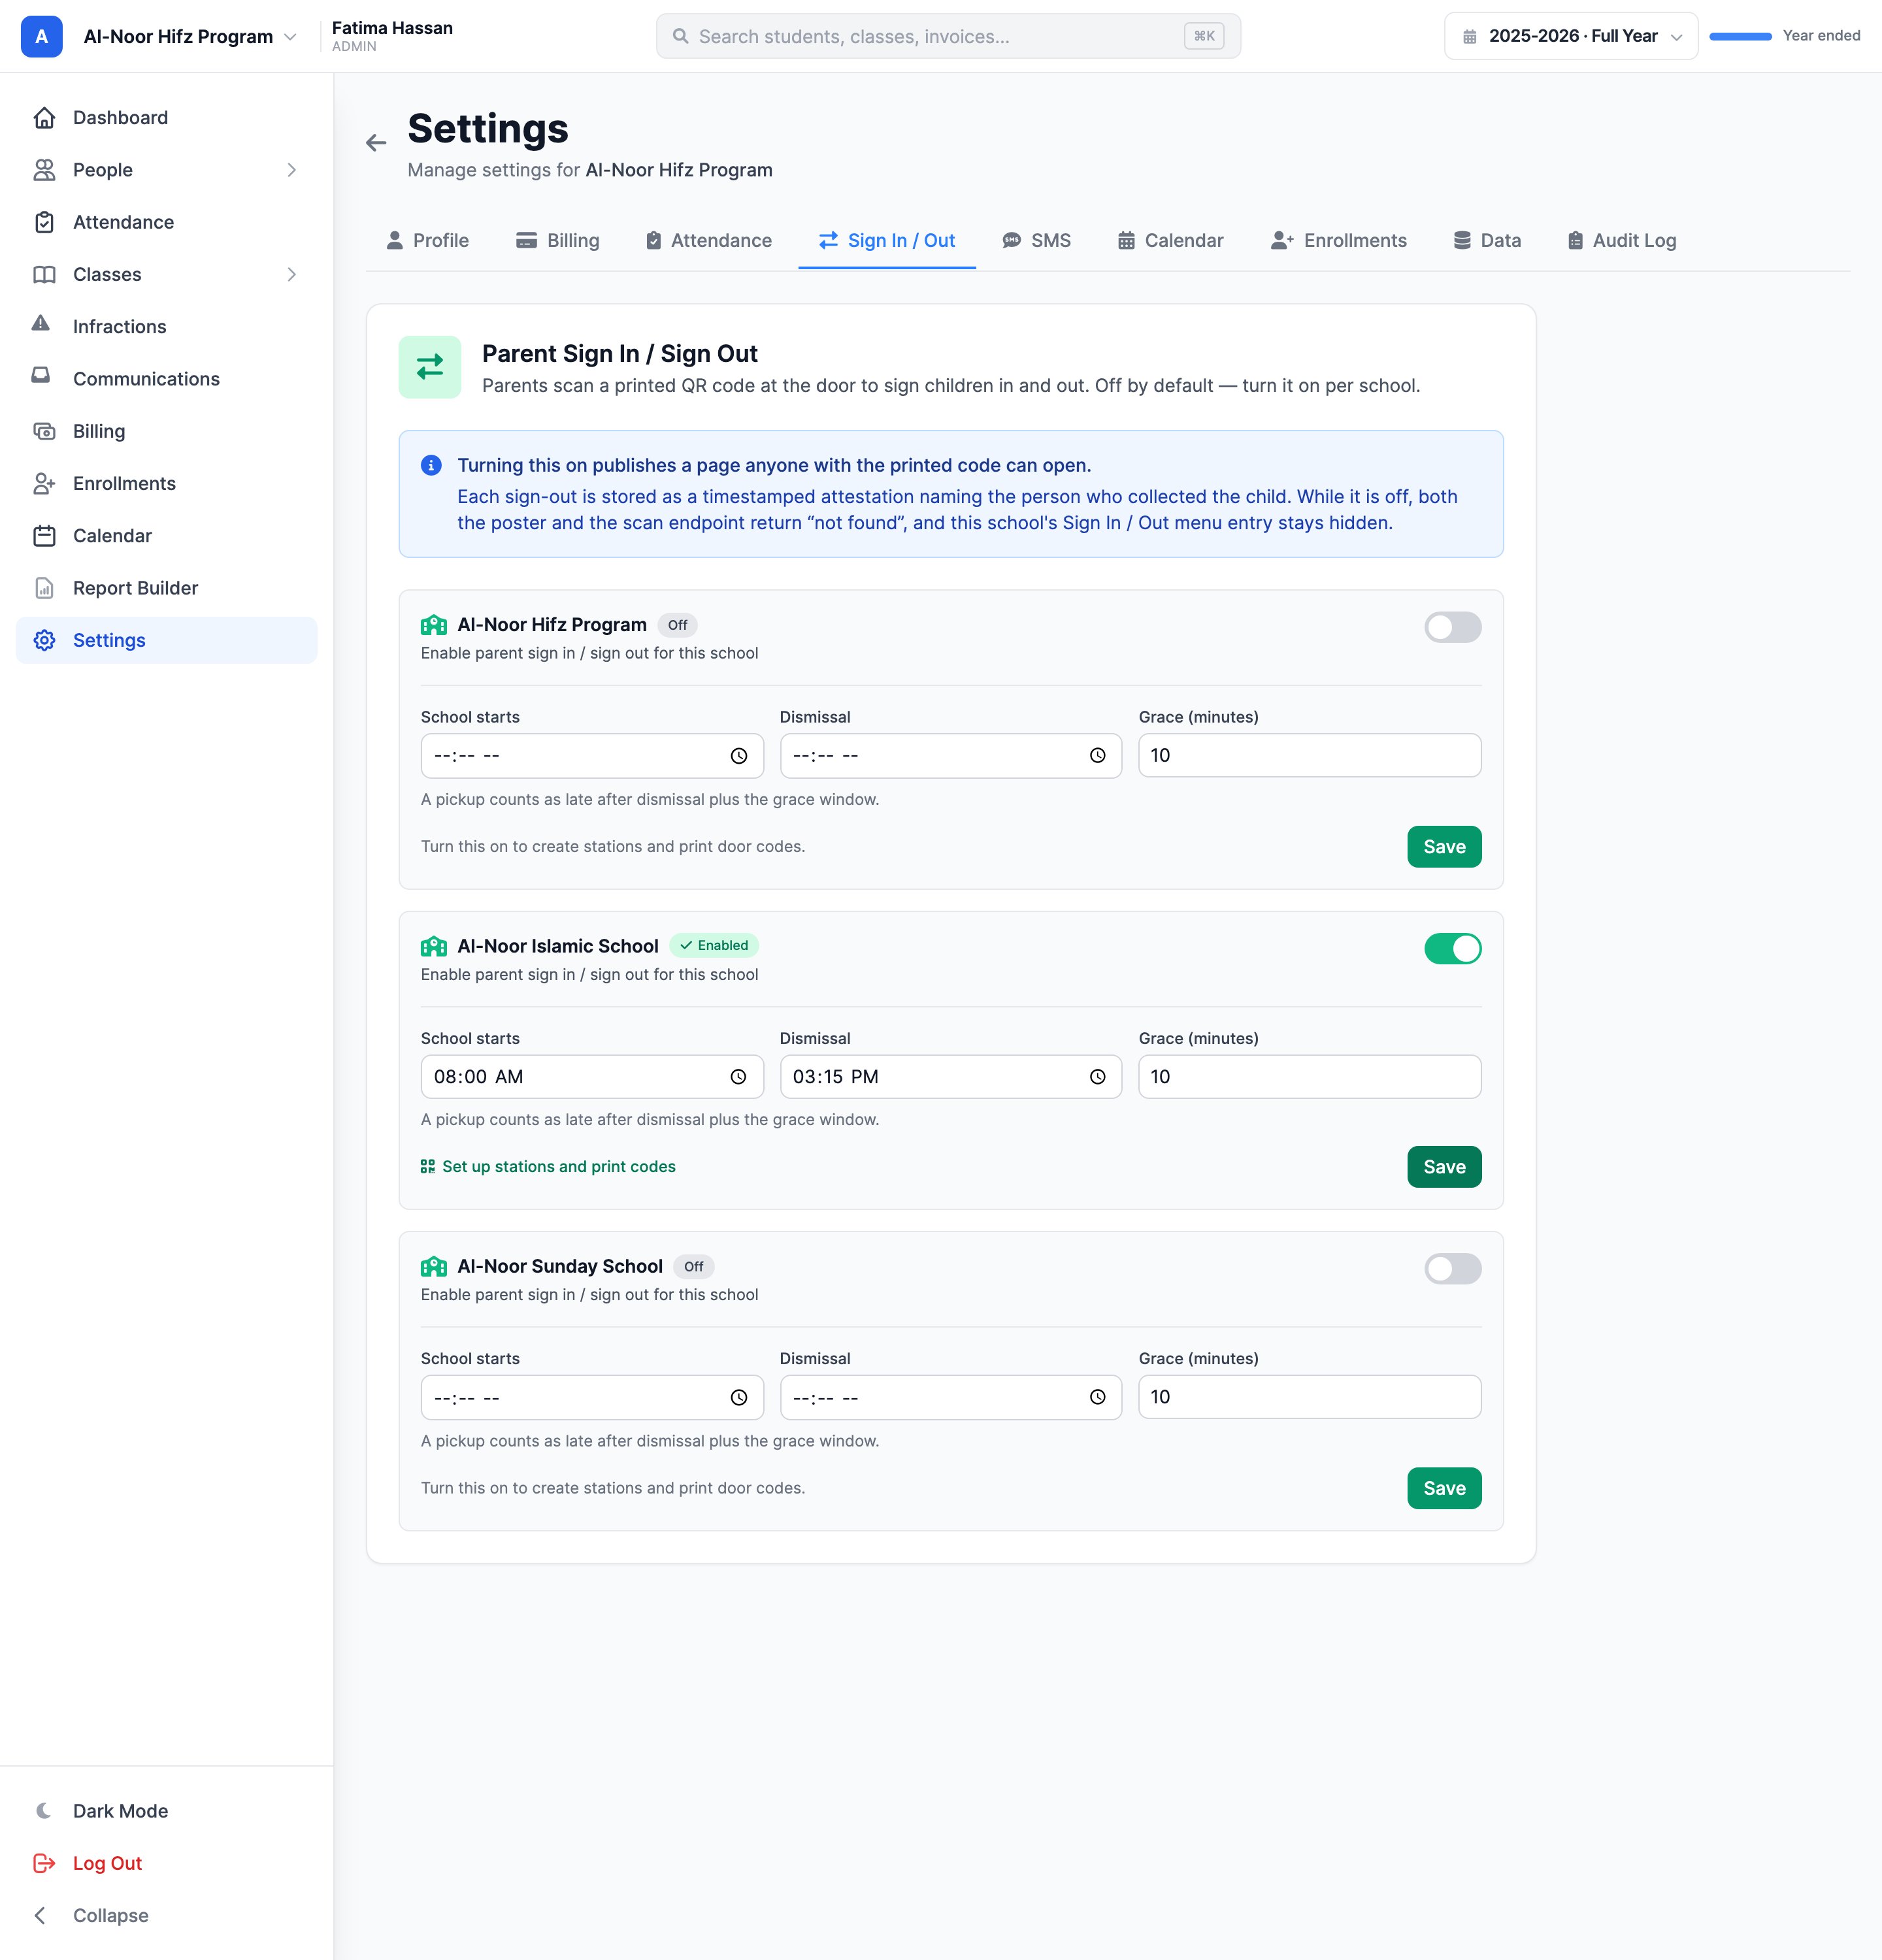
Each school gets its own switch and its own times, and each is independent. Once a school is on, a Sign In / Out entry appears in that school's sidebar.
Set a dismissal time, or nothing is ever late
A pickup counts as late after dismissal plus the grace window. If you switch a school on without a dismissal time, every pickup scores as on time and the analytics page will look answered when it isn't. The tab warns you when a school is live without one.
If your admin account uses a custom permissions set rather than full admin, sign_in_out has to be granted explicitly before the tab and the menu entry appear.
Step 2 — Create a station
A station is one QR code with one job: the front door, the carpool line, the office, or a single classroom door. Open Sign In / Out → QR Codes → New QR Code.
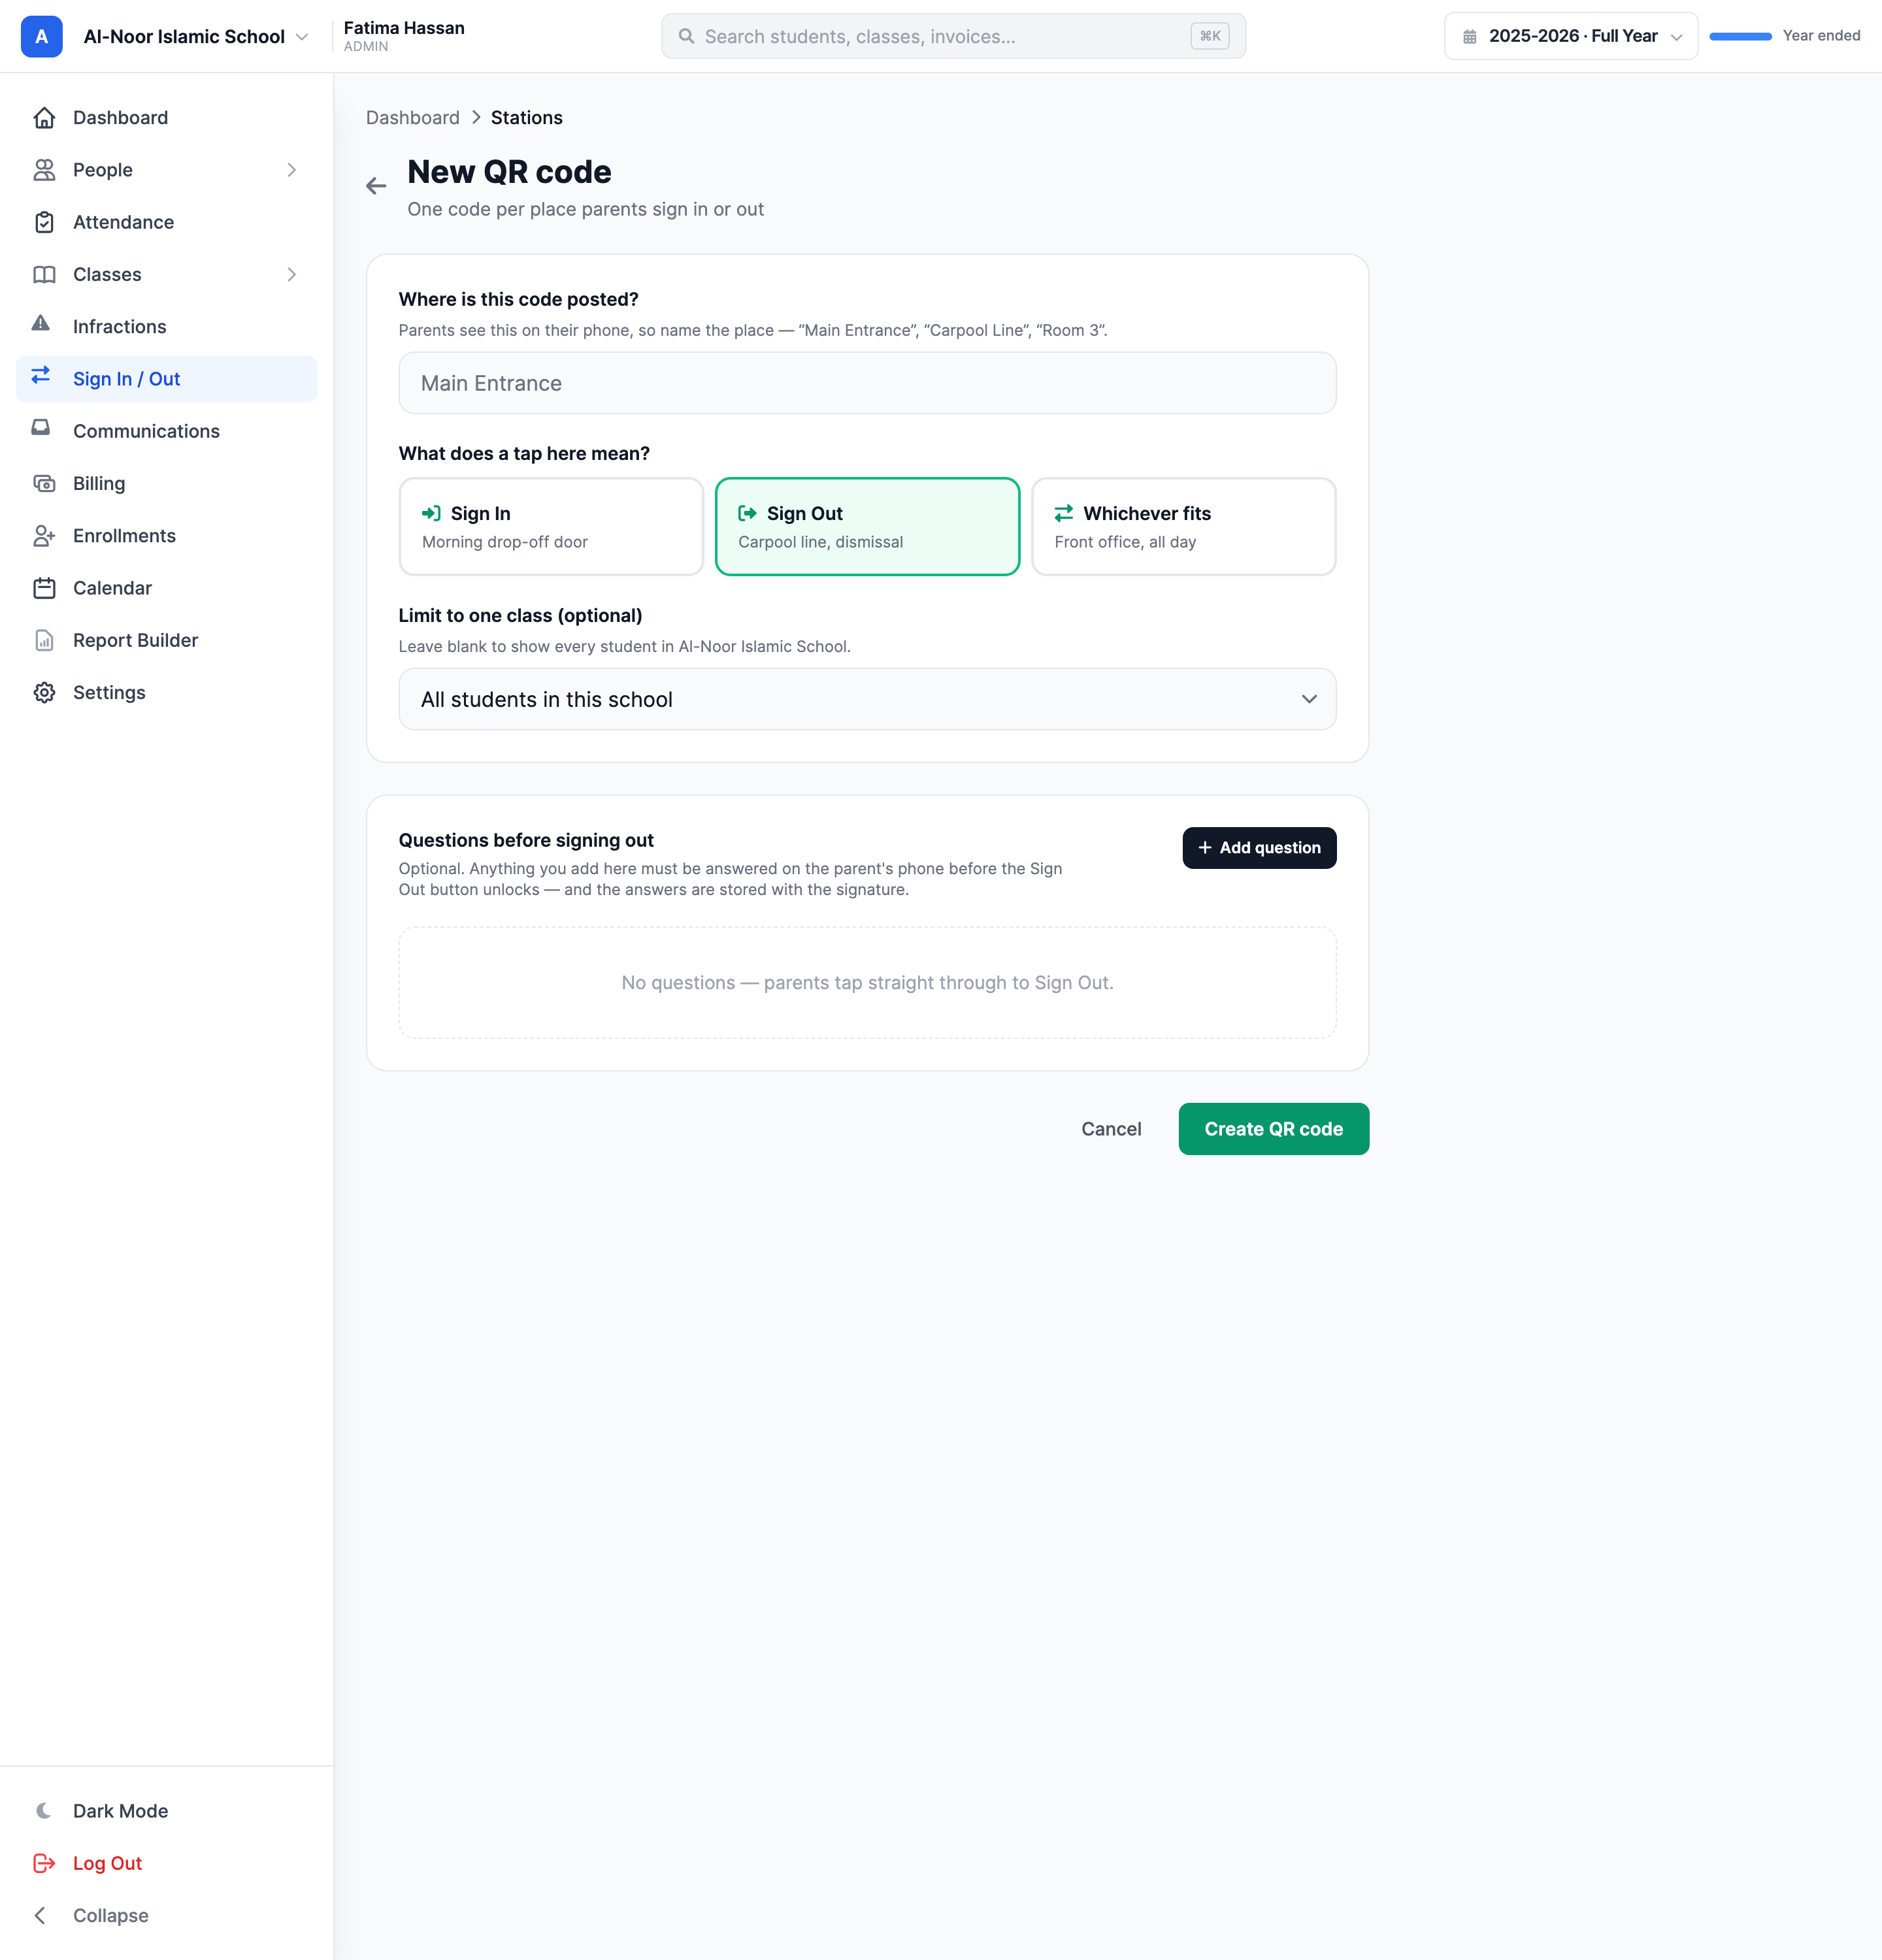
Each station has a direction, which decides what a scan does:
- Sign in — arrivals only. Good for the front door in the morning.
- Sign out — departures only. Good for the carpool line and classroom doors.
- Automatic — signs a child out if they are currently in, and in if they are currently out. Good for a front office that handles both late arrivals and early pickups from one code.
Optional: ask your own questions
A station can ask questions before the record is saved — a dropdown for "reason for early pickup", a text field for "car make and colour", a checkbox, a phone number, or free text. Mark a question required and the sign-out button stays disabled until it is answered. Answers are stored on the record and appear in the log and in the CSV export.
Optional: restrict a station to one class
Attach a class to a station and the roster it opens contains that class only. A code taped to the Year 4 Fiqh door shows thirteen names instead of the whole school's six hundred — a shorter list for the parent, and a much smaller disclosure, since that code cannot be used to enumerate any other class.
If you archive the class, its door code stops working
A class-scoped station whose class has been archived or deleted returns "not found" rather than falling back to the whole school. That is deliberate: a poster already taped to a wall must not silently start showing a wider roster than it did on the day you printed it.
Step 3 — Print the poster, or cast the kiosk
Every station card on the QR Codes tab carries three ways to put the code somewhere useful, plus a live count of today's scans.
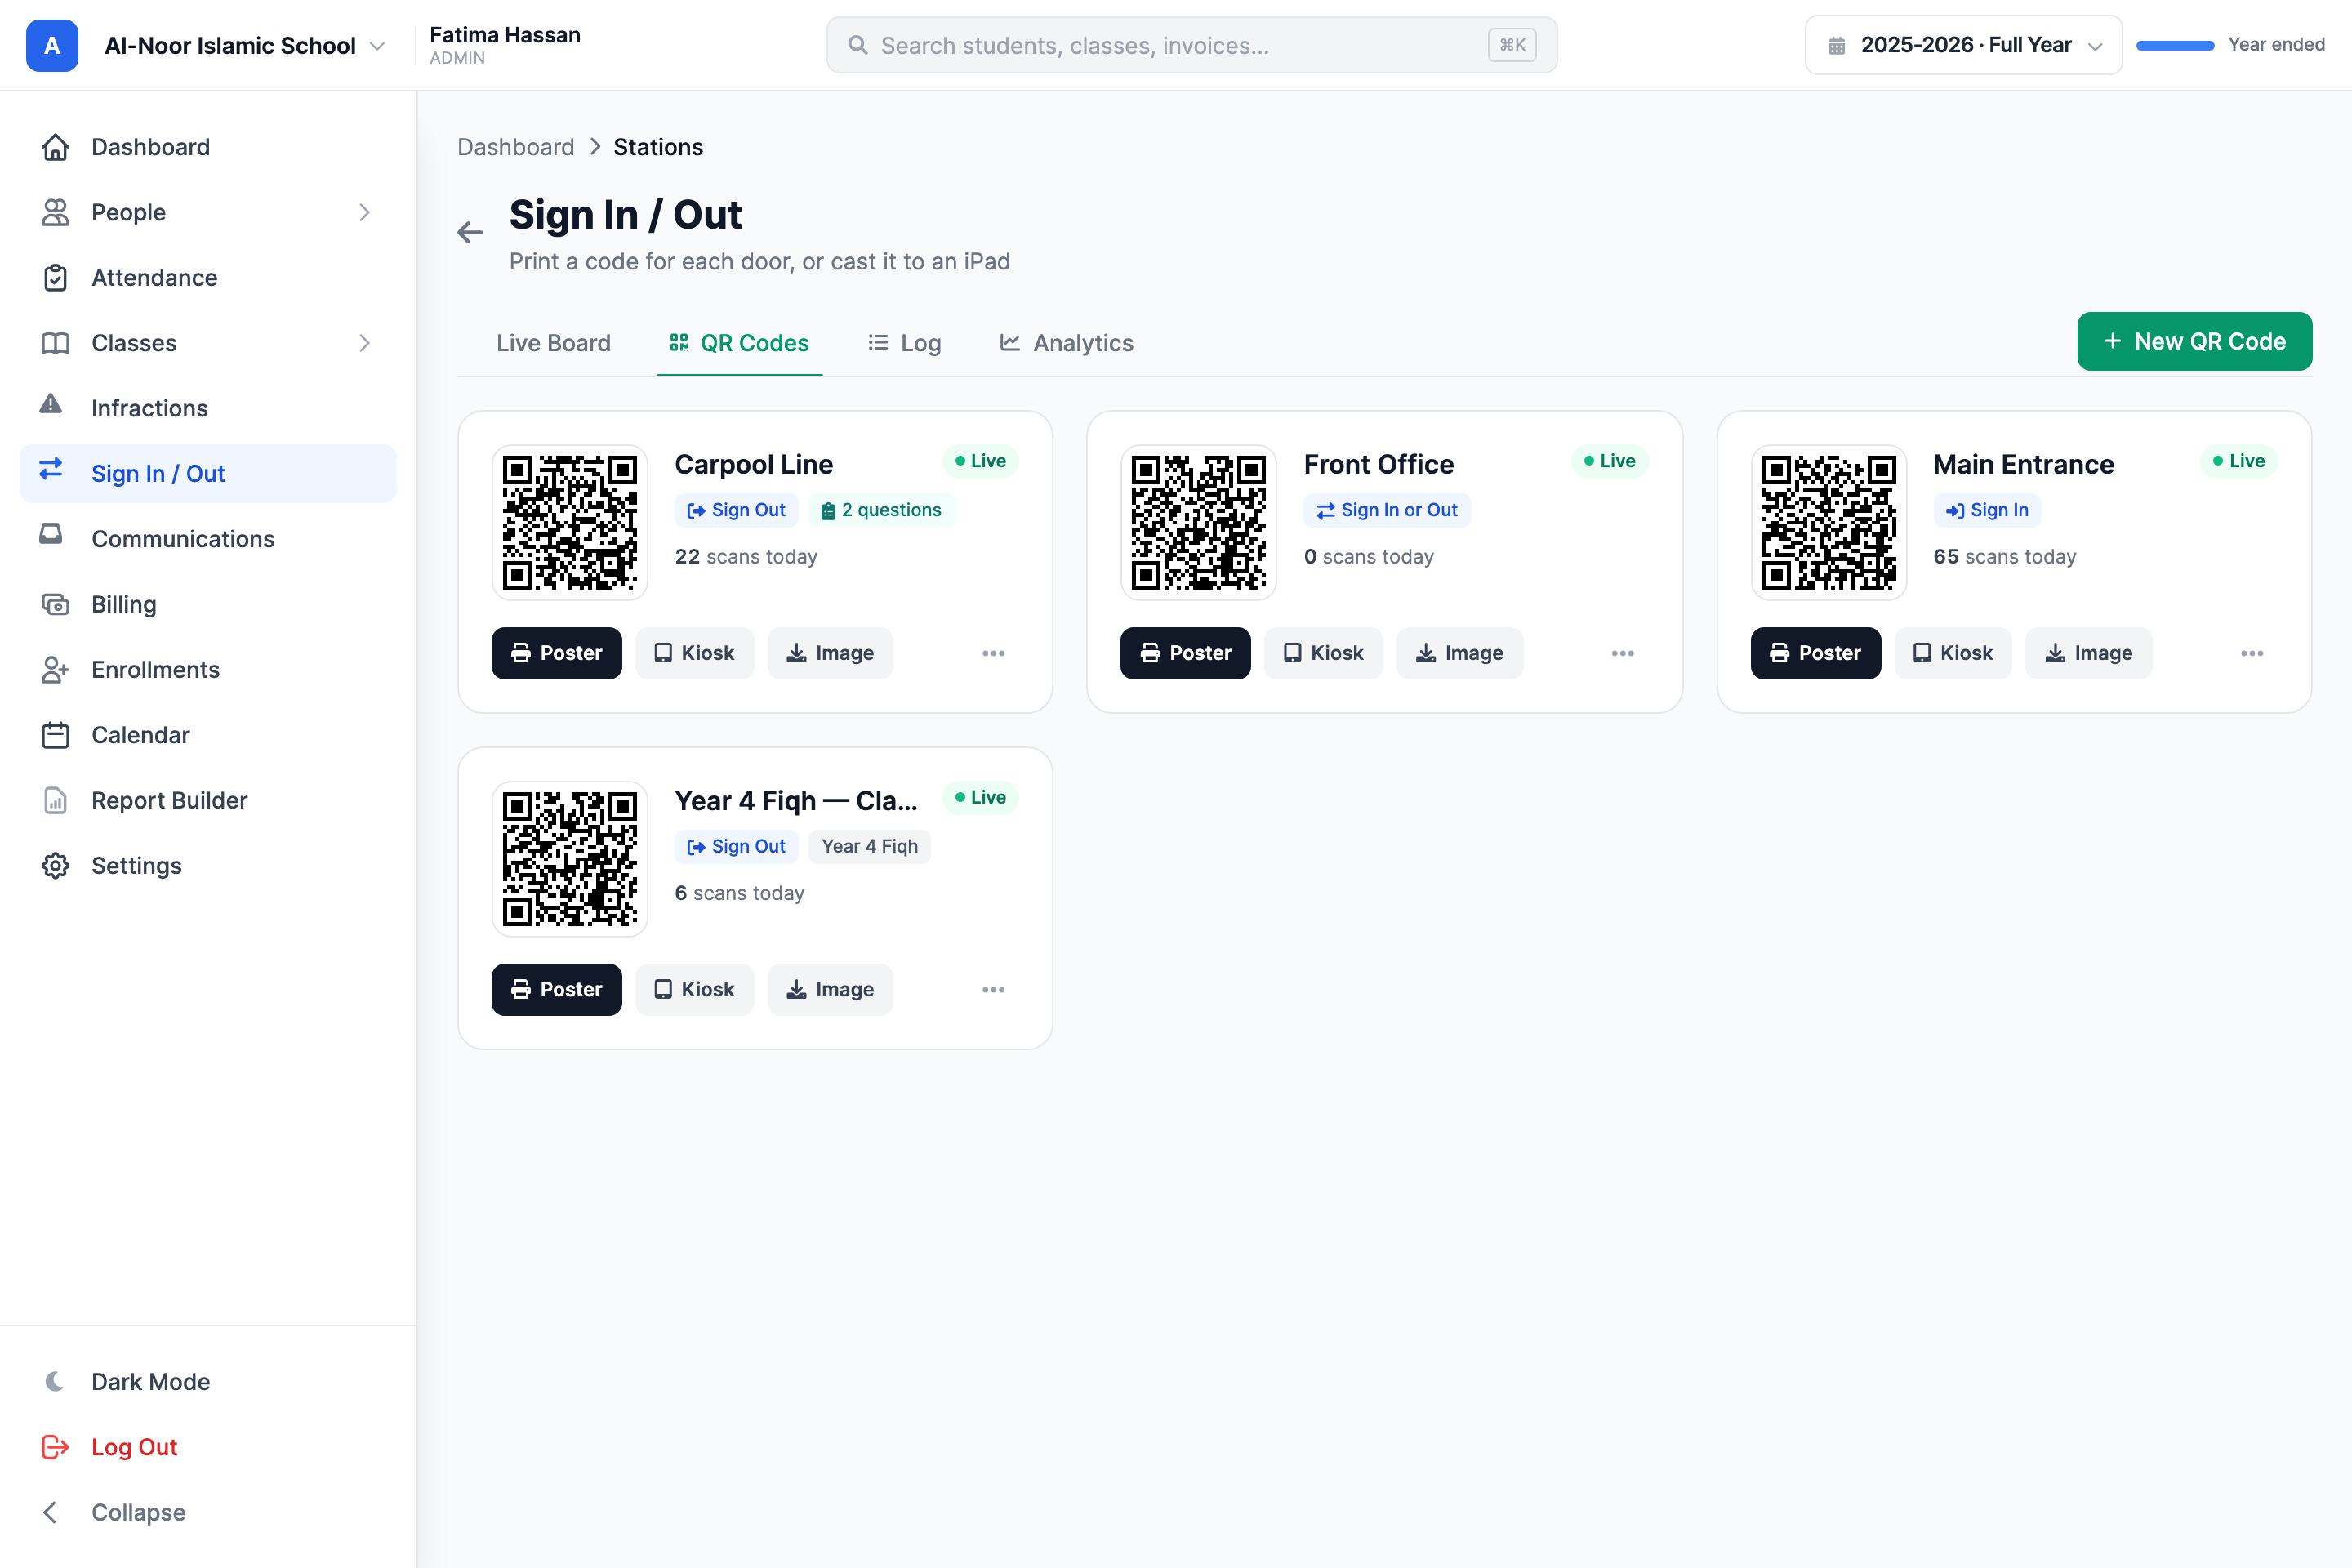
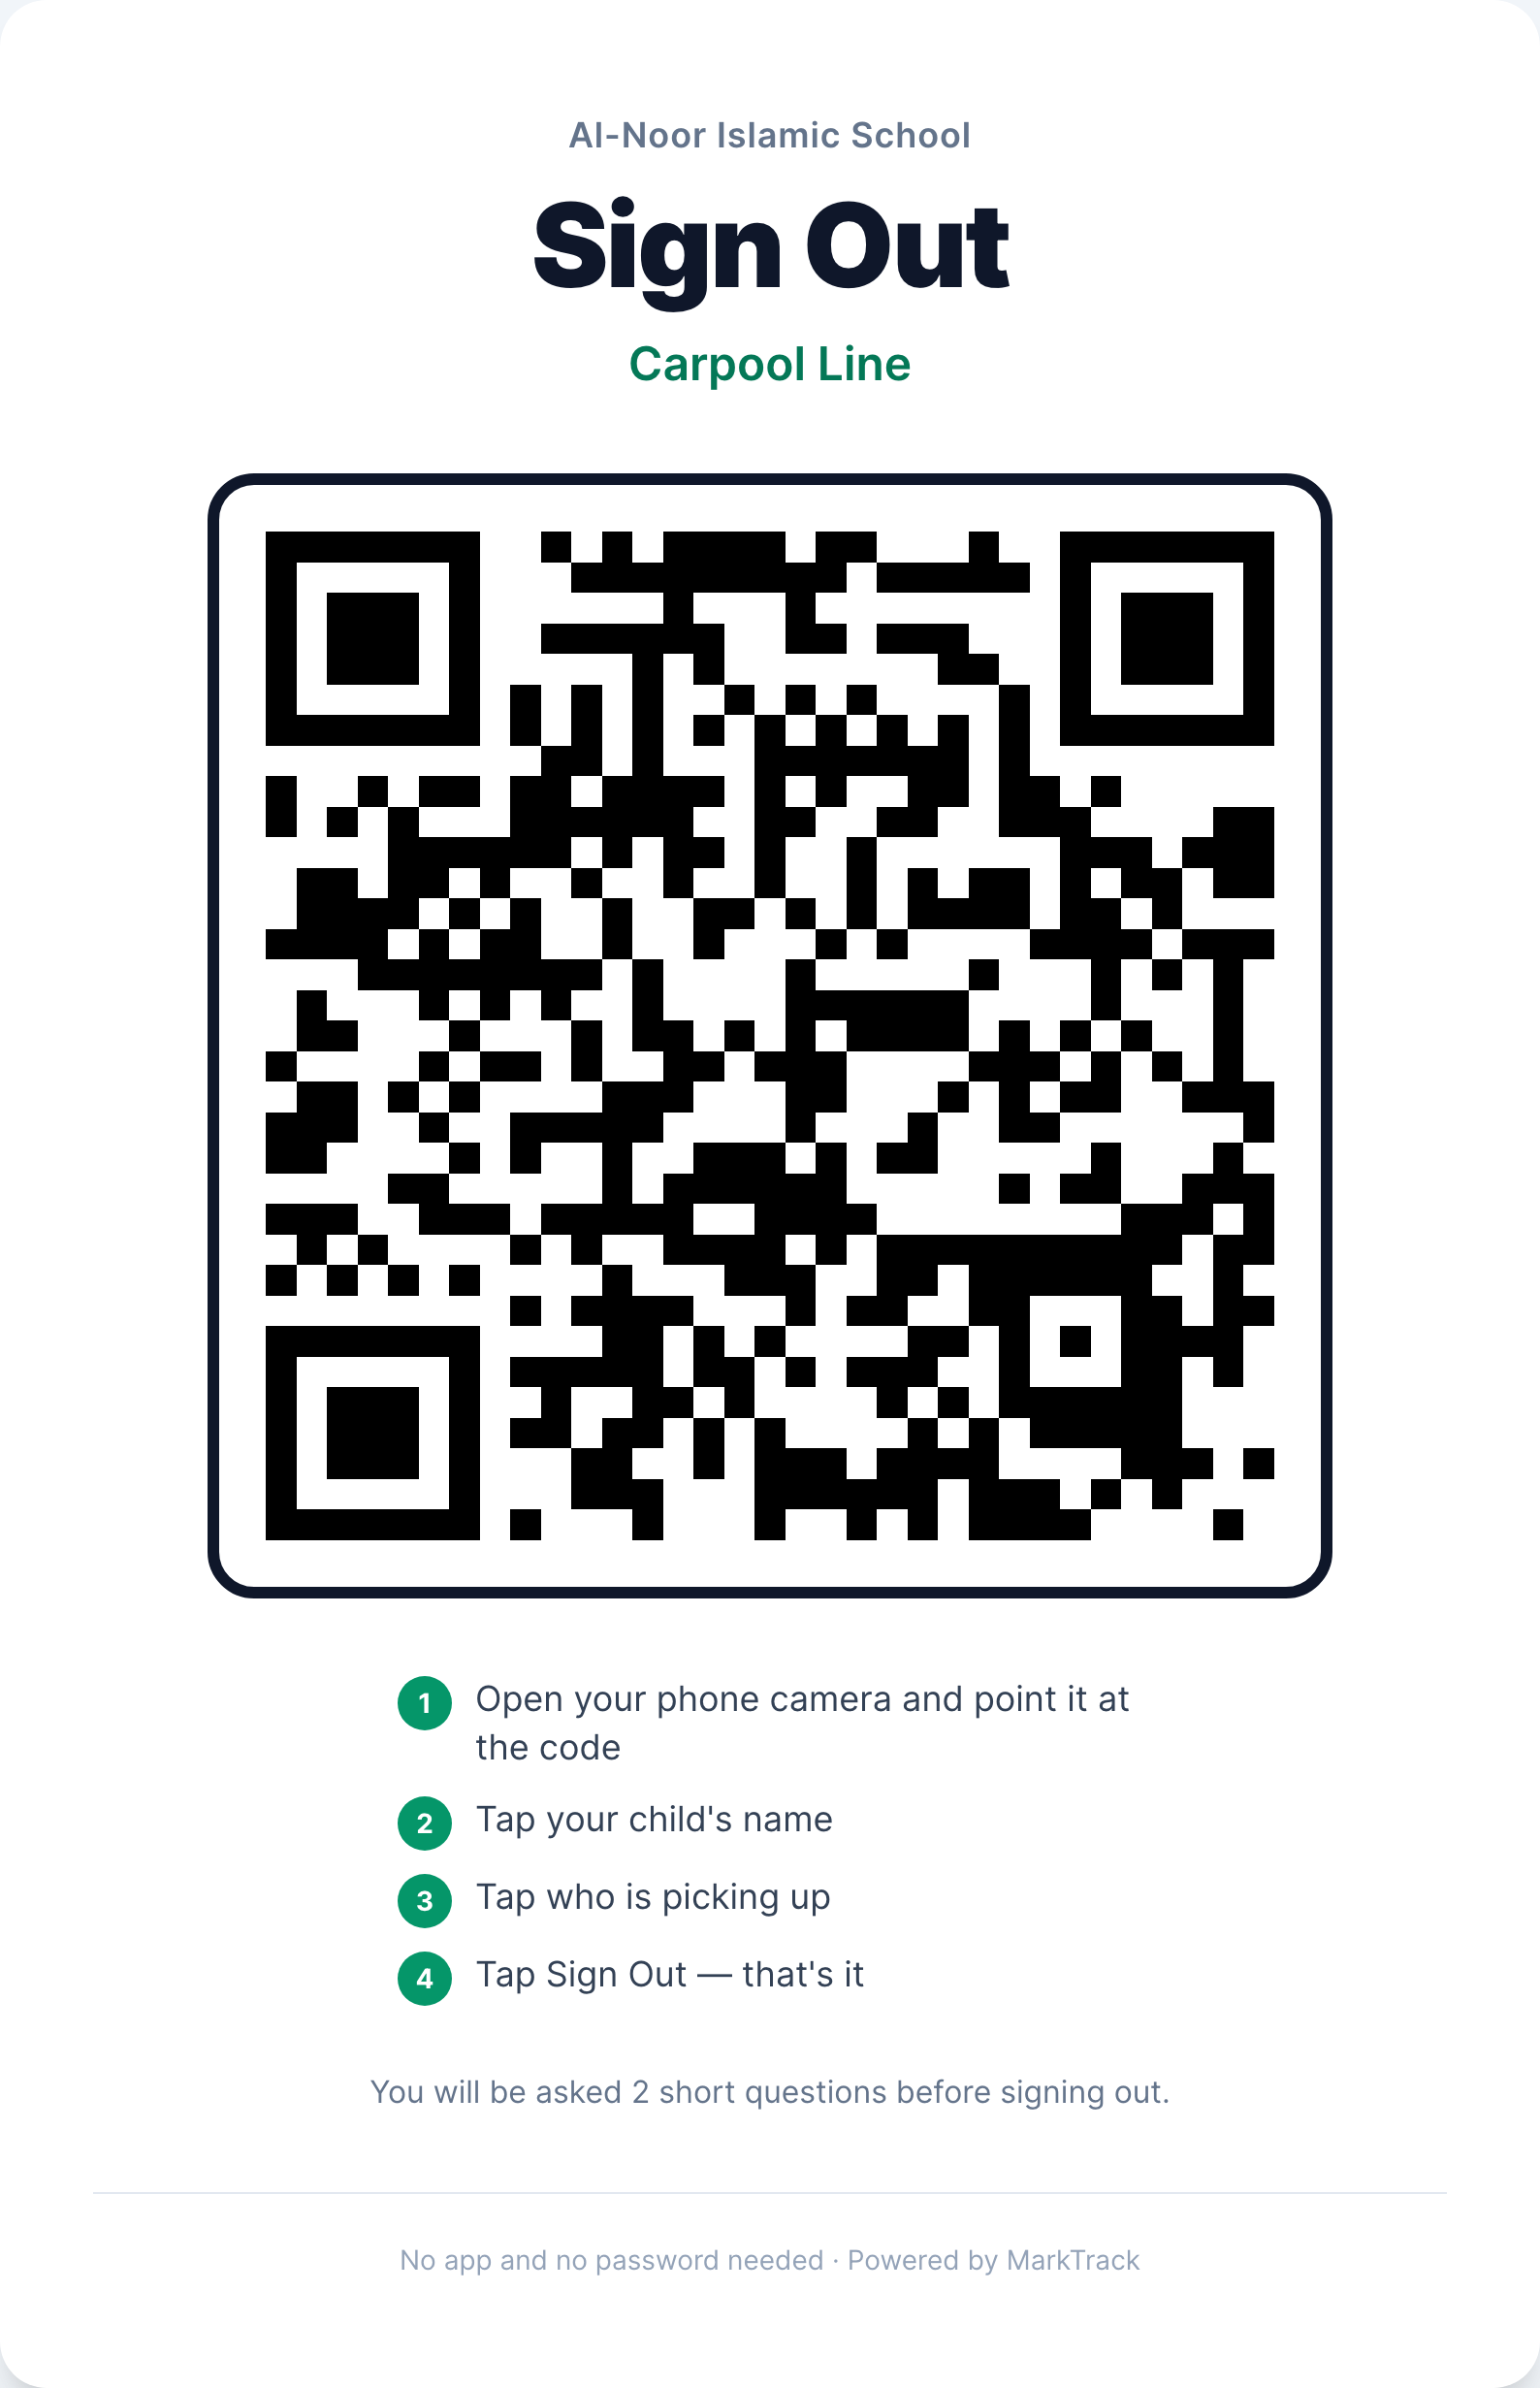
- Poster — a print-ready page with the code, the school and station name, and four numbered instructions. Print it and tape it to the door.
- Kiosk — a full-screen display for a spare iPad or a TV, showing the code large with a live "just collected" feed beside it.
- Image — downloads just the QR code, for a newsletter or your own signage.
Step 4 — Manage a code after it is up
Use the … menu on a station card:
- Pause — the code stops working but the station and its history stay. Use it out of term.
- Rotate code — issues a new code and kills the old one immediately. Use it when a poster goes missing, then reprint.
- Delete — removes the station. Its past records stay in the log.
A paused code, a rotated-away code and a code that never existed all return the same "not found" page, so a wrong guess tells an outsider nothing about which is which.
Next steps
More in Attendance
Still stuck?
Our team is happy to walk you through it.