Absence requests: let families request planned absences
An absence request is a family's way of telling the school ahead of time that a student will be out — a doctor's appointment, travel, a family event. A parent submits it for their child (or an independent student submits it for themselves), and it lands in a review queue for an admin to approve or reject. This guide covers how families send a request, how you review the queue, and the one side effect that matters most: approving a request automatically marks those days Excused in every one of the student's classes.
Under the hood, a request is just a date range plus a reason that waits in a pending state. Nothing happens to attendance until you act on it. Approving it writes Excused attendance records; rejecting it writes nothing at all. That difference is the heart of this feature.
How this connects to daily attendance
Absence requests are the only way to mark a student Excused across all their classes in one action. Day-to-day marking is still per class — see Take daily attendance.
Step 1 — How a parent submits a request
Parents send requests from the family portal. They don't need an admin's help, and they can request for any of their children.
- The parent opens My Children and picks the child, or opens that child's Absence Requests page.
- They click Request Absence (also labeled New Request on the requests list).
- They fill in the form: a Start Date, an optional End Date (only needed for a multi-day absence), and a Reason.
- They click Submit Request. The request appears in your review queue as Pending, and the school is notified by email.

A few rules the form enforces
Leaving the end date blank makes it a single-day request (the system copies the start date). Dates can't be in the past, the end date can't come before the start date, and a single request can't span more than 30 days. Either parent listed on the child can submit.
Step 2 — How an independent student submits their own
A student who logs in on their own — meaning they are not linked to a parent account and are not a child profile — can request an absence for themselves.
- The student opens their own Absence Requests page.
- They click Request Absence and fill in the same Start Date, optional End Date, and Reason.
- They click Submit Request. It joins the same queue you review, shown as submitted "by [student name] (self)".
Children must go through a parent
A student who is attached to a parent (or is a child profile with no login) cannot self-submit — their parent has to send the request. This keeps younger students from filing absences on their own.
Step 3 — Open the review queue
All requests for your school land in one place, reachable from the Attendance page.
- Go to Attendance.
- Click the Actions button at the top right. A small number badge on it tells you how many requests are waiting.
- Choose Attendance Requests. The review panel opens over the page.
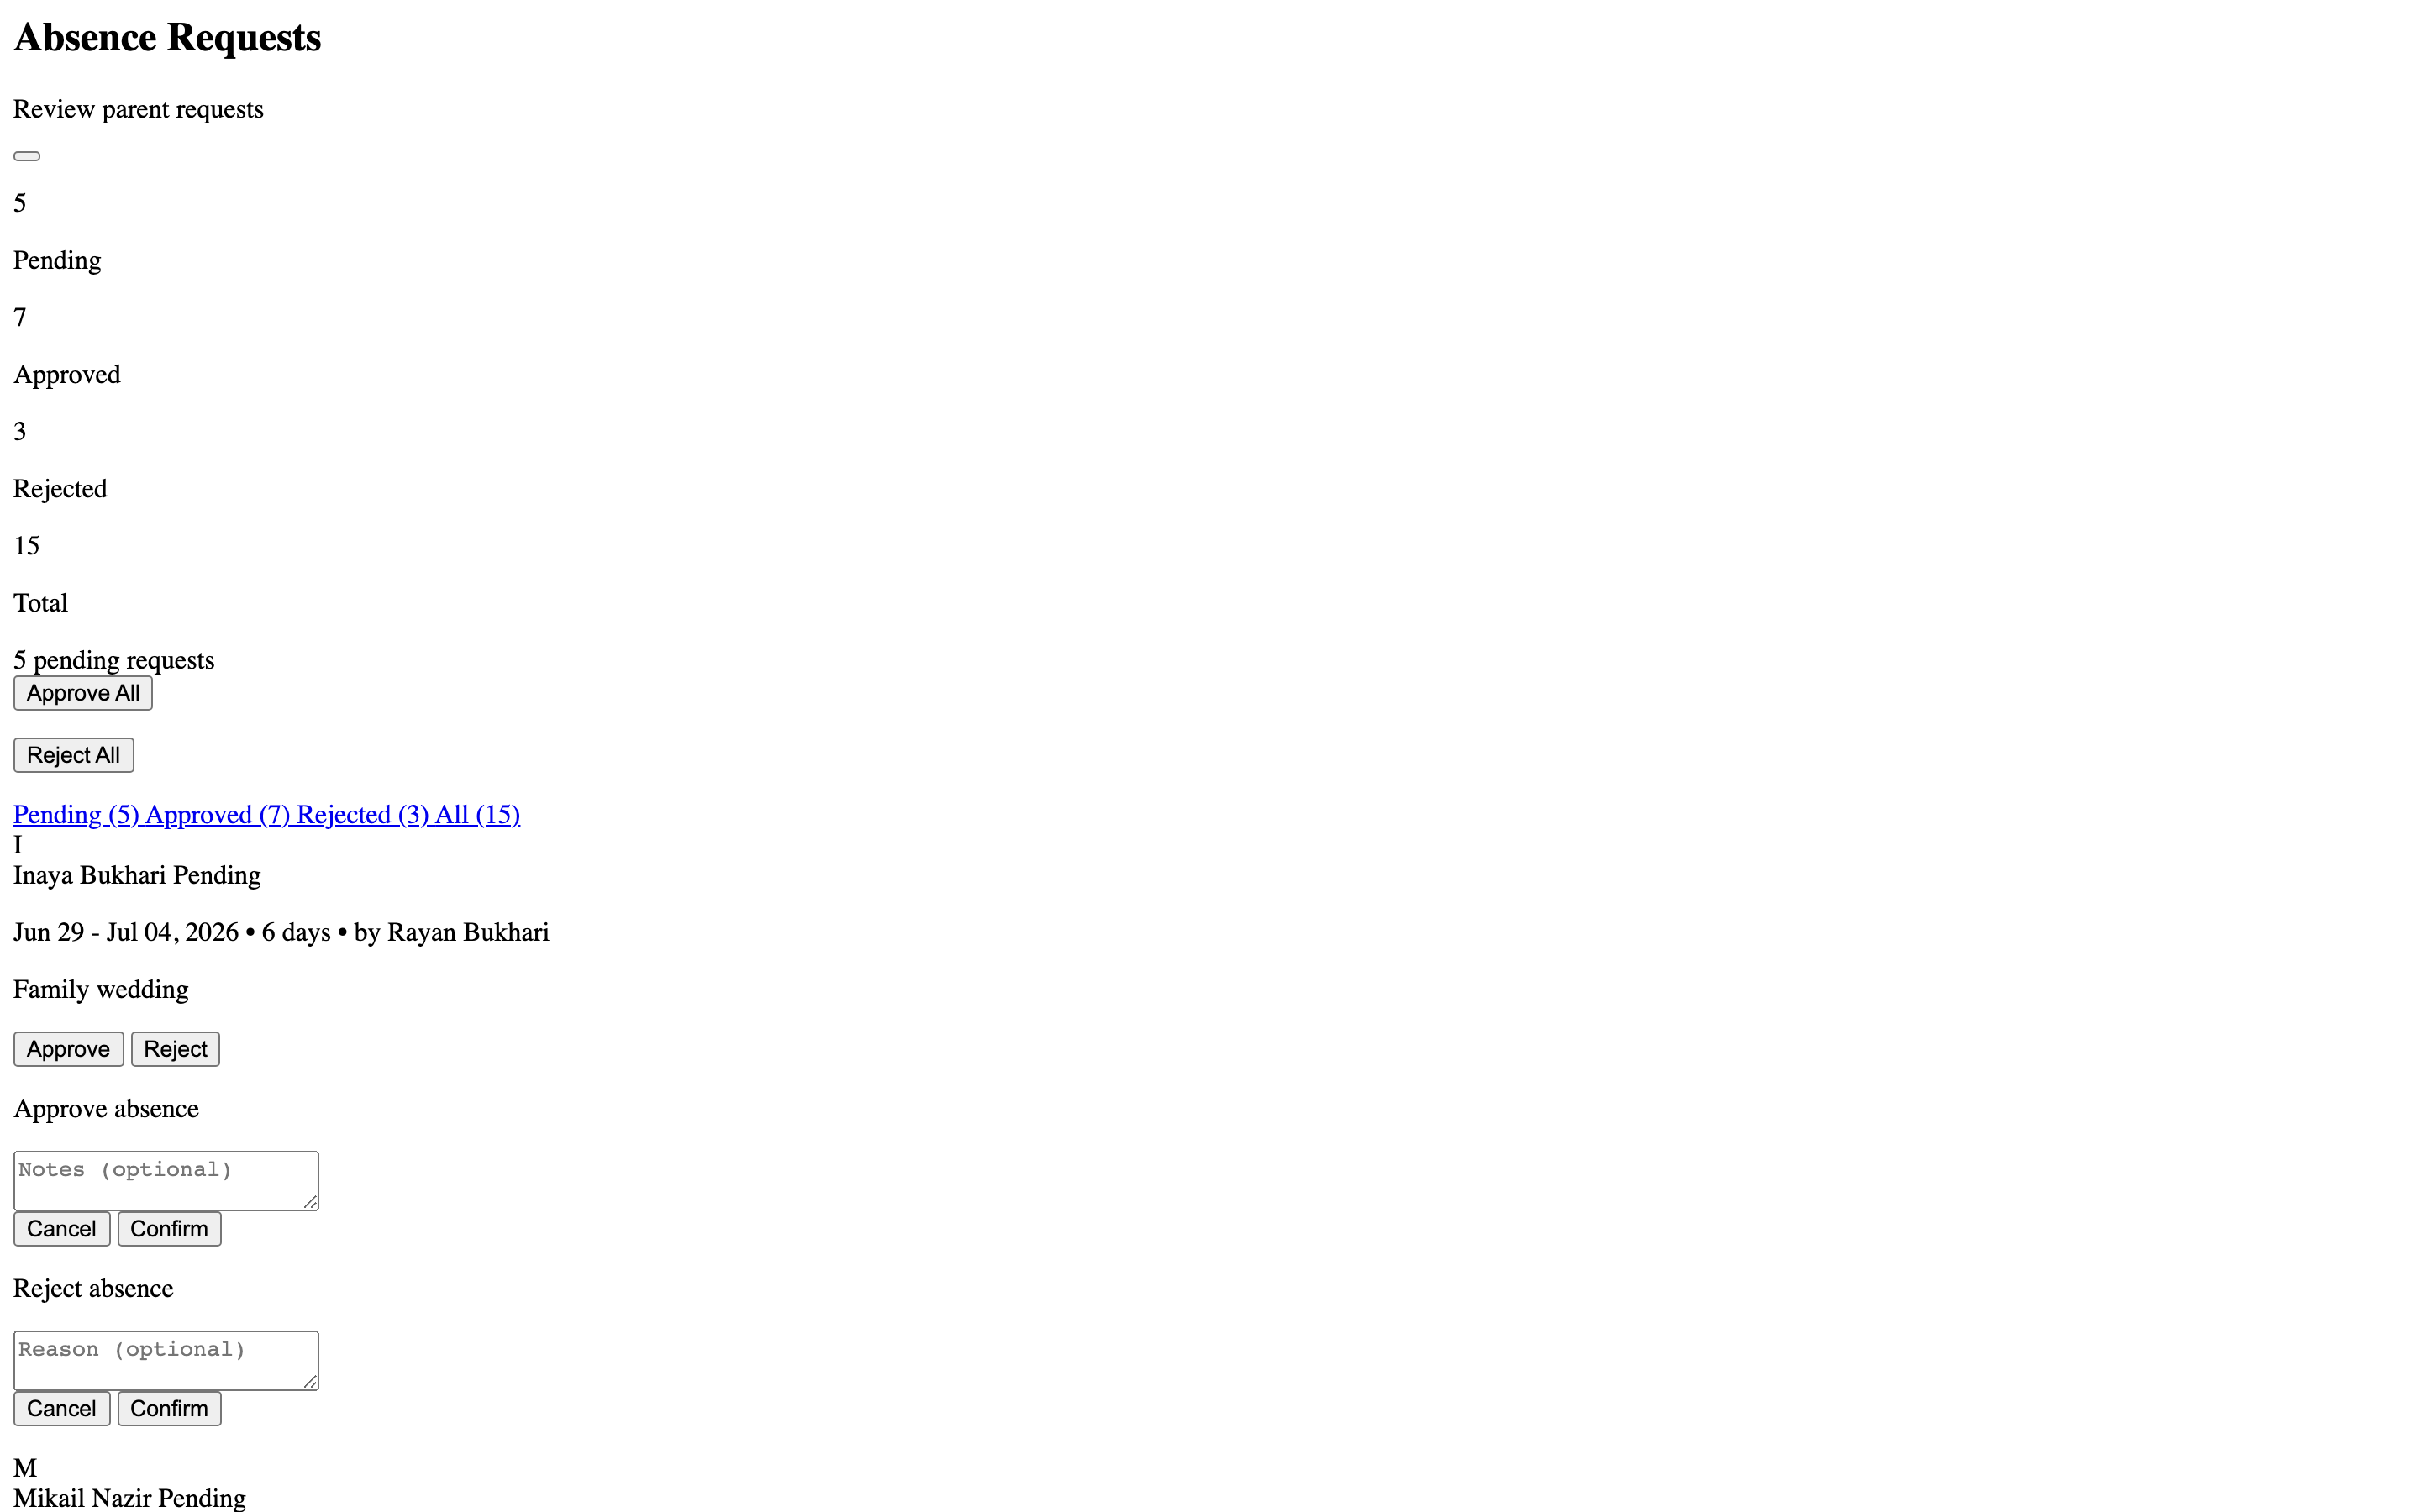
The panel header shows four counts — Pending, Approved, Rejected, and Total — and four tabs to filter the list the same way (plus an All tab). It opens on Pending so you see what needs a decision first. Each row shows the student, the date range, the number of days, who submitted it (the parent's name, or the student marked "(self)"), and the reason.
Teachers can look, only admins can decide
Teachers can open the queue and read requests, but the Approve, Reject, Approve All, and Reject All actions are admin-only.
Step 4 — Approve a request (this marks the days Excused)
Approving is the action that touches attendance. When you approve, MarkTrack creates an Excused attendance record for the student on every date in the range, for every class they're enrolled in. You don't have to mark those classes yourself.
- On a pending request, click the green Approve button.
- A small box opens with an optional Notes field. Type a note if you want the family to see why (it's saved as the admin note and shown on their copy of the request). You can leave it blank.
- Click Confirm.
What approval does, in order
It sets the request to Approved, stamps it with your name and the time, writes an Excused mark for each date in each of the student's classes, and emails the family that it was approved. Excused days don't count against the student's attendance rate.
Approval overwrites existing marks for those days
If a class was already marked Present or Absent on one of those dates, approving the request changes that mark to Excused. If the student isn't enrolled in any class yet, approval still succeeds but no attendance records are created.
Step 5 — Reject a request (no attendance is changed)
Rejecting declines the request and leaves attendance completely untouched — no Excused records are written.
- On a pending request, click the red Reject button.
- A box opens with an optional Reason field. A note here is saved on the request and shown to the family on their copy.
- Click Confirm. The request moves to Rejected, gets stamped with your name and time, and the family is emailed.
Step 6 — Bulk approve or reject everything pending
When the Pending tab has requests, a bar at the top of the panel offers two shortcuts for clearing the whole backlog at once.
- Approve All — approves every pending request for your school. Each one marks its days Excused and emails the family, exactly as if you approved them one by one. The bulk note "Bulk approved" is recorded.
- Reject All — rejects every pending request and emails each family. No attendance is changed. The bulk note "Bulk rejected" is recorded.
Both ask you to confirm first, since they act on every pending request in one go.
Bulk actions don't filter
Approve All and Reject All apply to all pending requests, not just the ones currently visible. If you only want to act on some of them, decide those one at a time instead.
Step 7 — The status lifecycle
Every request lives in exactly one of four states:
- Pending — submitted, waiting for a decision. This is the only state where Approve, Reject, or a family cancellation can happen.
- Approved — accepted; the Excused days are on the books. The decision is final on the record.
- Rejected — declined; attendance unchanged. Also final.
- Cancelled — the family withdrew the request before anyone decided on it.
A request can only move out of Pending. Once it's Approved or Rejected it stays there — there's no "undo" that reverses the Excused marks, so if a family's plans change after approval you'd adjust the affected attendance days directly on the attendance grid.
Families can cancel — but only while Pending
A parent (or an independent student) can withdraw their own request as long as it's still Pending; the cancel option lives in the MarkTrack mobile app. The moment you approve or reject it, that window closes and the request can no longer be cancelled.
That's the full loop: families request planned absences, you review them in one queue, and a single approval marks those days Excused everywhere the student is enrolled. If anything in the queue looks off, reach out through our contact page.
More in Attendance
Still stuck?
Our team is happy to walk you through it.