Create and manage discount codes
A discount code is a named, reusable price reduction you create once and reuse across enrollment. It can take a fixed amount off (like $50) or a percentage off (like 10%), and you can optionally cap how many times it can be used. This guide covers creating codes, where they apply, how the usage count works, and the difference between archiving, deleting, and restoring a code.
Discount codes are managed from the Billing page and belong to your whole organization, not a single school. So a code you create is available on every school's enrollment forms. They pair naturally with enrollment fees and payments — the code is what knocks money off the fee a family pays.
Two different kinds of discount
Discount codes (this guide) apply to enrollment-form fees. Sibling discounts are a separate, automatic system for families with multiple children — see Sibling discounts.
Step 1 — Open the Discount Codes panel
- Go to Billing → Tuition.
- In the row of quick-action buttons at the top, click Discounts.
- The Discount Codes panel opens with three tabs: Active Codes, Create New, and Archived.
Step 2 — Create a discount code
Click the Create New tab and fill in the form:
- Discount Name — required. A label you'll recognize, like Early Bird Discount. This is what shows in the dropdown when you attach a code to an enrollment form.
- Code (optional) — the short text a family types to redeem the discount, like EARLYBIRD2026. Leave it blank for a discount you apply yourself without a typed code. If you set one, it must be unique within your organization.
- Discount Type — choose Flat Amount ($) or Percentage (%).
- If flat, enter the dollar Amount ($). If percentage, enter the Percentage (%) (1–100).
- Max Uses (optional) — leave blank for unlimited, or enter a number to cap how many times the code can be redeemed.
- Click Create Discount Code.
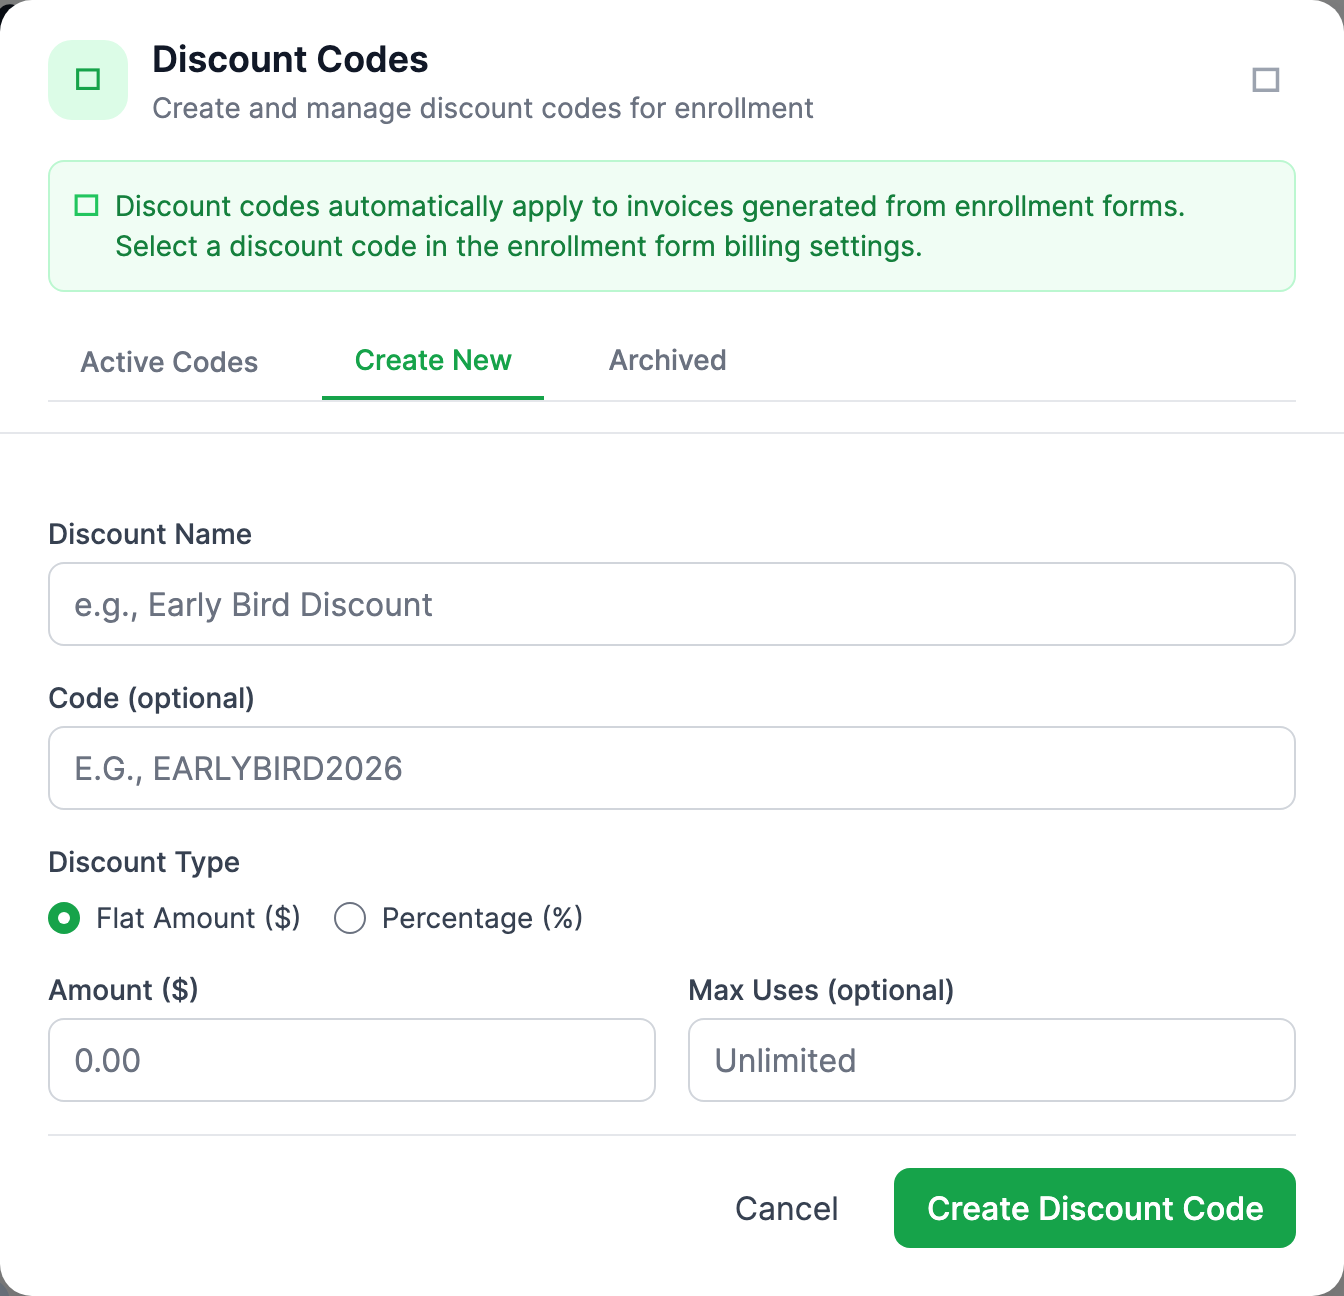
Flat amounts never go negative
A flat discount is capped at the fee it's applied to. A $100 code on a $60 fee takes off $60, not $100 — the family never ends up with a credit from a discount code.
Step 2.1 — Where discount codes apply
A code reaches a family in one of two ways:
- Attached to an enrollment form. When you build or edit an enrollment form, the billing settings have a Discount Code dropdown listing your active codes by name and amount. Pick one and every applicant on that form gets it applied to their fee automatically. See Build an enrollment form.
- Typed by the family. If a code has a typed Code value, an applicant can enter it on the public enrollment (or re-registration) page. MarkTrack checks the code is active and not at its max uses, then applies the discount to their fee.
Step 3 — Understand the usage count
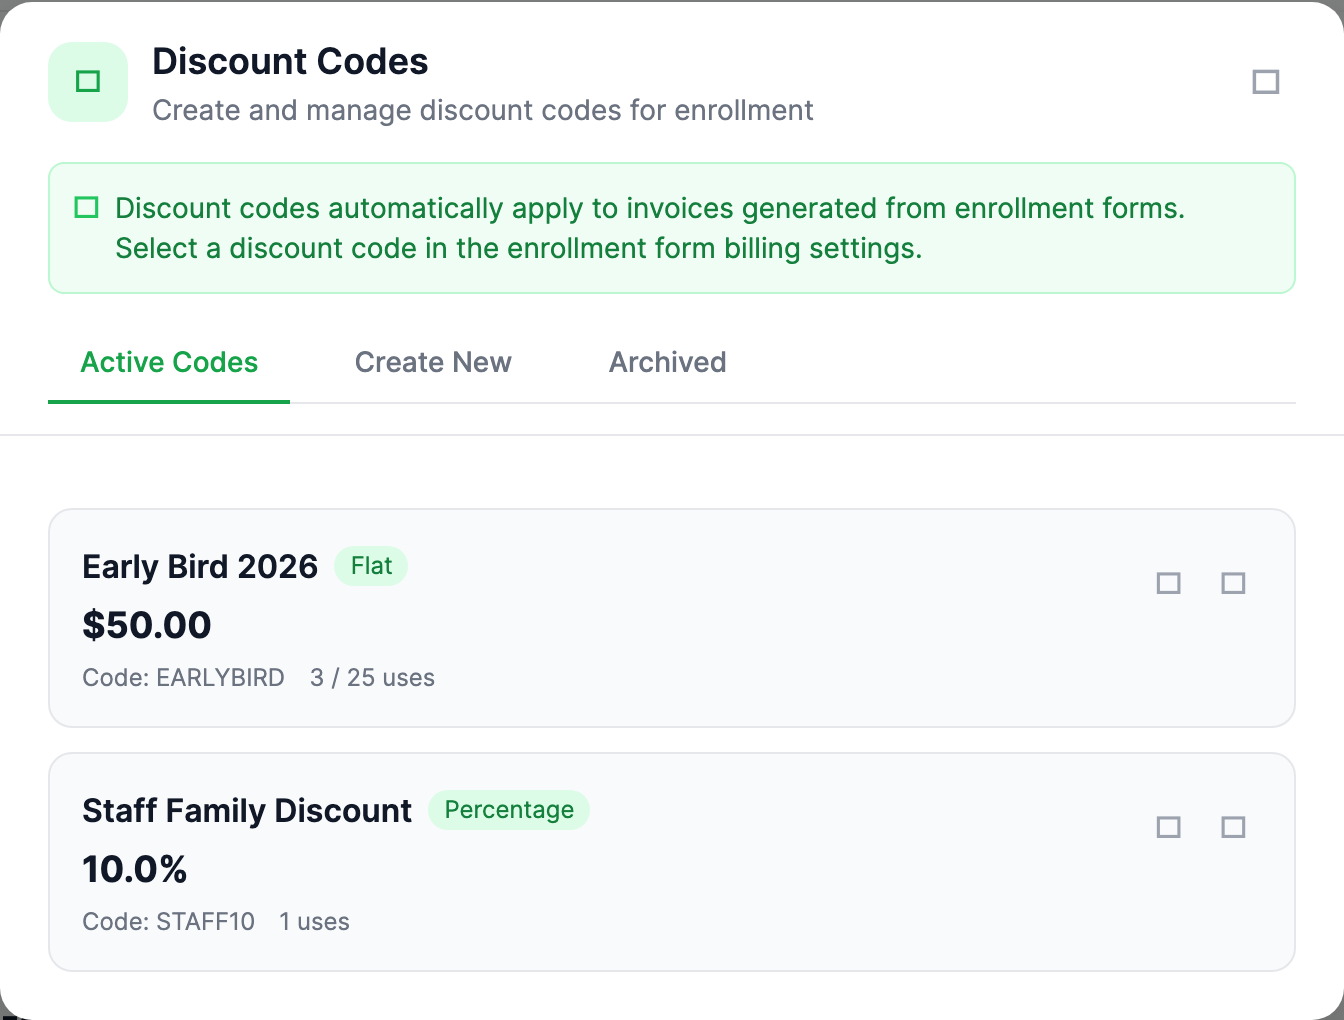
Each code tracks a uses count. On the Active Codes tab, every card shows the usage — either 3 uses (unlimited) or 3 / 25 uses (capped). A "use" is counted when an applicant actually redeems the code through enrollment, not when you create or attach it.
What "at max uses" does
Once a capped code's uses count reaches its Max Uses, the code stops working — typing it returns "not valid," and it's skipped when calculating fees, even if it's still listed as active. The cap is enforced strictly: two families redeeming at the exact same moment can't push the count past the limit. If a use is later reversed (for example an unpaid application is revoked before any money was collected), MarkTrack gives that use back so the code can be used again.

Step 4 — Edit a code
- On the Active Codes tab, click the edit (pencil) button on the code's card.
- The form opens pre-filled. Change the name, code, type, amount, or max uses.
- Click Save.
Editing the amount changes future redemptions only — fees already calculated for past applicants are not retroactively recalculated.
Step 5 — Archive vs. delete
MarkTrack protects your records by preferring archive over permanent deletion.
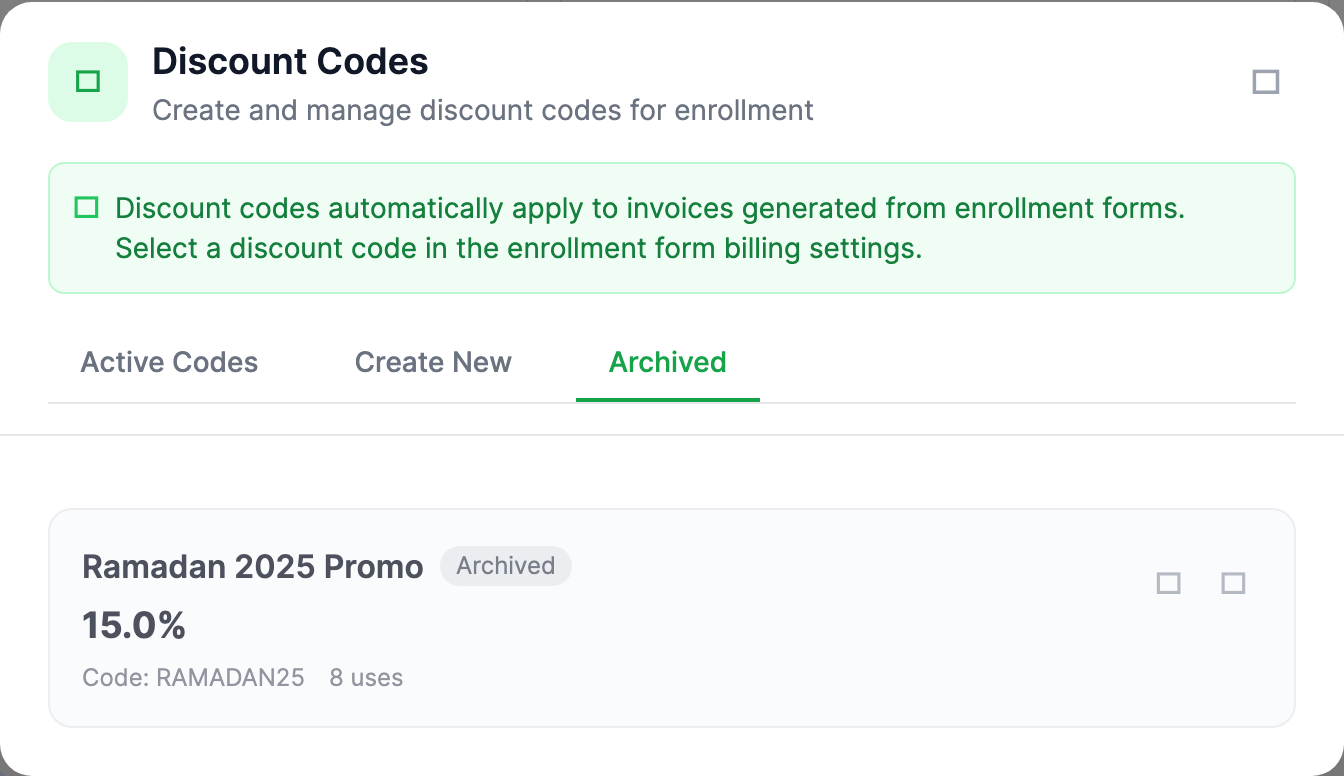
- Archive — click the archive button on an active code. The code becomes inactive: it disappears from the enrollment-form dropdown and stops working for new redemptions, but its history is kept. Archived codes move to the Archived tab.
- Delete — on the Archived tab, the delete (trash) button permanently removes a code only if it was never used (zero uses and not tied to any invoice). If it has any history, "delete" quietly archives it instead, so a code that has discounted real fees is never erased from the record.
Restoring an archived code
On the Archived tab, click the restore button to bring a code back to active. It reappears in the enrollment-form dropdown and starts working again, with its old usage count intact.
Discount codes are the simplest way to run a promotion across enrollment without editing each application by hand. For automatic multi-child savings, set up sibling discounts instead. Stuck? Contact support and we'll help.
More in Billing & Tuition
Still stuck?
Our team is happy to walk you through it.