Create and send invoices
Every charge you send to a family in MarkTrack is an invoice. This guide walks through the whole flow: setting up reusable tuition templates, creating invoices for one person or a whole family, billing many students at once, and putting tuition on an automatic schedule with recurring invoices.
Billing is per school. Each school in your organization has its own Billing page with its own invoices. Behind the scenes, online payments all flow into one payment account shared by your whole organization, so you only connect payments once.
Before you start
Parents can only pay online once your payment setup is complete. Open Payment Setup under Billing — you are ready when the page says Payments Ready! with Card Payments: Enabled and Payouts: Enabled. Until then, the Billing page shows a setup card walking you through verification.
A quick tour of the Billing page
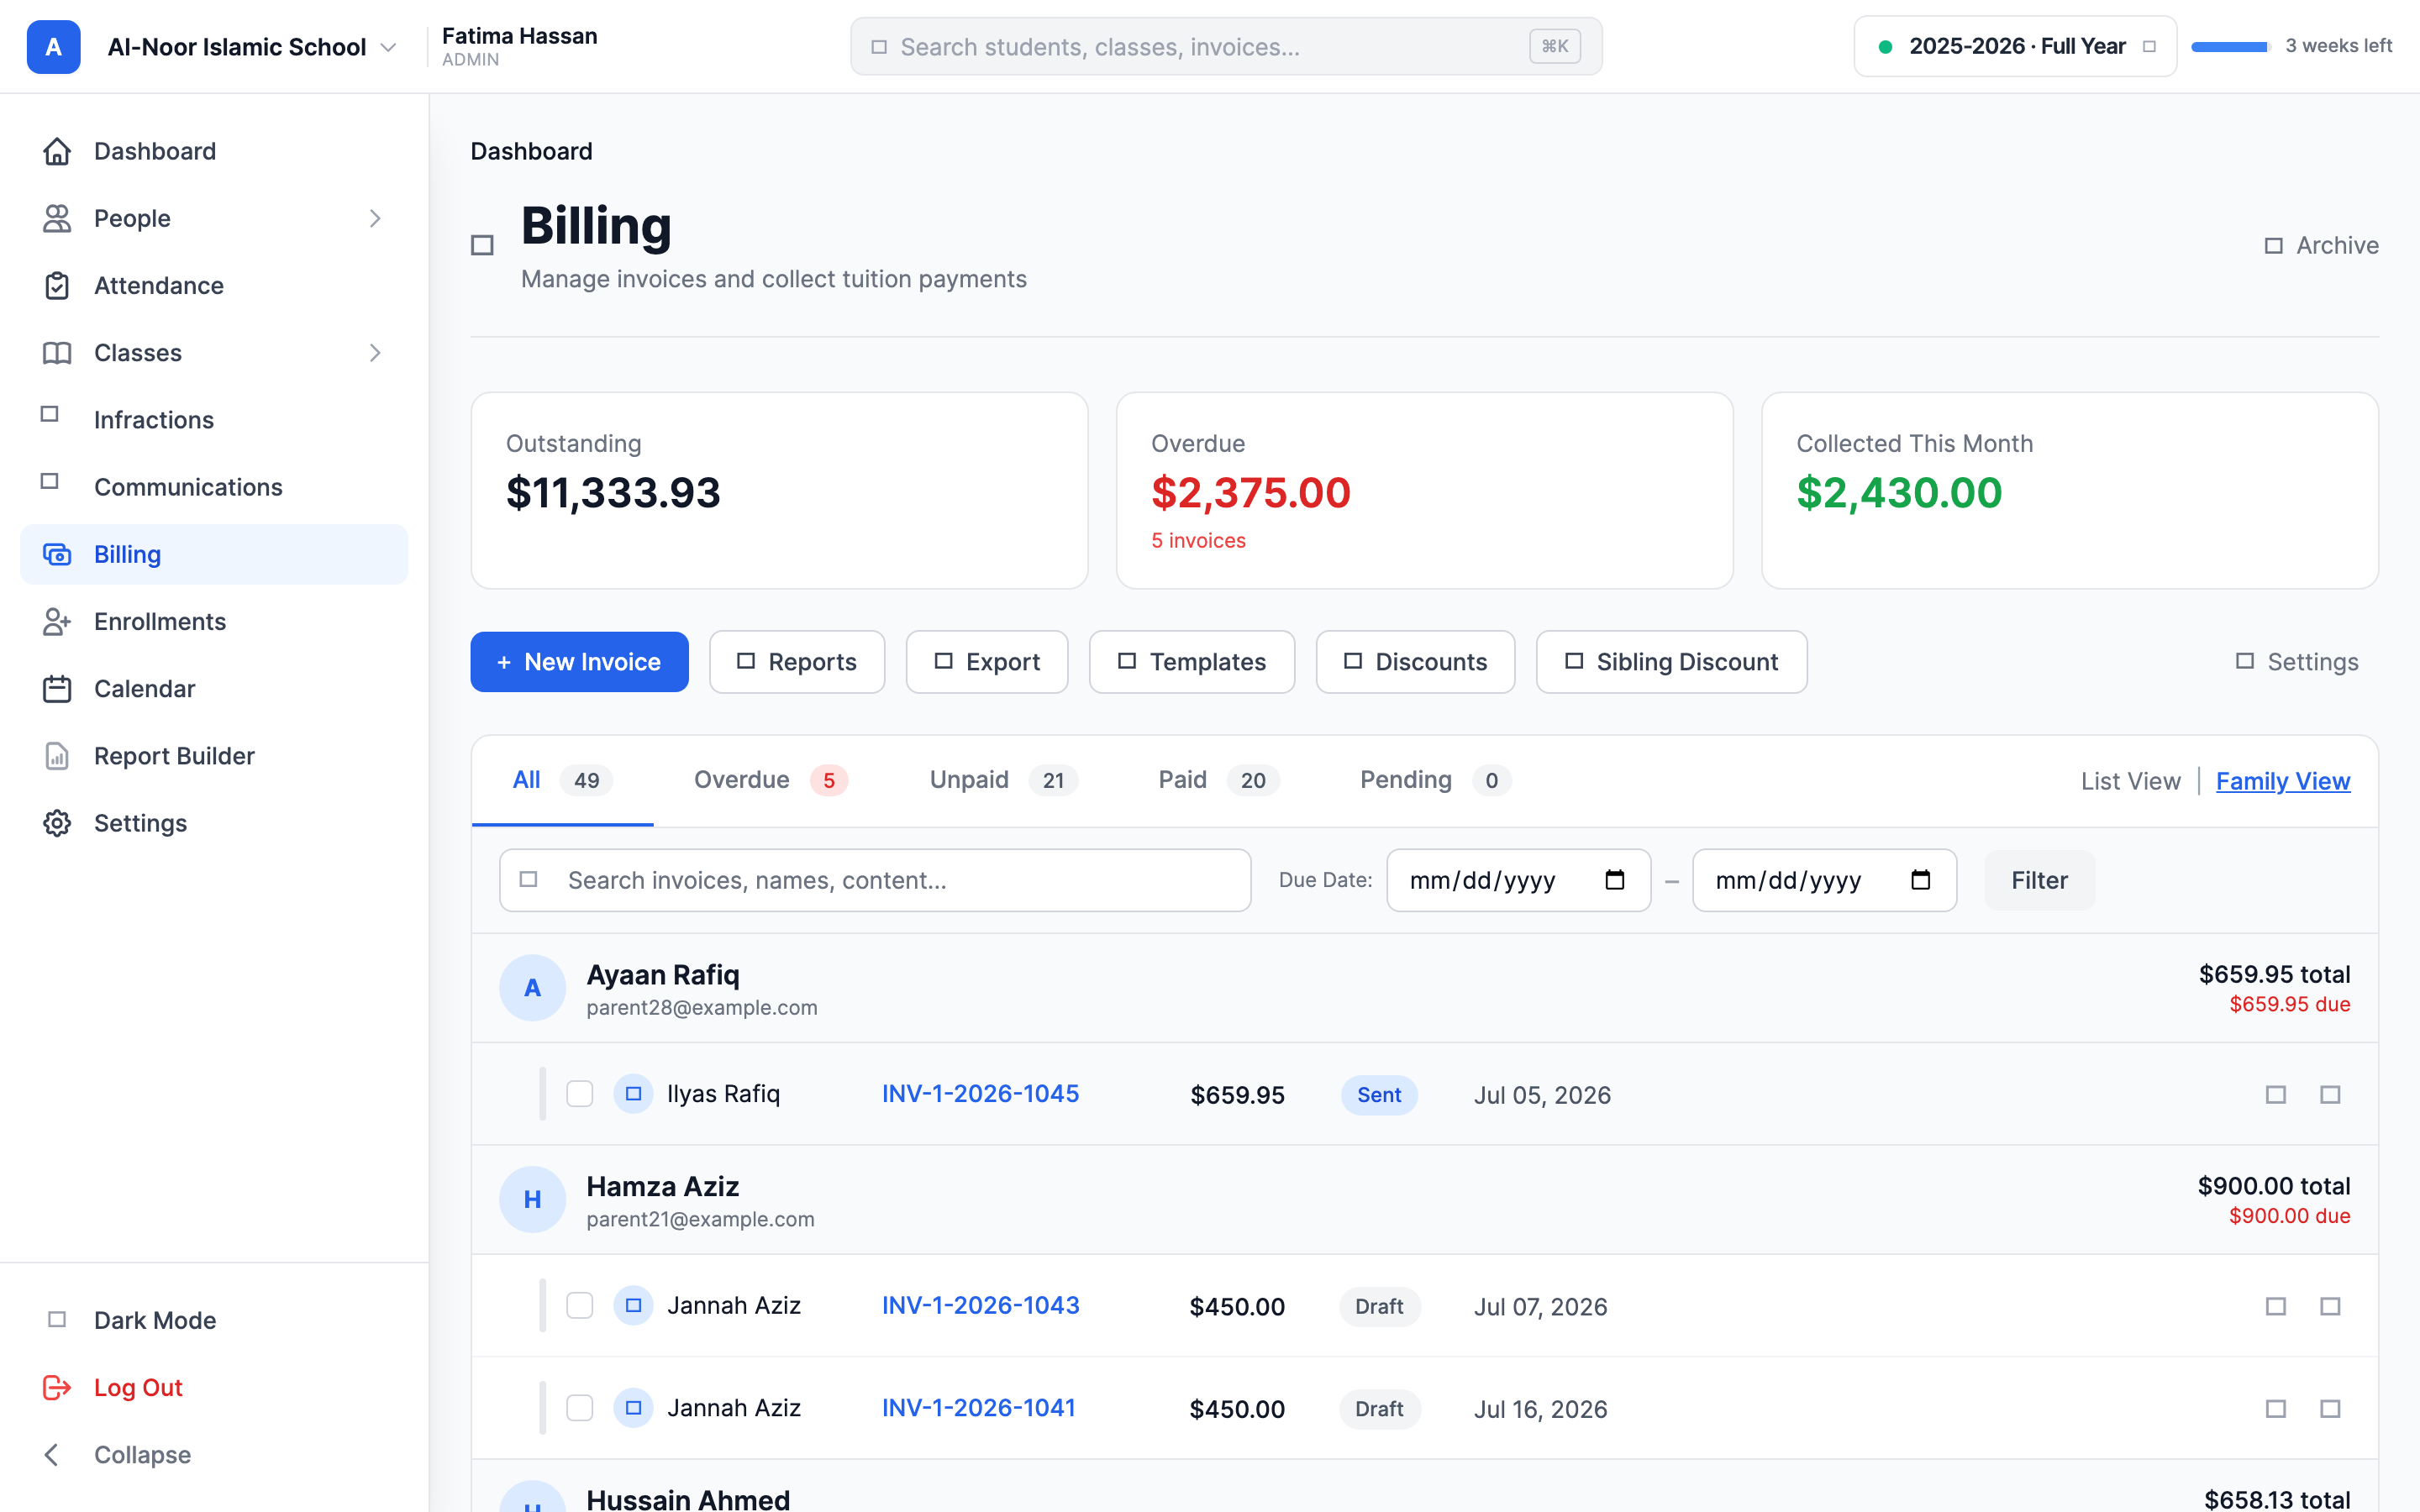
Go to Billing → Tuition. At the top you'll see three numbers: Outstanding, Overdue, and Collected This Month. Below them, quick-action buttons: New Invoice, Reports, Export, Templates, Discounts, Sibling Discount, and Settings.
The invoice list has tabs — All / Overdue / Unpaid / Paid / Pending — each with a count, and a view toggle: List View shows one row per invoice, Family View groups invoices by family.

Step 1 — Set up tuition templates
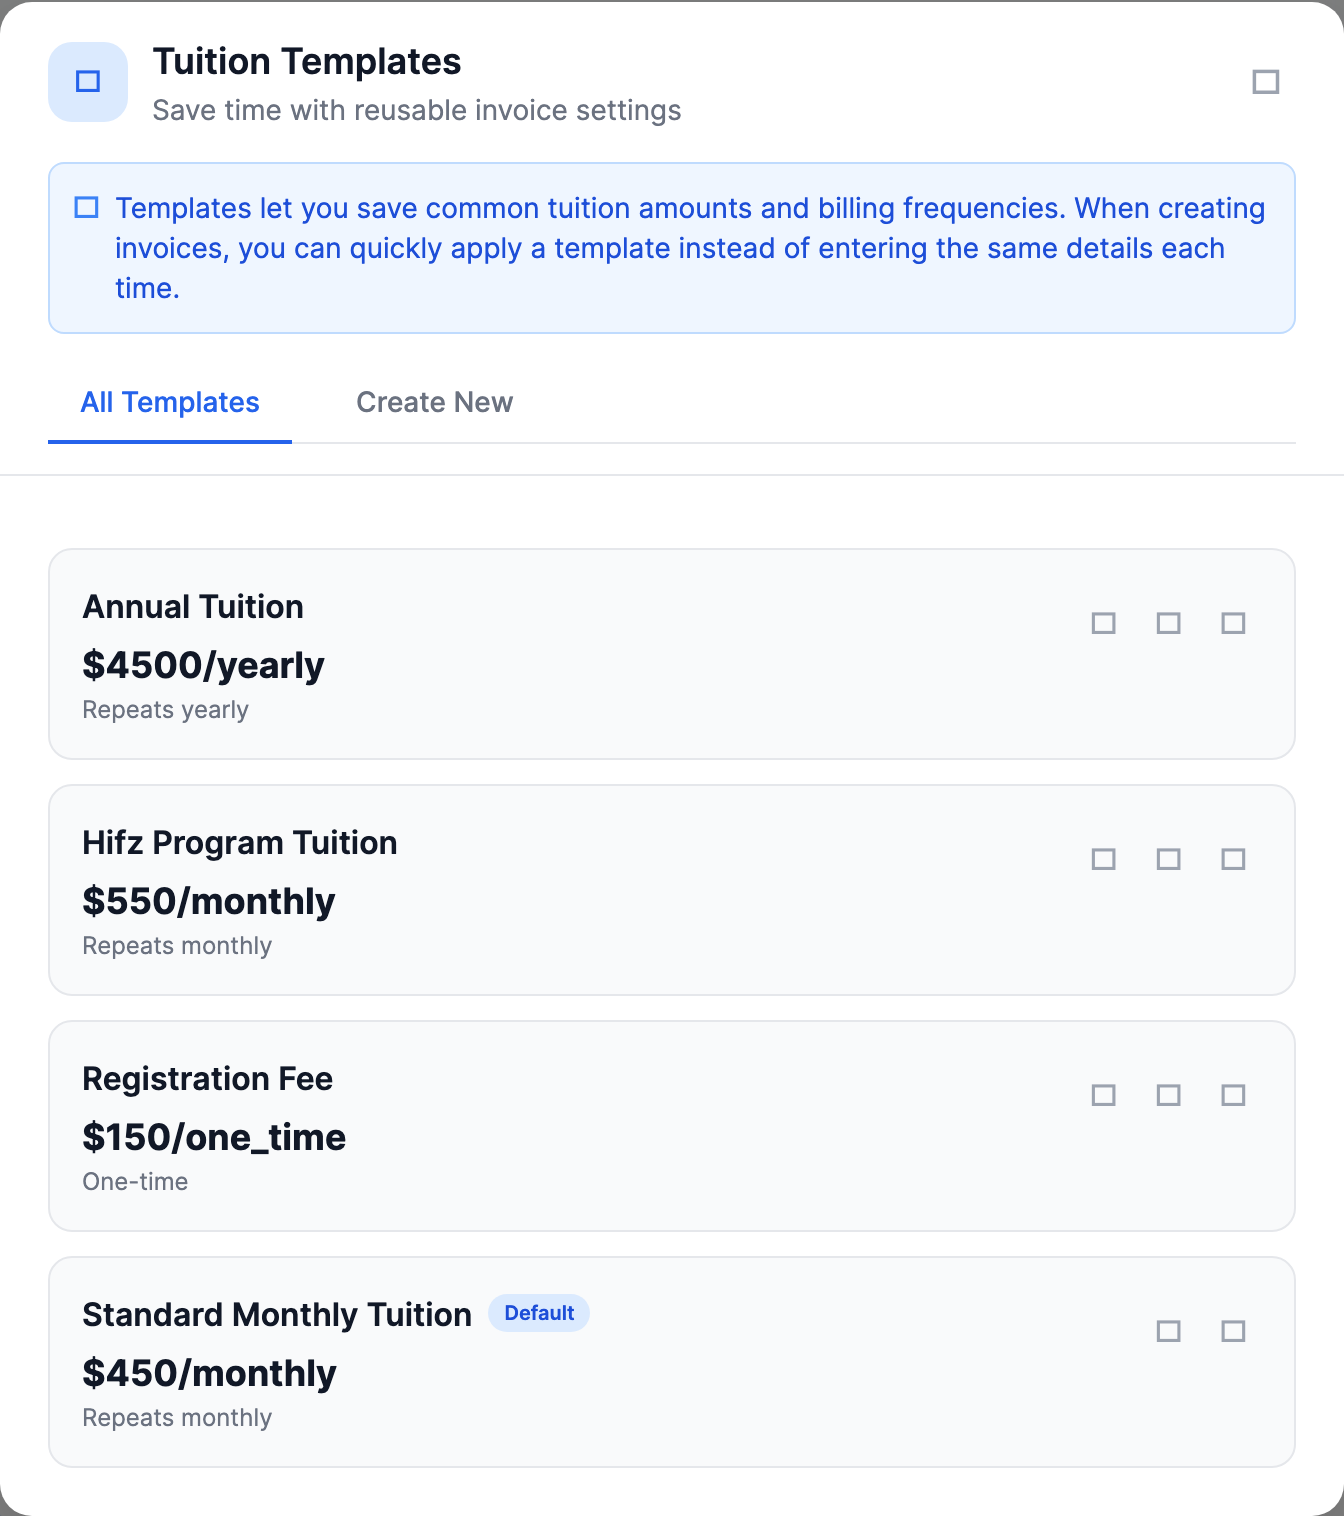
A tuition template is a saved charge — a name, an amount, and how often it repeats. Set them up once and reuse them everywhere. To manage them:
- On the Billing page, click Templates. The Tuition Templates modal opens ("Save time with reusable invoice settings").
- Fill in Template Name (required — e.g. "Monthly Tuition"), Amount ($) (required), and Billing Frequency: One-time, Monthly, Quarterly, or Yearly.
- Add Notes (optional) if you want, then save.
Good to know about templates:
- Templates are shared across your whole organization, not just one school. A template can also be tied to a specific program.
- One template can be marked Default (it shows a "Default" badge). Setting a new default clears the old one.
- Delete doesn't erase anything. Deleting a template just deactivates it — old invoices that used it keep their history.
- Templates show up in four places: the New Invoice modal's template dropdown, the Quick Add fee chips (like "Books $50", "Uniform $75", "Field Trip $25"), enrollment-form registration fees, and the bulk-billing page.
- A template with a Monthly, Quarterly, or Yearly frequency produces a recurring invoice (more on that below). A One-time template produces a normal one-off invoice.
Step 2 — Create invoices with the New Invoice modal
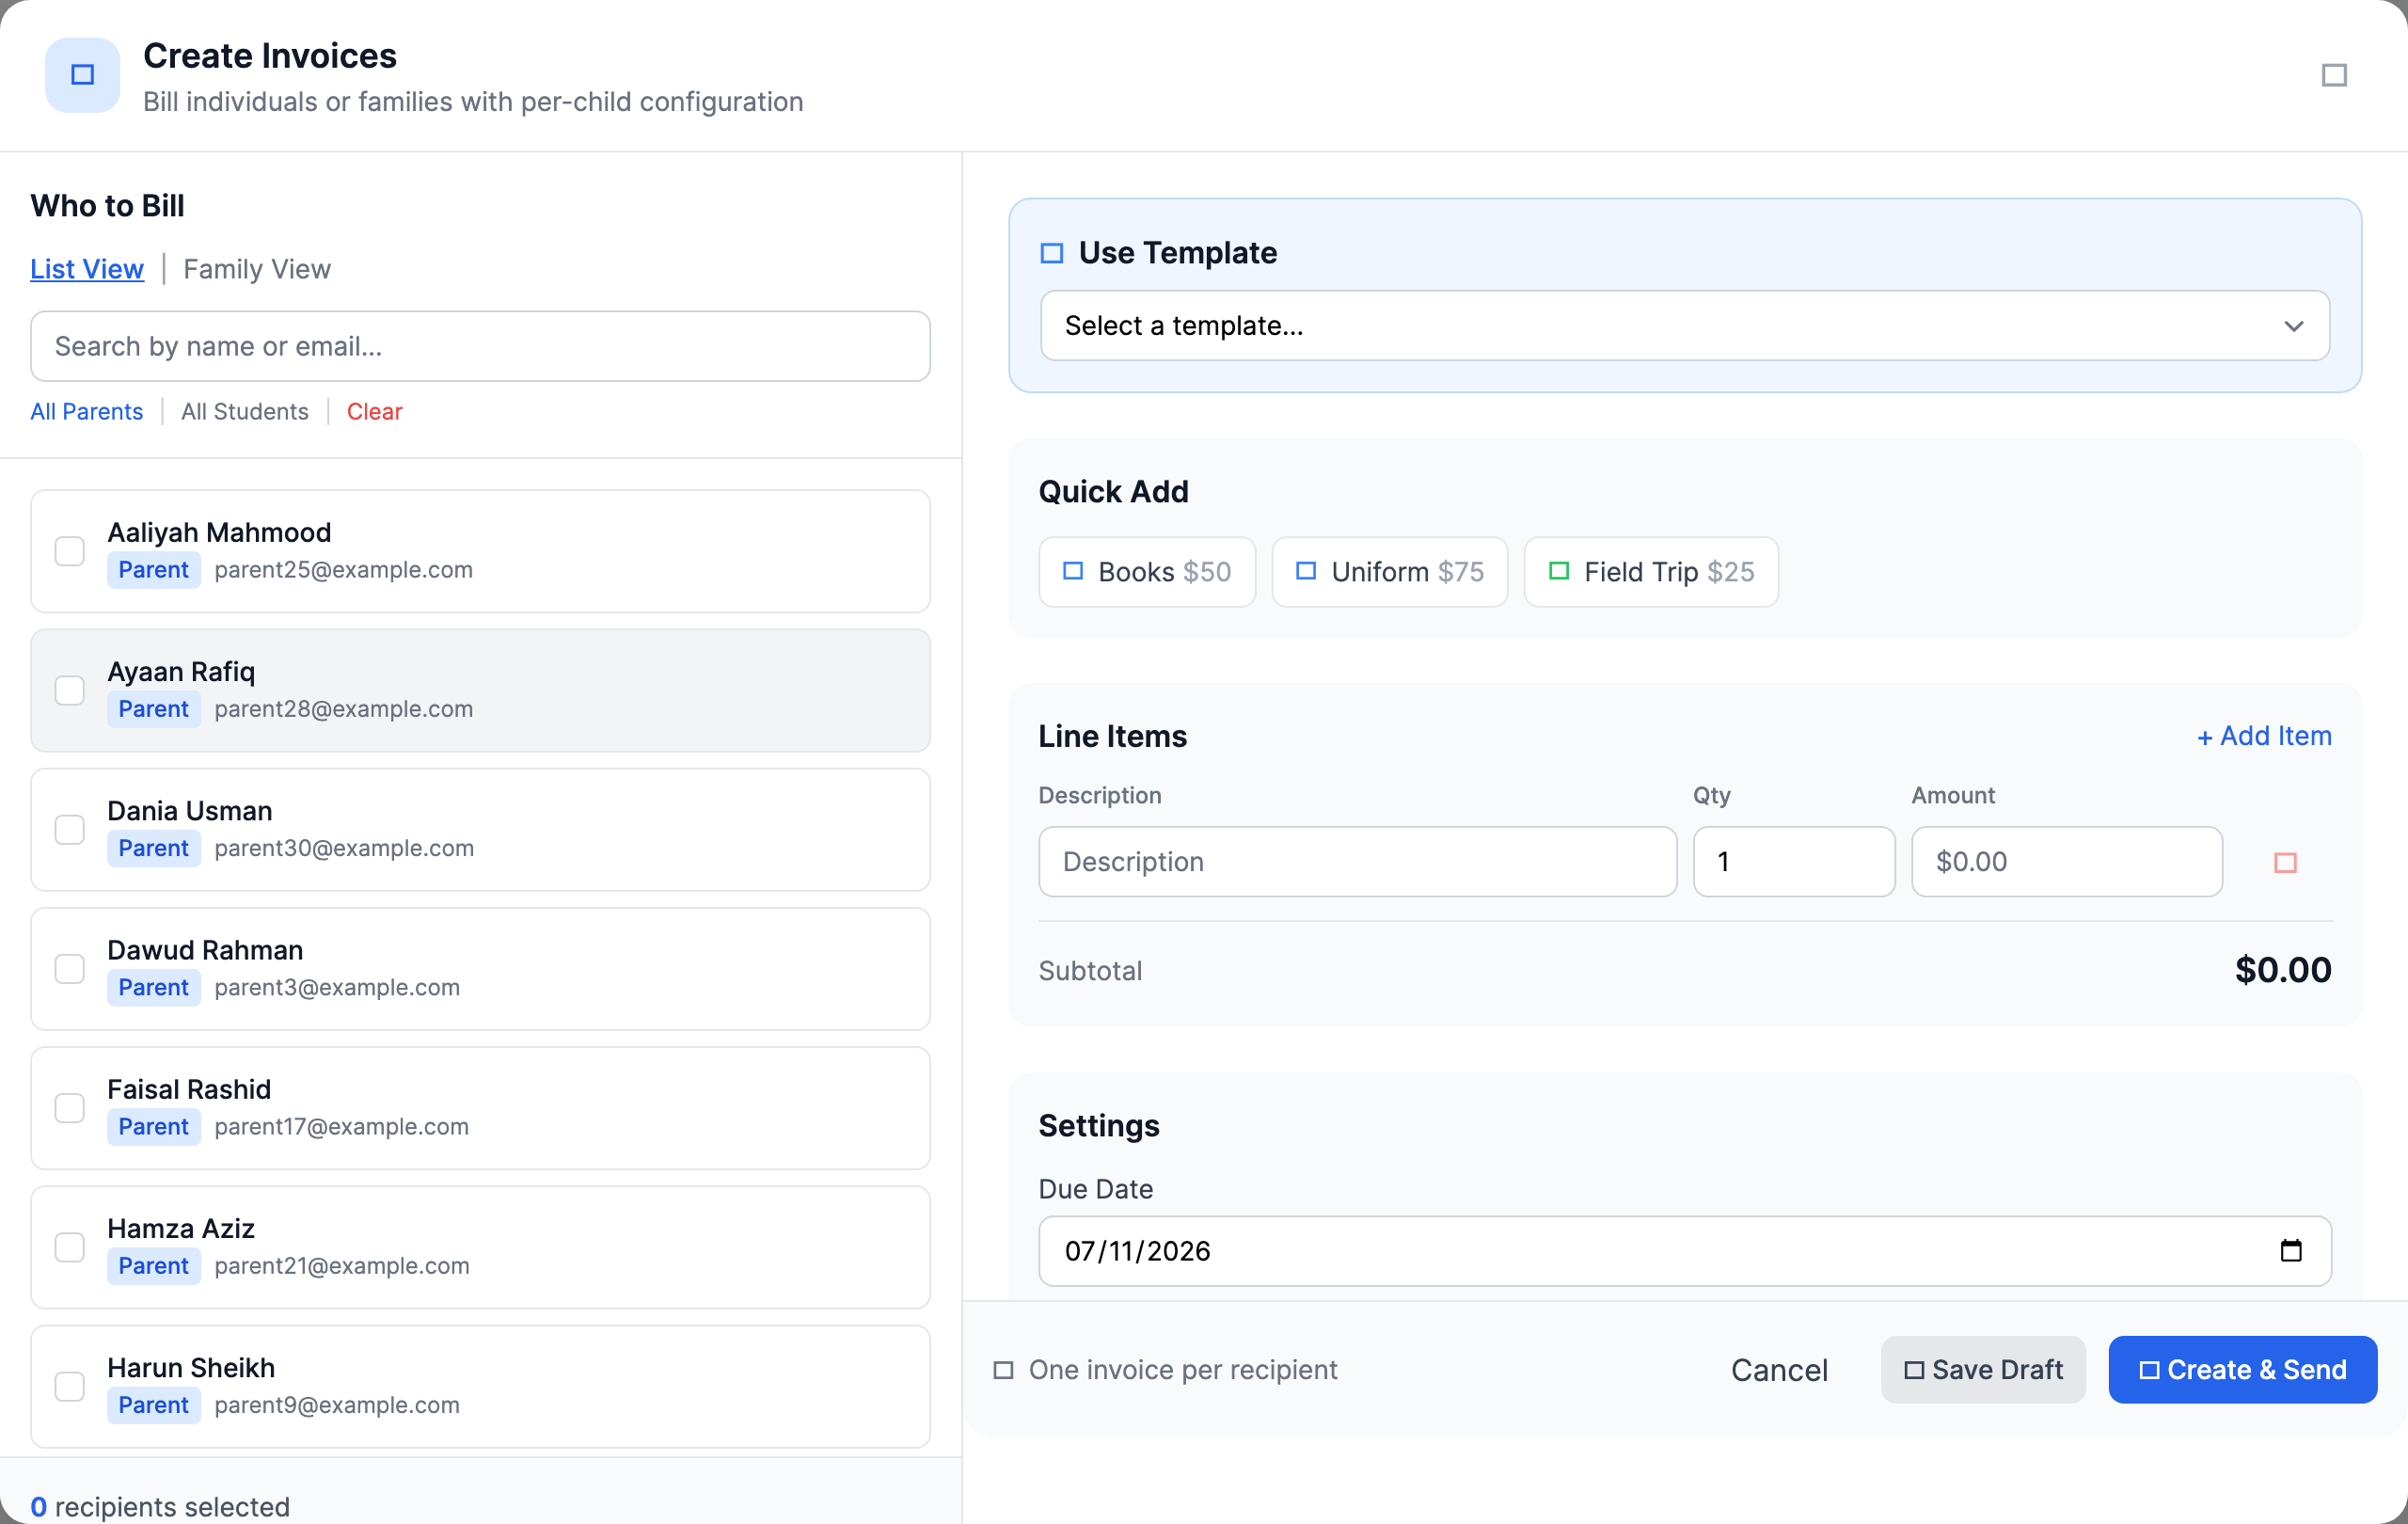
- On the Billing page, click New Invoice. The Create Invoices modal opens ("Bill individuals or families with per-child configuration").
- In the Who to Bill panel, pick your recipients. Use the search box ("Search by name or email...") or the All Parents / All Students / Clear links. Each person shows a badge: Parent, or Self-Pay for students who handle their own billing.
- Add Line Items: a Description, Quantity, and Amount for each charge. To go faster, pick a template from the Select a template... dropdown or click a Quick Add chip.
- In Settings, set the Due Date, add Notes (optional), and decide whether to leave "Send immediately after creation" checked (it is by default).
- Click Create & Send to send right away, or Save Draft to keep the invoices private until you're ready.
MarkTrack creates one invoice per recipient. If you pick a parent, they get one invoice that covers their family. If you pick a self-pay student, the invoice goes to the student.
Blank or $0 lines are silently dropped
A line with an empty description, or an amount of $0 or less, is skipped without an error message. Double-check the invoice total before you send. If you select no recipients or add no valid lines, you'll see "Please select at least one recipient." or "Please add at least one line item."
Draft vs. Create & Send
- Save Draft: the invoice stays in Draft. No email goes out, parents can't see or pay it, and you can still edit or delete it.
- Create & Send: the invoice becomes Sent, is dated today, and the parent gets an email with a payment link — as long as the Invoice Sent email toggle is on in your Billing Settings. Text-message notifications are a separate setting and also need the parent's consent.
Step 3 — Bill a whole family on one invoice
The Create Invoices modal has a second mode for families. Use the All Families selector to switch to family mode. Instead of one shared list of charges, you build line items per child — each child in the family gets their own charges, due date, and notes, all on a single invoice sent to the parent.
- Quick Apply — "Add the same item to all children" copies one charge to every child so you don't retype it.
- Per-child notes are combined on the invoice as "Child: note".
- If some children's charges are recurring and others are one-time, the family gets two invoices — one recurring, one one-time. The confirmation message tells you, e.g. "3 invoices created (1 recurring, 2 one-time)." The recurring invoice's due date is the earliest due date among the children on it.
Family invoices are also what makes sibling discounts work — automatic discounts only apply when several children share one invoice. See Sibling discounts and payment plans.
Back on the Billing page, switch to Family View to see invoices grouped by family. A family invoice's detail page lists the children covered ("Children: ...") in its header.
Bill many students at once (bulk billing)
For a charge that applies to a long list of students — a field trip, a book fee — use the bulk page at Billing → Invoices → Bulk Create:
- Pick the students.
- Add the shared line items (a row that's completely blank is rejected before anything is created).
- MarkTrack groups the students by who pays — usually the parent, or the student themselves if they're self-pay — and creates one invoice per payer, repeating each charge once per student on it. Two siblings = one invoice to the parent with each fee listed twice (once per child).
Recurring invoices (automatic monthly tuition)
When you turn on the Recurring Invoice toggle ("Auto-generate invoices on a schedule") and pick a Billing Interval (Monthly / Quarterly / Yearly), the invoice you create becomes the master copy of a schedule. Here's how it behaves:
- MarkTrack generates the next invoice automatically, once a day (6:00 AM UTC). The first automatic copy is created one interval after the original due date — so a monthly invoice due September 1 generates its next copy on October 1.
- Each generated invoice is sent immediately and due 30 days later.
- If the parent has Auto-Pay set up with a valid saved payment method, the generated invoice is charged automatically right away. If the charge fails, the parent gets an email and MarkTrack retries the next day. If the parent doesn't use Auto-Pay, they just get the normal invoice email.
- On the invoice's detail page, the Recurring Schedule card in the sidebar shows the frequency and "Next invoice" date, with a Pause recurring / Resume recurring button.
- Parents see their active schedules under Recurring Charges on their My Billing page and on their Auto-Pay page.
Two things to know about recurring invoices
Resuming does not bill missed months. If you pause in January and resume in April, the schedule restarts from today — no catch-up invoices are created for February and March. Bill those manually if you need them.
One-time discount codes don't repeat. A discount code redeemed on the original invoice is deliberately not copied to the automatic monthly copies — the next month bills full price. Automatic sibling discounts, on the other hand, are recalculated fresh on every generated invoice.
What each line-item type means
- Tuition, Fee, Custom, and Lunch are normal charges. Their amounts must be positive and the quantity must be more than zero.
- Discount and Credit reduce the invoice. Enter the amount as a positive number — MarkTrack stores it as a reduction automatically.
- Each line can be tagged to a specific student (that's how family invoices track who owes what) and to a school.
Invoices MarkTrack creates for you
Not every invoice is made by hand. When you accept an enrollment application on a form with Auto-create invoice turned on, MarkTrack builds and sends the registration invoice automatically — one invoice per family, with one fee line per accepted child. See Add a registration fee to an enrollment form for the full setup.
You're set
Templates saved, invoices out the door, tuition on a schedule. Next, learn what happens after you hit send — payments, reminders, and refunds — in Collect payments: parent portal, reminders, and refunds.
More guides in Billing & Tuition.
More in Billing & Tuition
Still stuck?
Our team is happy to walk you through it.