Set up payment plans (installments)
A payment plan splits one invoice into several smaller charges that MarkTrack collects automatically on a schedule you set. Instead of asking a family to pay a big tuition bill all at once, you break it into installments — for example, $1,200 in three monthly charges of $400 — and the system bills the parent's saved card on each due date without you lifting a finger.
This guide covers the whole flow: turning an invoice into installments, sending the parent a setup link when there's no card on file yet, what happens when they add a card, how the automatic charges run, what a failed charge does, and how to cancel a plan. Payment plans build on top of a normal invoice, so if you haven't sent the invoice yet, start with Create and send invoices.
A plan needs an open invoice
You can only set up a payment plan on an invoice that's still payable and has a balance left. A draft, cancelled, fully paid, or refunded invoice won't show the option. The plan's installments must add up to exactly the invoice's outstanding balance.
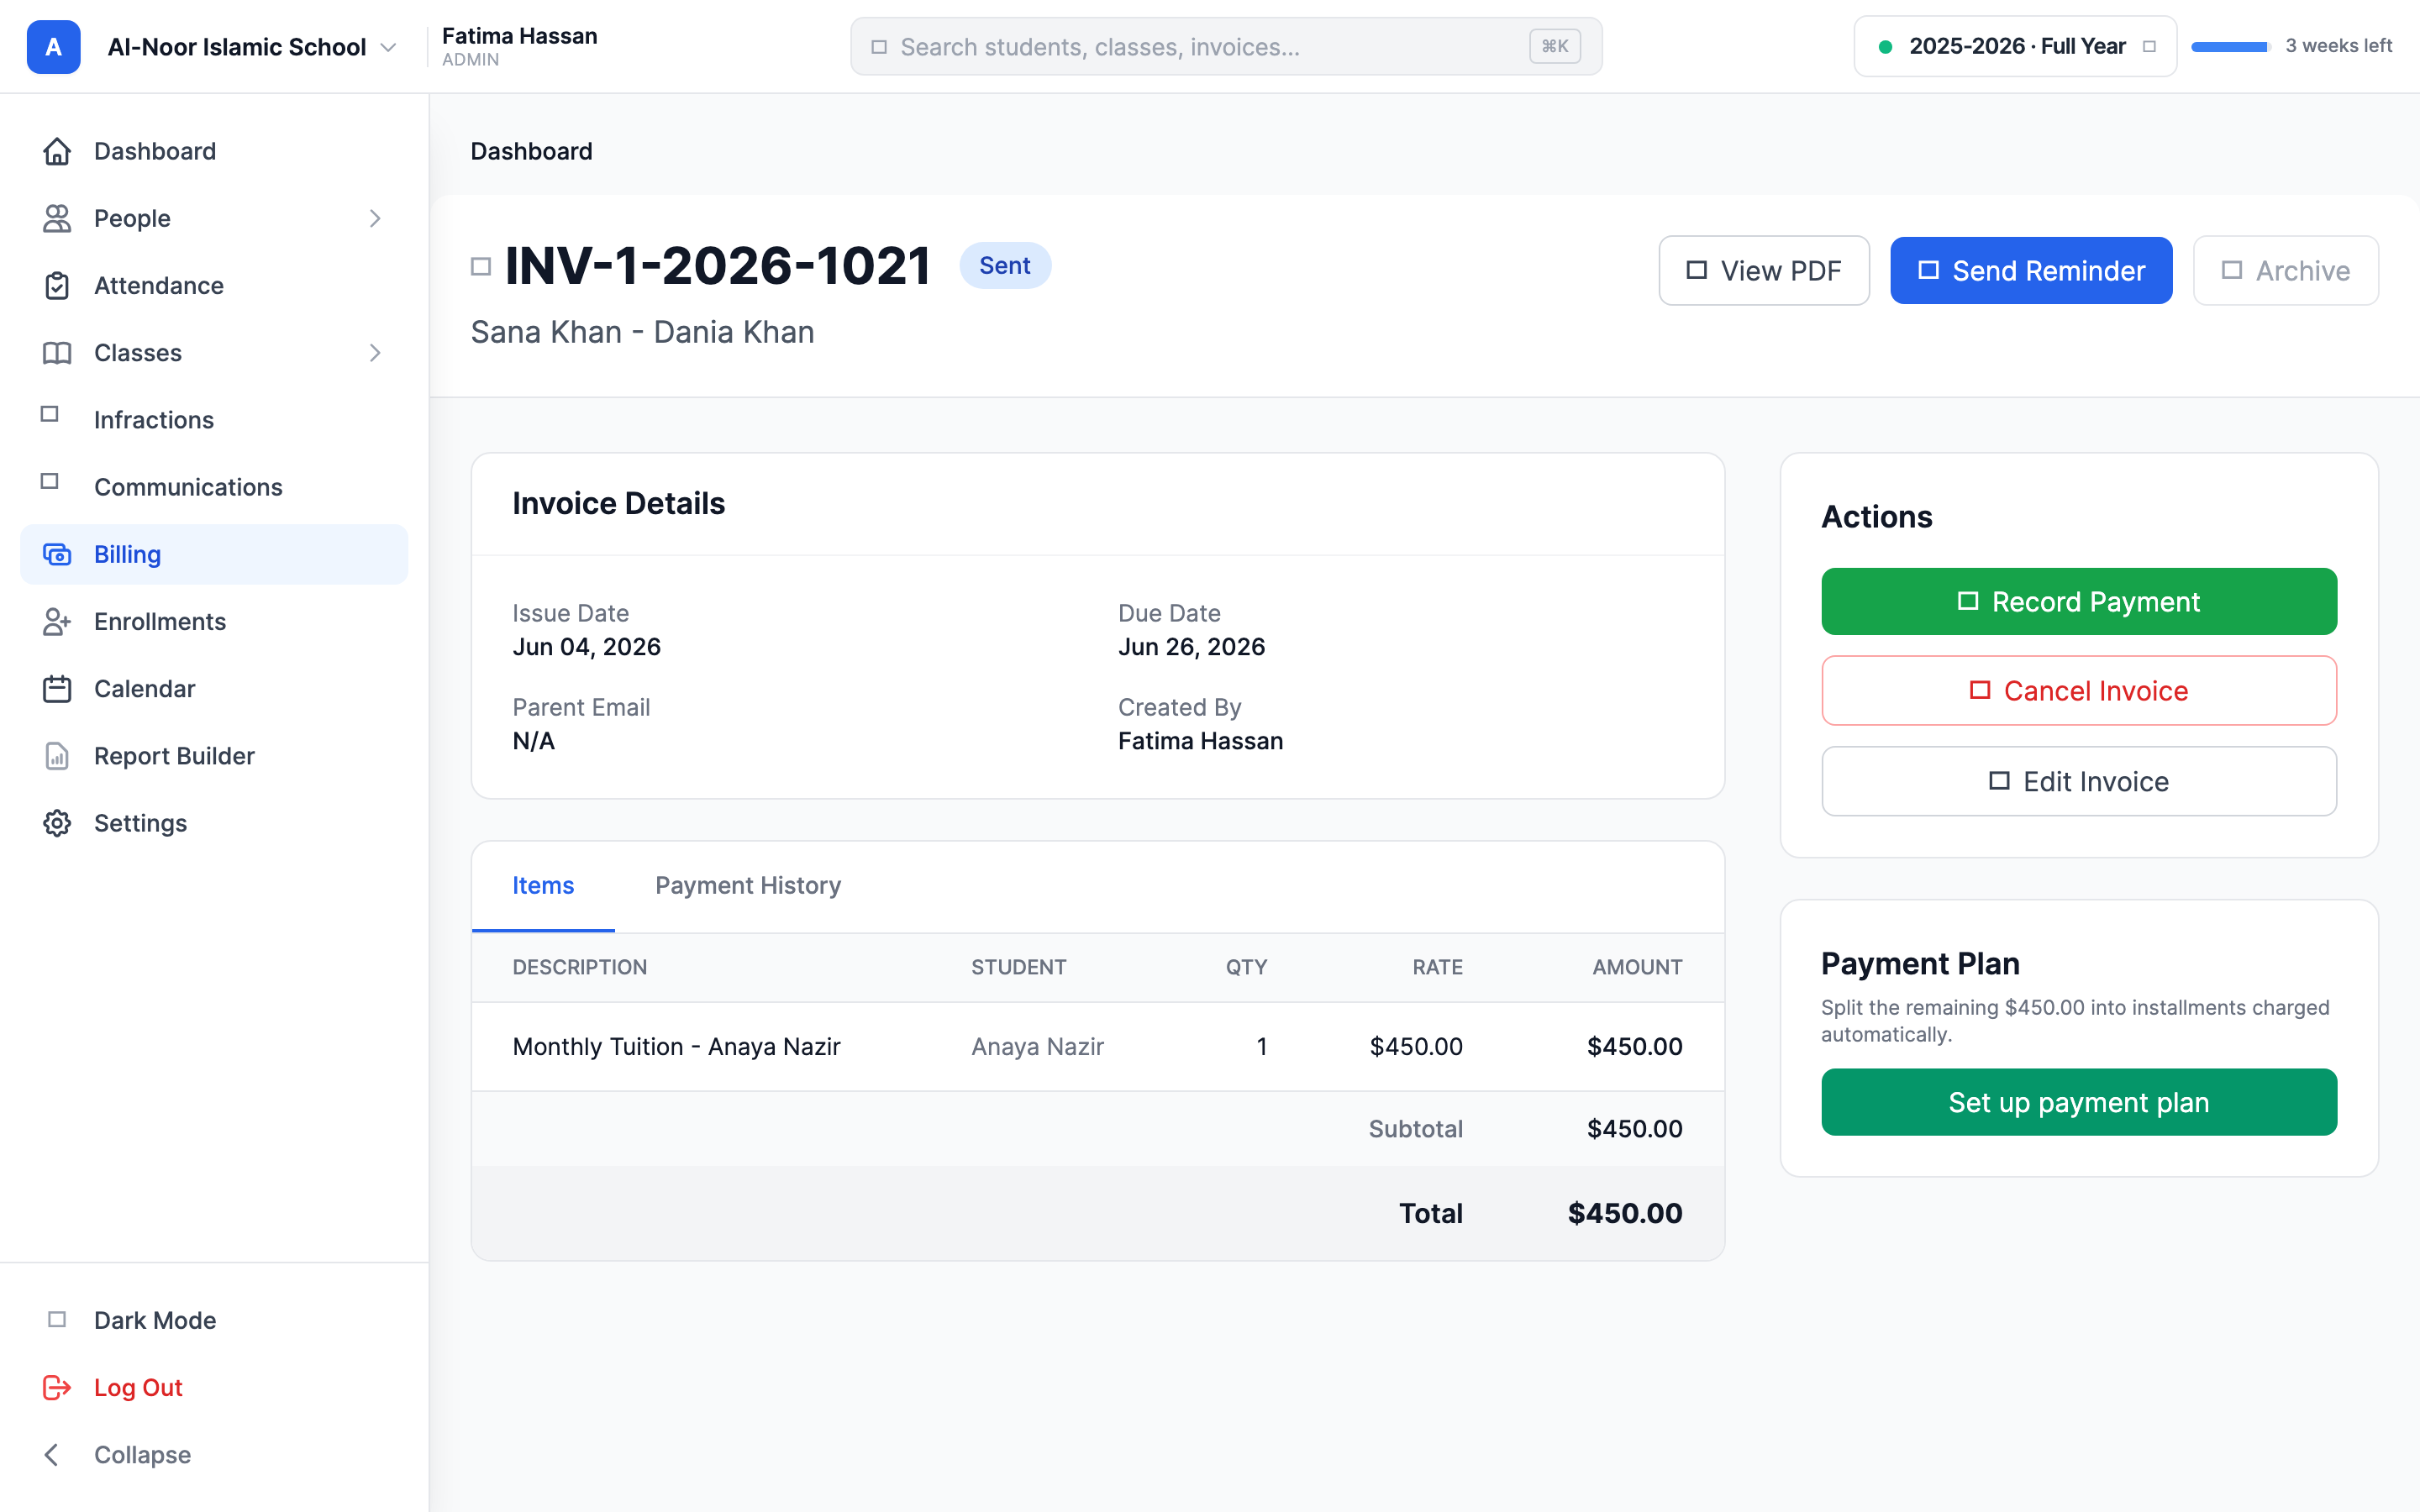
Step 1 — Open the invoice and start a plan
Payment plans live on the invoice itself, not on a separate page. To begin:
- Go to Billing → Tuition and open the invoice you want to split (click its row in the invoice list).
- In the right-hand sidebar, find the Payment Plan card. It reads "Split the remaining $X into installments charged automatically."
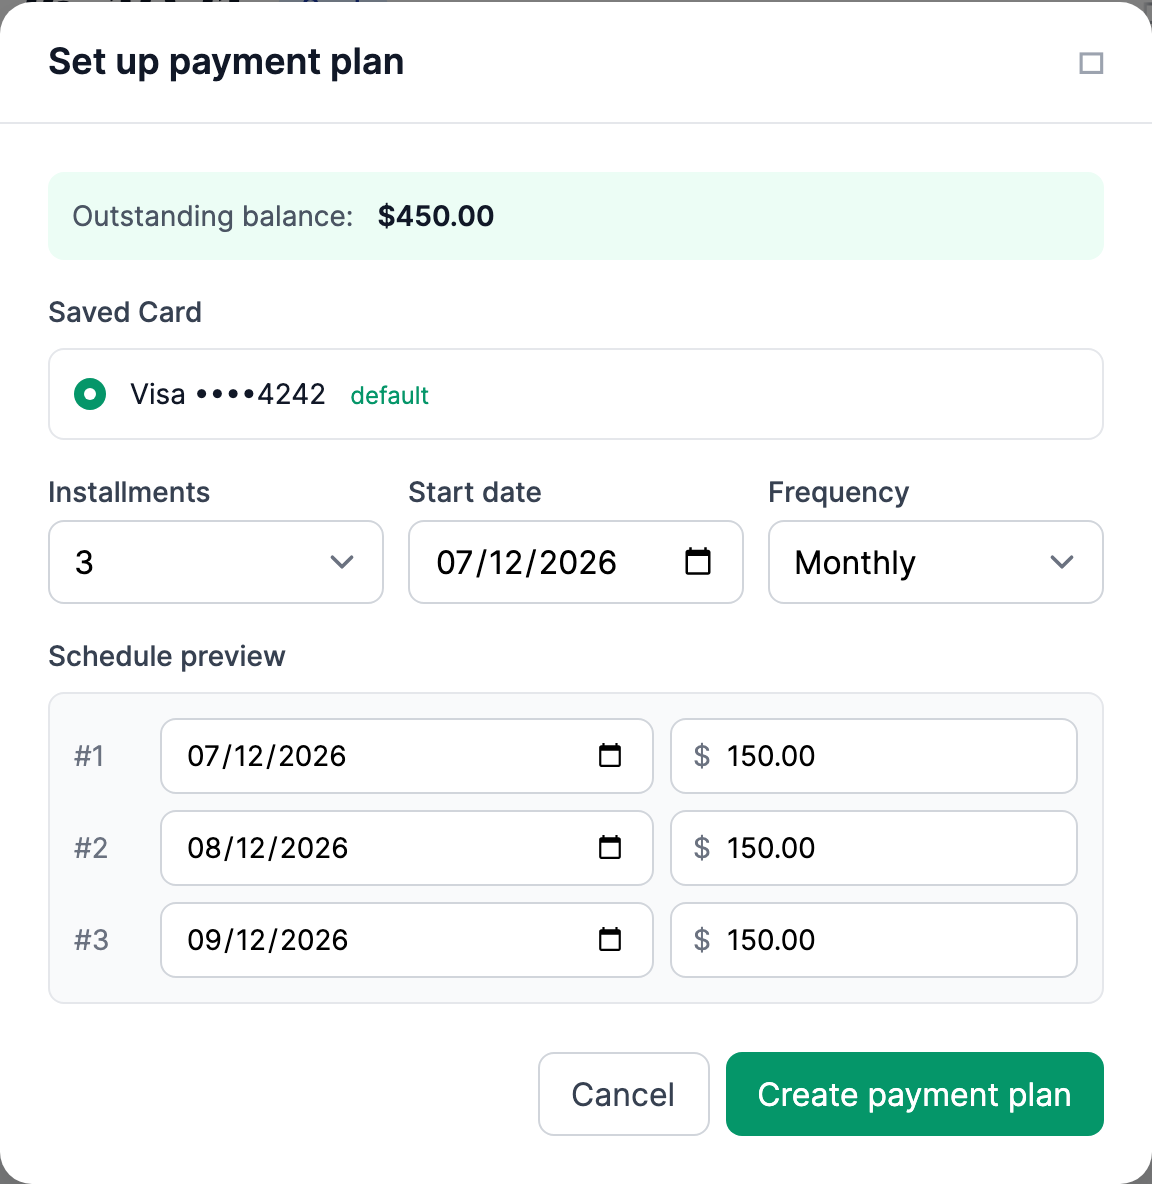
- Click Set up payment plan. The Set up payment plan window opens, showing the invoice's Outstanding balance at the top.
Step 2 — Build the installment schedule
Whether or not the family has a card on file, you build the schedule the same way. The window gives you three controls and a live preview:
- Installments — how many charges to split the balance into. You can pick anywhere from 2 to 12 (it starts at 3). Every plan needs at least two installments — a single charge is just a normal payment.
- Start date — the due date of the first installment. It defaults to 30 days out.
- Frequency — how far apart the charges fall: Weekly, Every 2 weeks, or Monthly (the default).
As you change these, the Schedule preview updates instantly, listing each installment's date and amount. MarkTrack divides the balance evenly and adds any leftover penny to the last installment, so the installments always add up to the exact outstanding balance.
Each installment must be at least $0.50
Card processors reject charges under fifty cents, so MarkTrack does too. If you split a small balance into too many pieces, you'll get an error: "each installment must be at least $0.50 — use fewer installments for small balances." Lower the installment count until each piece clears that floor.
Step 3 — With a card on file: create the plan now
If the parent has already saved a payment method (from paying a past invoice or setting up auto-pay), the window shows a Saved Card section listing their cards, with the default one pre-selected.
- Pick the card to charge under Saved Card.
- Set the Installments, Start date, and Frequency as in Step 2.
- Click Create payment plan.
The plan is created and goes Active right away. You'll see a confirmation like "Payment plan created with 3 installments," and the Payment Plan card now shows an Active badge with every installment listed. Nothing is charged the moment you create the plan — the first charge happens automatically on the first installment's due date (see Step 5).
One open plan per invoice
An invoice can only have one plan running at a time. If a plan is already active, awaiting a card, or paused, the "Set up payment plan" option disappears for that invoice. Cancel the existing plan first if you need to rebuild the schedule.
Step 4 — No card yet? Send the parent a setup link
Most families won't have a card saved the first time. In that case the window shows a note — "No card on file. Build the schedule below and we'll email the parent a setup link. The plan activates automatically when they save a card." — and the button reads Email parent setup link instead.
- Build the schedule (Step 2) exactly as you want it.
- Click Email parent setup link.
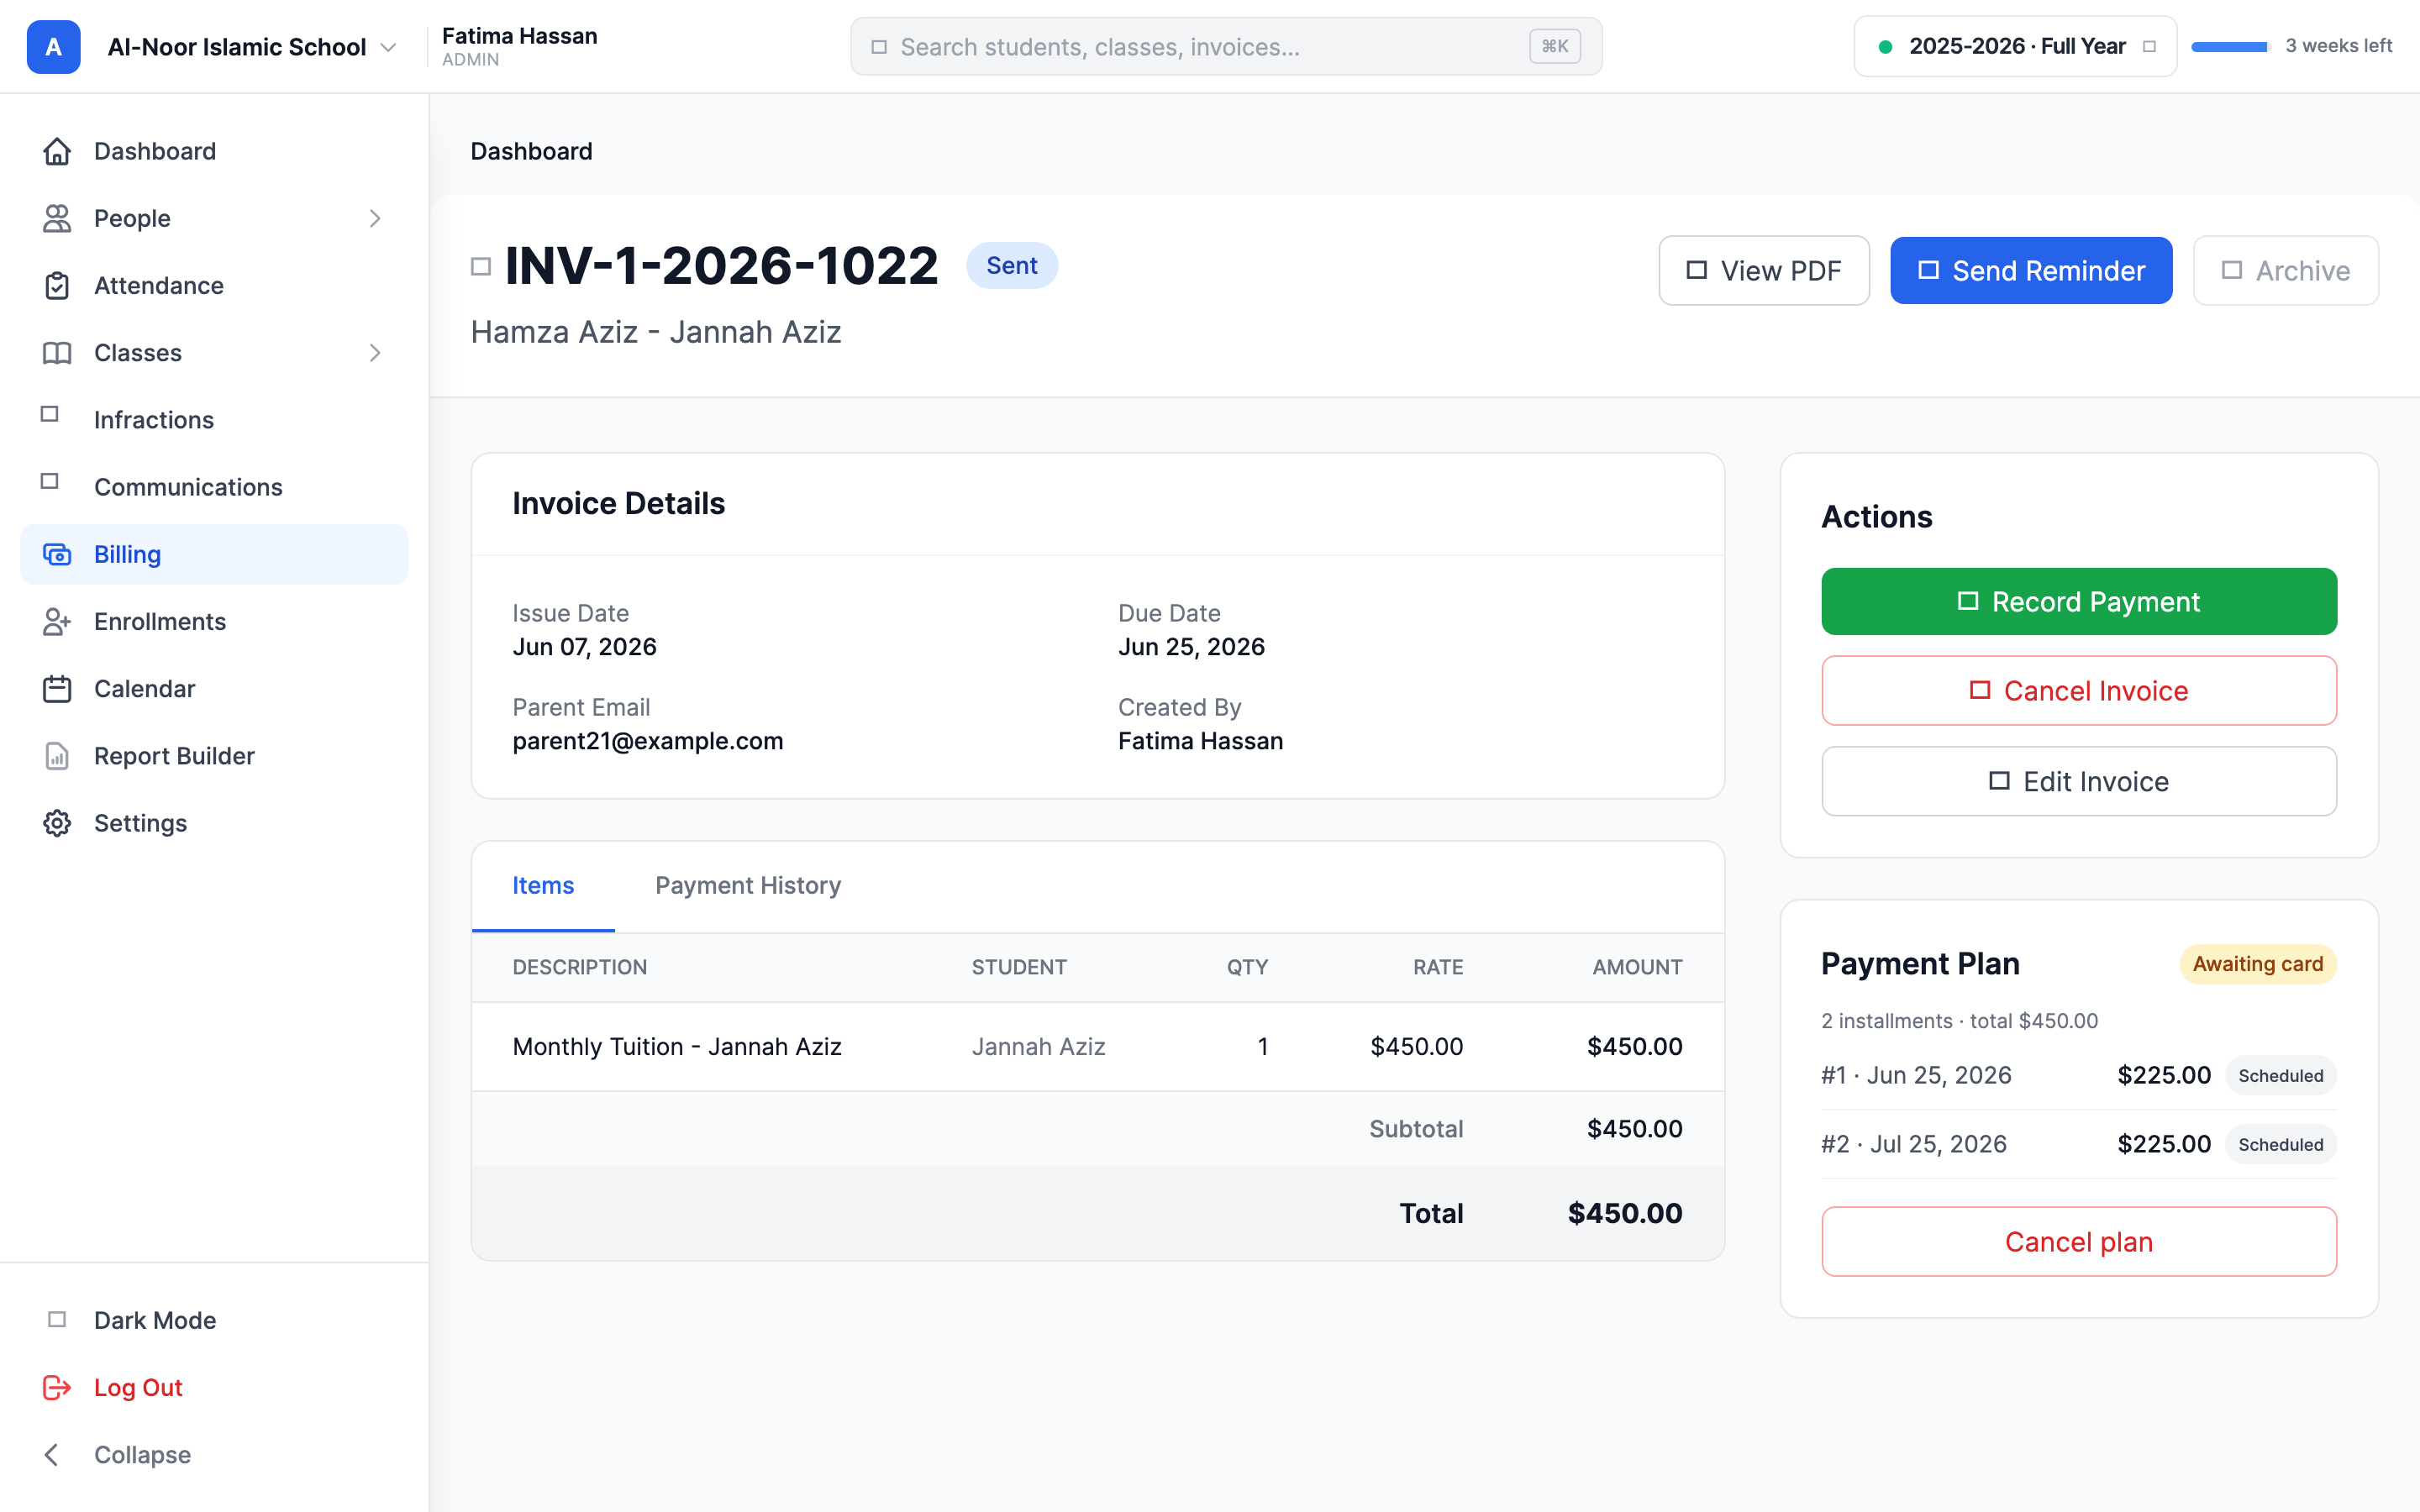
Two things happen at once. First, MarkTrack saves the plan right away in an Awaiting card state — the schedule you built is locked in, so you don't have to come back and re-enter it later. Second, it emails the parent a secure link (to their billing contact email) that takes them to a page where they can add a card. You'll see a confirmation: "Setup link emailed to [parent's email]."
On the invoice, the Payment Plan card now shows an amber Awaiting card badge with the full schedule listed, so you can see exactly what will be charged once the parent acts.
Step 5 — What happens when the parent adds a card
When the parent follows the link and saves a card, MarkTrack activates the plan automatically. The badge flips from Awaiting card to Active, and the saved card becomes the one the plan charges. You don't have to do anything — the next time the daily billing run finds a due installment, it charges that card.
If the parent removes their card
A plan can only charge a card that's on file. If the parent deletes the card the plan was using, the plan drops back to Awaiting card and pauses charging until they add a new one. Saving another card re-activates it automatically.
Step 6 — How the automatic charges run
Once a plan is Active with a card, you're hands-off. Every day, MarkTrack runs a background billing job (around 7:00 AM UTC) that:
- Finds every active plan with an installment due today or earlier that hasn't been charged yet.
- Charges the saved card for that installment's amount, off-session (the parent doesn't have to be present or approve it).
- Marks the installment Paid and records a payment on the invoice, which lowers the invoice's balance. The family gets the same receipt they would for any online payment.
When the last installment is paid, the plan is marked Completed and the invoice is fully paid off. You can watch progress any time on the invoice's Payment Plan card — each row shows the installment's number, due date, amount, and a status chip (Scheduled, Processing, Paid, Failed, or Skipped).
If someone pays part of the invoice another way
If you record a cash payment or the parent pays a chunk online outside the plan, MarkTrack re-spreads the remaining installments to match the new, smaller balance — so the plan never overcharges the family beyond what they actually owe.
Step 7 — What a failed charge does
Cards get declined — expired, insufficient funds, a bank block. When an installment charge fails, MarkTrack handles it gracefully:
- The installment is marked Failed and the parent is emailed that the charge didn't go through.
- MarkTrack automatically retries the next day, and again the day after if needed.
- After 3 failed attempts on the same installment, MarkTrack stops retrying, sets the whole plan to Paused, and sends an escalation email. This prevents an endlessly-declining card from hammering the parent with failure notices forever.
A Paused plan is waiting on a human. The usual fix is for the parent to add a working card (which can re-activate the plan), or for you to follow up with the family and collect the balance another way. A paused plan does not charge again on its own until the underlying problem is resolved.
Paused is not the same as cancelled
A paused plan still "owns" the invoice's remaining schedule and can resume once the card issue is fixed. Because of that, you can't start a second plan on the same invoice while one is paused. If you want to walk away from the schedule entirely, cancel it (next step).
Step 8 — Cancel a plan
Cancelling stops all future charges. To cancel:
- Open the invoice and find the Payment Plan card in the sidebar.
- Click Cancel plan.
- Confirm when prompted — "Cancel this payment plan? Paid installments are not affected."
The plan is marked Cancelled and its remaining scheduled installments are skipped, so the daily billing run will never charge them. Installments that already paid stay paid — cancelling does not refund anything. Whatever balance is left on the invoice simply goes back to being a normal unpaid balance that the family can pay any way they like, or that you can put on a fresh plan later.
That's the full lifecycle
Split an invoice into installments, send a setup link if there's no card, let the daily run collect each charge, and cancel any time without touching what's already paid. For everything else about invoices — sending them, reminders, and refunds — see Create and send invoices.
Need a hand setting up a plan or sorting out a paused one? Contact us, or browse more guides in Billing & Tuition.
More in Billing & Tuition
Still stuck?
Our team is happy to walk you through it.