Set up online payments (Stripe)
Before a single parent can pay tuition online in MarkTrack, your school has to connect a payment account. MarkTrack uses Stripe to move money: families pay by card or bank transfer, and the money lands in your school's own bank account. This guide walks through connecting that account, getting verified, checking your status, turning on bank (ACH) payments, and choosing which billing emails go out automatically.
One important thing to understand up front: payments are connected once for your whole organization, not per school. Al Noor Academy might run a main school, a Sunday school, and a Hifz program, but they all share one payment account. Set it up from any school's Billing area and every program can collect online right away. You connect it under Billing → Payment Setup.
Who can do this
Only an admin with the Billing permission can open Payment Setup and run onboarding. Resetting or disconnecting the account is restricted to your organization's owner (super admin).
Step 1 — Open Payment Setup
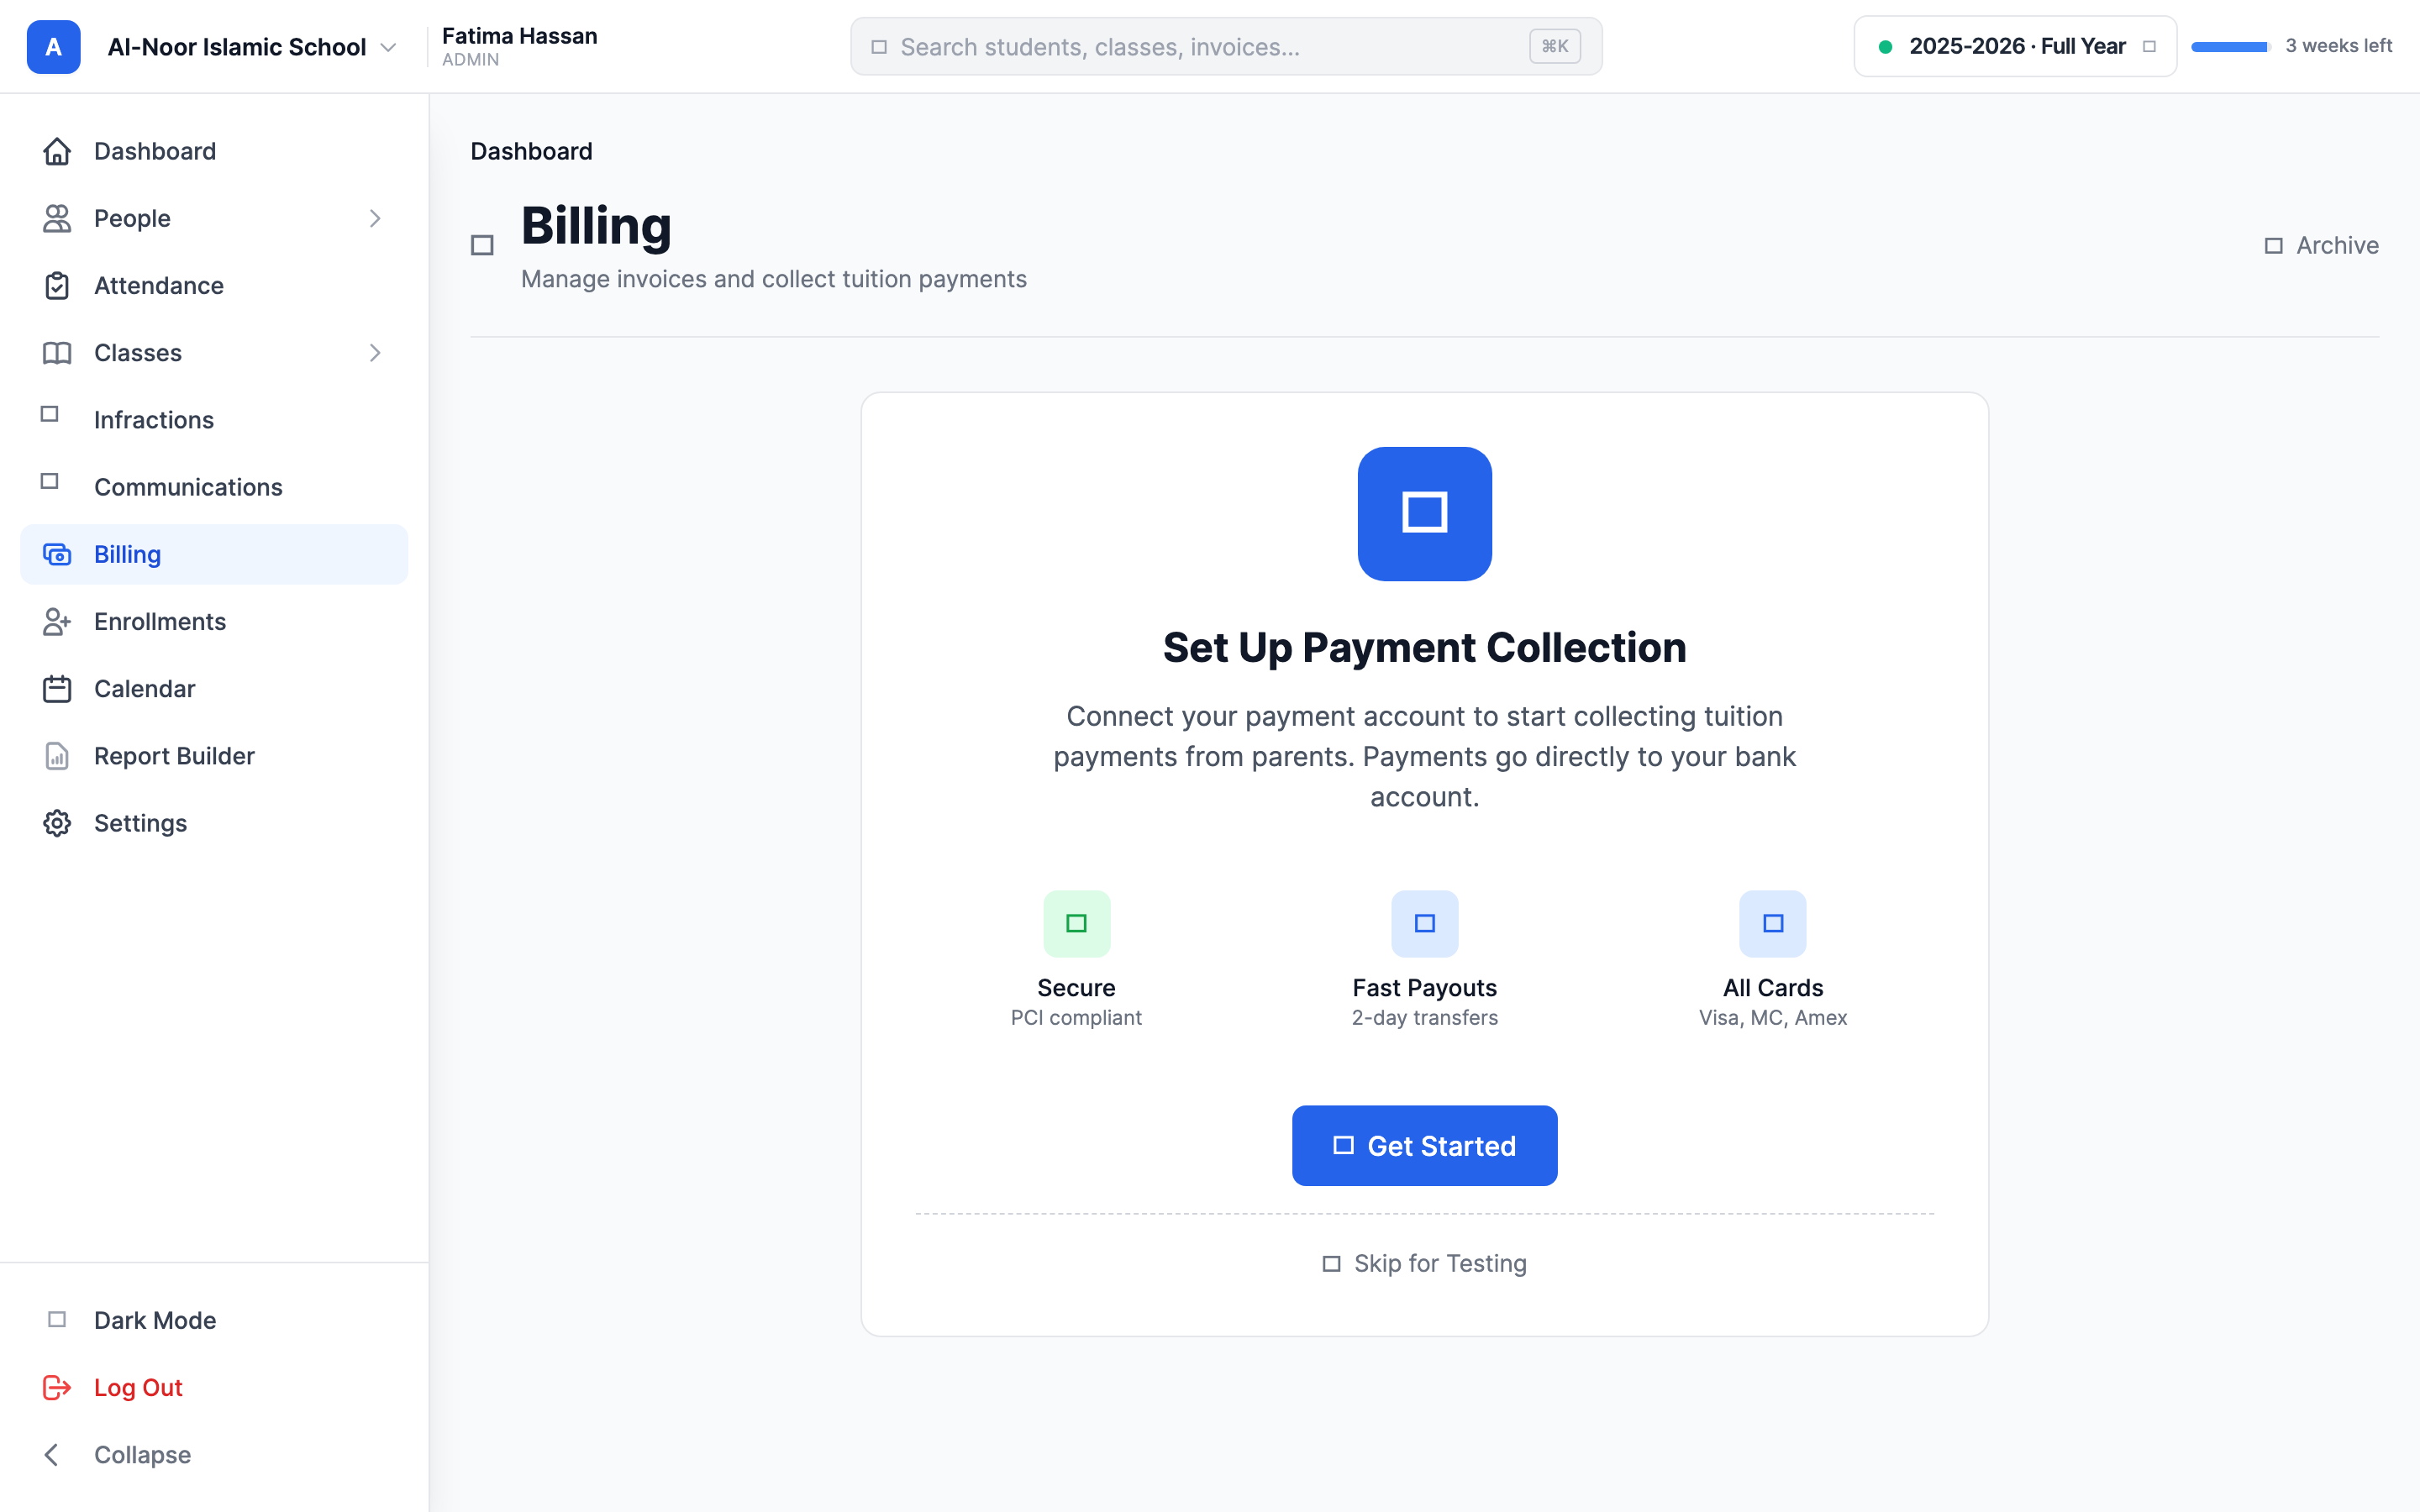
Once you create invoices you'll send them to families, but they can only pay online after setup is done. To begin:
- In the left sidebar, click Billing.
- If payments aren't connected yet, the Billing page shows a Set Up Payment Collection card explaining that payments go straight to your bank account. Click Get Started.
- You land on the Payment Setup page ("Complete verification to accept payments").
Step 2 — Complete Stripe verification
The Payment Setup page loads an embedded verification form from Stripe right inside MarkTrack — you never leave the app. It starts on its own; you'll see "Loading verification form..." for a few seconds, then Stripe's secure form appears. Work through it top to bottom.
Stripe typically asks for:
- Your school's business details — legal name, address, and EIN (tax ID).
- Details for a responsible person — usually an owner or officer, with their date of birth and the last four digits of their SSN.
- The bank account where payouts should be deposited — routing and account number.
When you finish, Stripe reviews what you submitted. The form is provided and secured by Stripe (PCI DSS Level 1 certified), so MarkTrack never sees or stores the sensitive numbers you type in.

Have your numbers ready before you start
You'll need your school's EIN, a bank routing and account number, and ID details for the responsible person. If you don't have these on hand, the form will sit unfinished and the Billing page will keep showing a "Complete Your Setup" prompt until you come back and finish.
Step 3 — Understand the status while you wait
After you submit, your account isn't always instantly live — Stripe may need a few minutes, or occasionally up to 24 hours, to verify. The Billing page reads your status straight from Stripe and shows one of these states:
- Complete Your Setup / Please Complete Setup — you haven't finished the form, or Stripe still needs some information. It lists what's missing (for example "Business details" or "Bank account"). Click Continue Setup to go back in.
- Verification In Progress — you've submitted everything and Stripe is reviewing. No action needed. You can click Refresh Status to re-check with Stripe right away.
- Additional Information Needed — Stripe accepted your first submission but wants more. Click Provide Information to add it.
- Account Issue Detected — a real problem (for example a rejection). This one needs you to review your details or contact Stripe support.
Whenever you open the Payment Setup page, MarkTrack quietly re-checks your status with Stripe, so the page is usually current on its own. The Refresh Status link is there for when you want to force an immediate re-check while waiting.
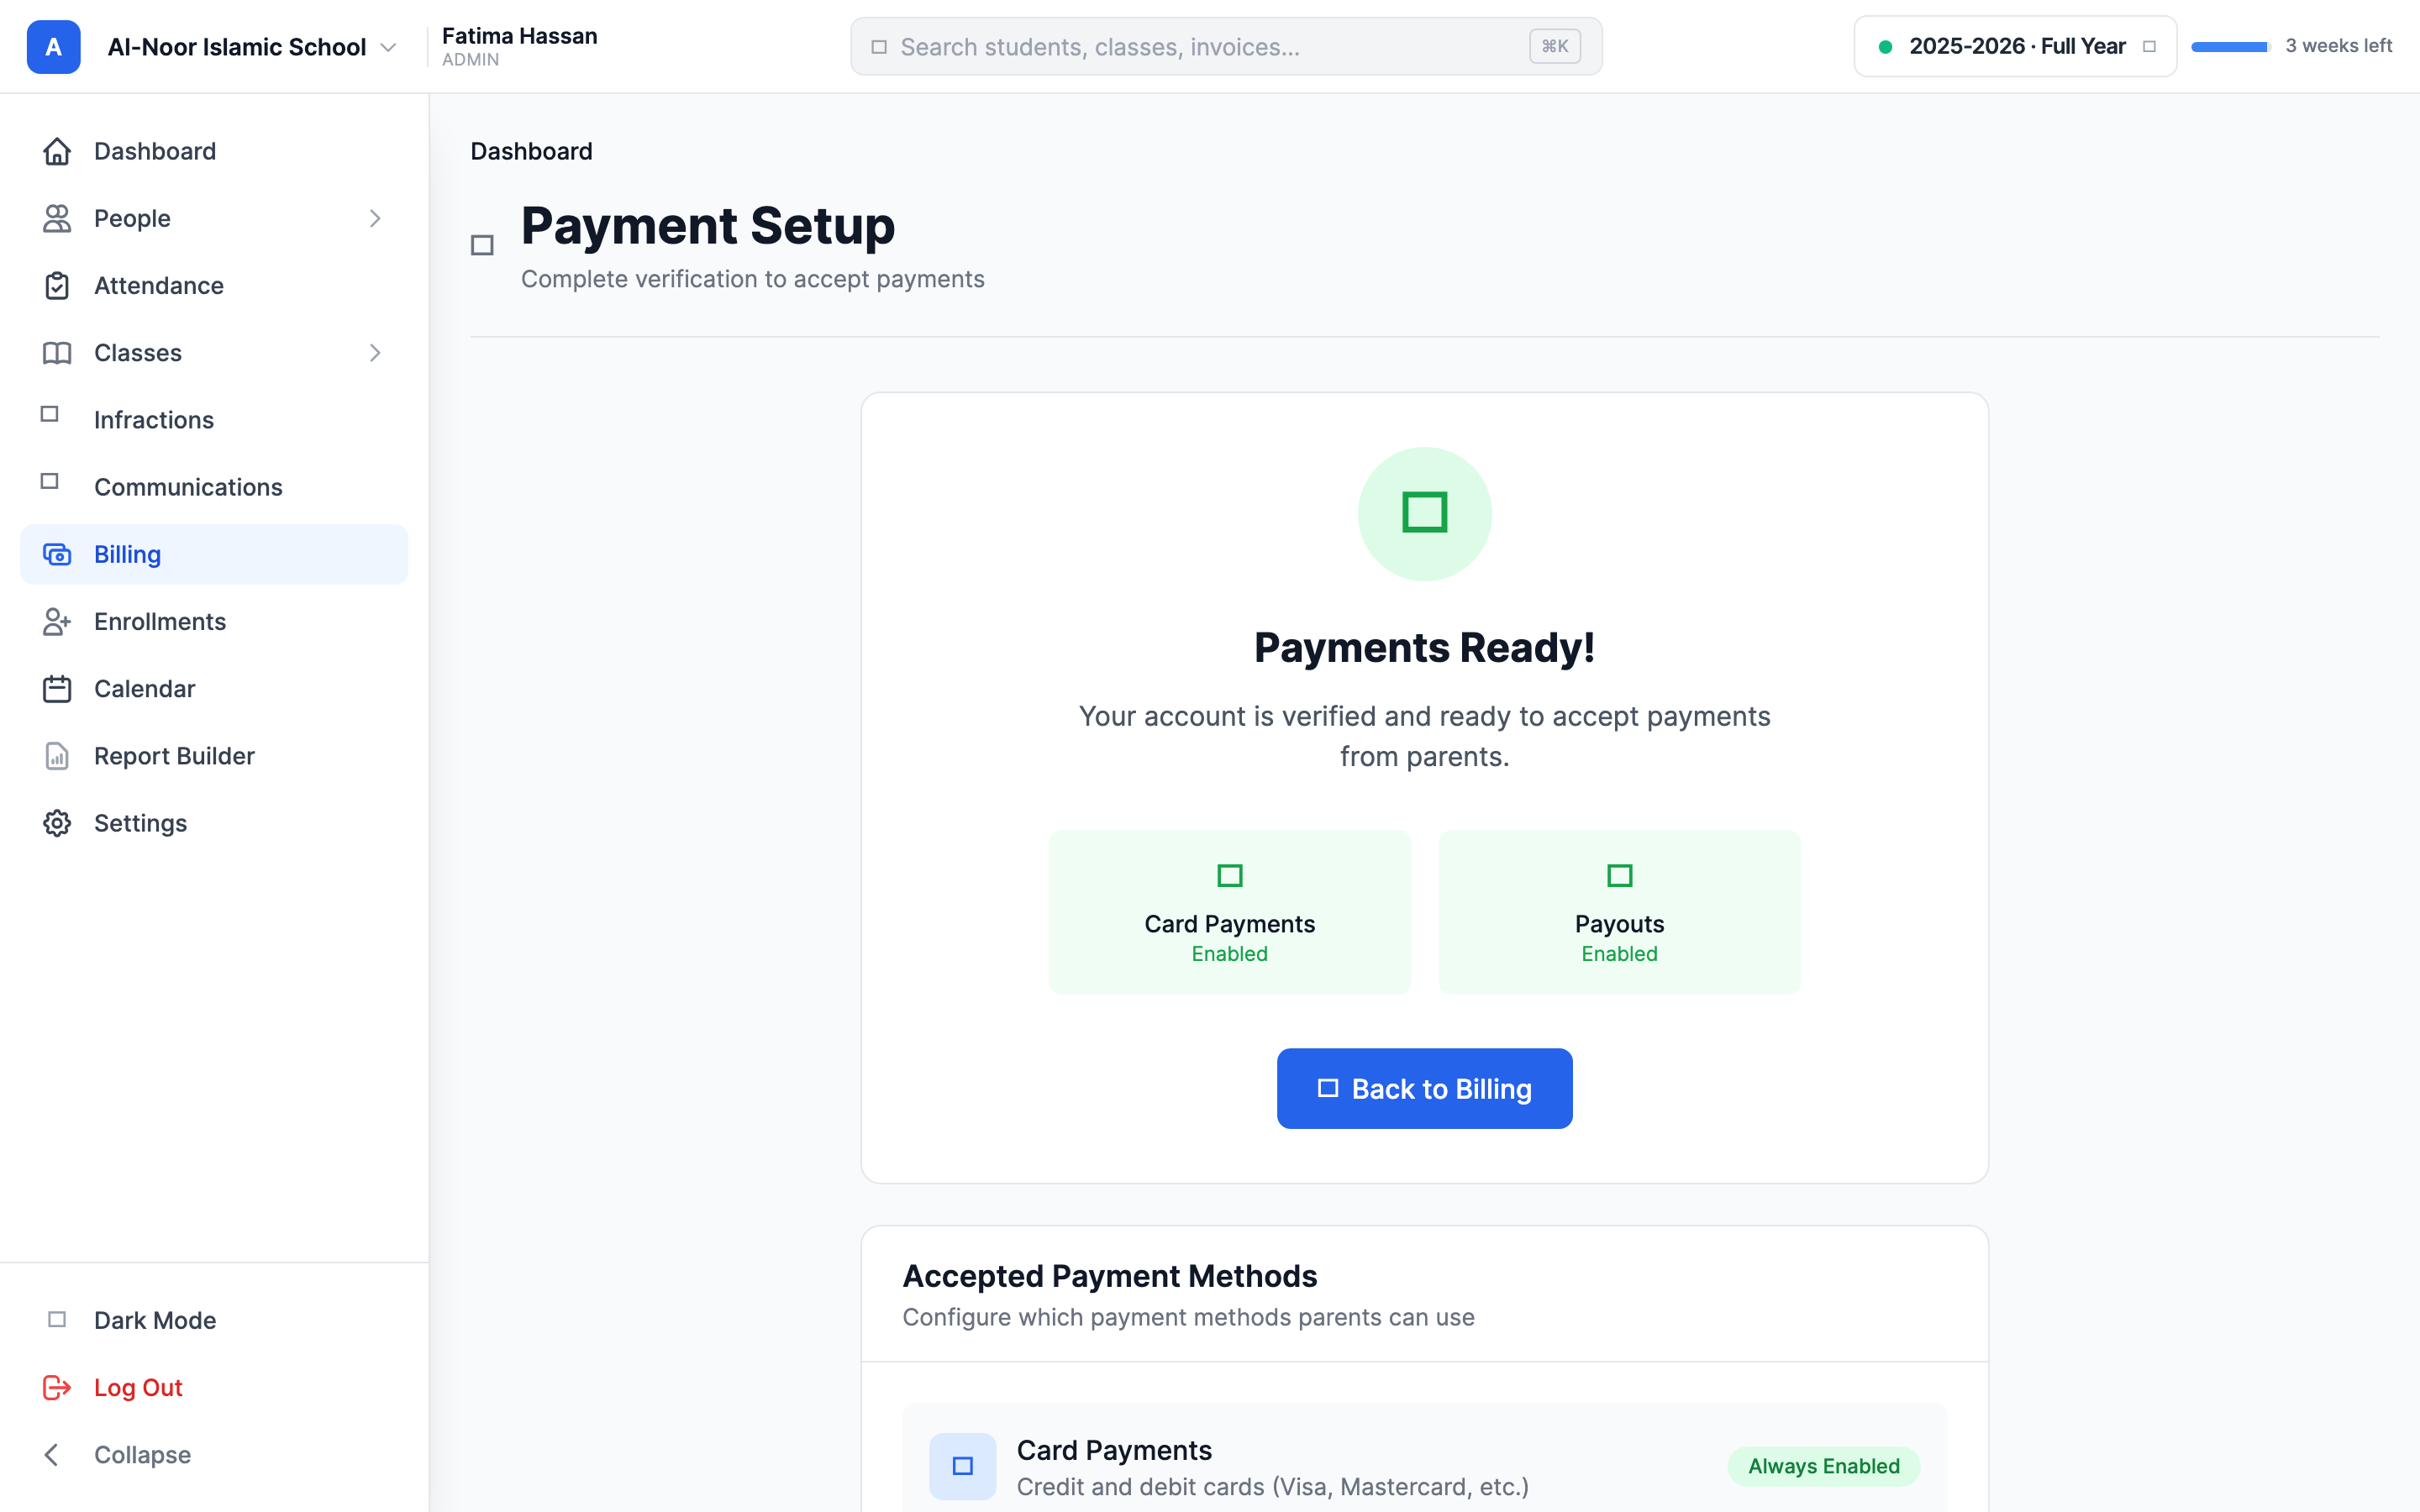
Step 4 — Confirm you're "Payments Ready"
Your account is fully ready only when Stripe has turned on both the ability to take charges and the ability to send payouts. When that happens, the Payment Setup page shows a green Payments Ready! banner with two badges: Card Payments: Enabled and Payouts: Enabled.
This is the line that matters: until you see "Payments Ready!", parents cannot pay invoices online. You can still create and send invoices before then, but the online payment button on the family's side won't work until charges and payouts are both enabled.
You only do this once
Because the account belongs to your whole organization, finishing setup once unlocks online payments for every school and program. You don't repeat onboarding per school.
Step 5 — Turn on bank (ACH) payments
Card payments are always enabled once you're ready — there's nothing to turn on. Bank account payments (ACH) are optional and off by default. ACH lets families pay straight from a checking account at much lower fees (around 0.8% versus roughly 2.9% for cards), though the money takes 3–5 business days to clear.
- On the Payment Setup page, find the Accepted Payment Methods panel.
- Next to Bank Account Payments (ACH), click Enable ACH.
- You'll see "ACH bank payments have been requested. It may take a few minutes to activate." MarkTrack asks Stripe to add the bank-payment capability; once Stripe approves it, the badge changes to Active.
"Enable ACH" is a request, not an instant switch
Clicking Enable ACH requests the capability from Stripe — it doesn't flip on immediately. It usually activates within a few minutes. If it still shows the Enable button after a while, reload the page; MarkTrack re-checks the live capability with Stripe each hour (and on a reload), so the Active badge appears once Stripe finishes.
Step 6 — Choose which billing emails go out
Once you're connected, the Payment Setup page adds an Email Notifications panel. These toggles control the automatic emails MarkTrack sends families. They apply to your whole organization's billing, and they're saved with the Save Settings button.
- Invoice Sent — emails a parent when you create and send them a new invoice. Turn this off and a sent invoice still appears in the parent portal, but no email goes out.
- Payment Receipt — emails a parent a receipt when their payment is received.
- Overdue Reminders — automatically emails parents about invoices that have passed their due date.
- Set Overdue Reminder Frequency — how often a reminder repeats while an invoice stays overdue: Every 3 days, Every 5 days, Every 7 days, Every 2 weeks, or Every month.
- Click Save Settings. You'll see "Billing settings saved successfully."

The Invoice Sent toggle is the email switch
When you use Create & Send on a new invoice, the parent only gets the payment-link email if Invoice Sent is on here. Saving a draft never emails anyone regardless of this setting.
Once you're connected
With a "Payments Ready!" account, families can pay invoices online by card (and ACH if you enabled it), money flows to your bank, and your chosen emails go out automatically. Now you're ready to start billing — head to Create and send invoices to charge a family or a whole roster, set up reusable templates, and schedule recurring tuition.
Stuck on verification or an ACH capability that won't activate? Reach out via our contact page and we'll help you get connected.
More in Billing & Tuition
Still stuck?
Our team is happy to walk you through it.