Add a registration fee to an enrollment form
A registration fee in MarkTrack is a one-time charge attached to an online enrollment form. You can collect it two ways: have the applicant pay when they submit the form, or generate an invoice automatically when you accept them. This guide covers both.
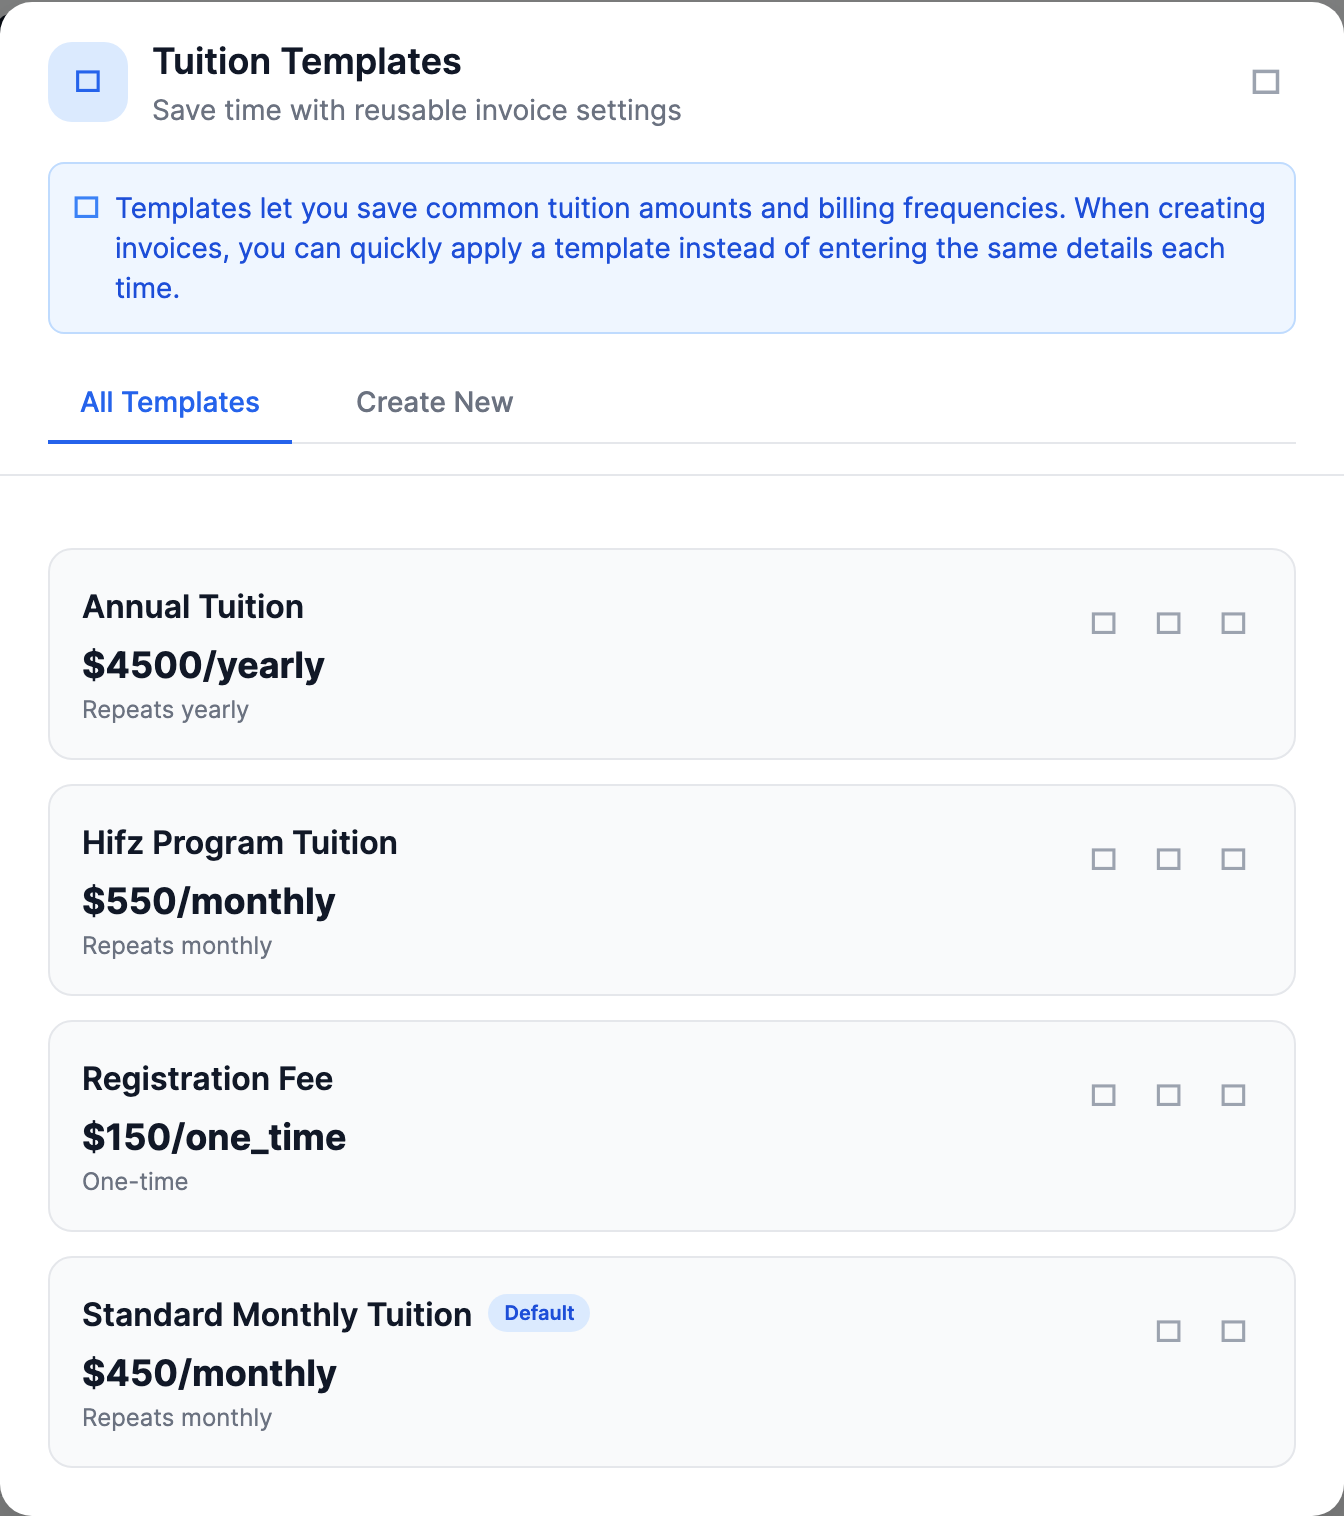
Under the hood, a registration fee is just a one-time tuition template (the template holds the dollar amount) that you attach to the form. So the whole task is: pick the template, then choose when it’s collected.
Before you start
You’ll need a one-time tuition template for the fee amount. If you don’t have one yet, jump to Create a registration-fee template first, then come back here.
Step 1 — Open the form’s Billing settings
- Go to Enrollments and open the form you want to charge for.
- Click Edit to open the form builder.
- Click the gear icon in the top-right of the form card to open the Settings drawer.
- Select the Billing tab.
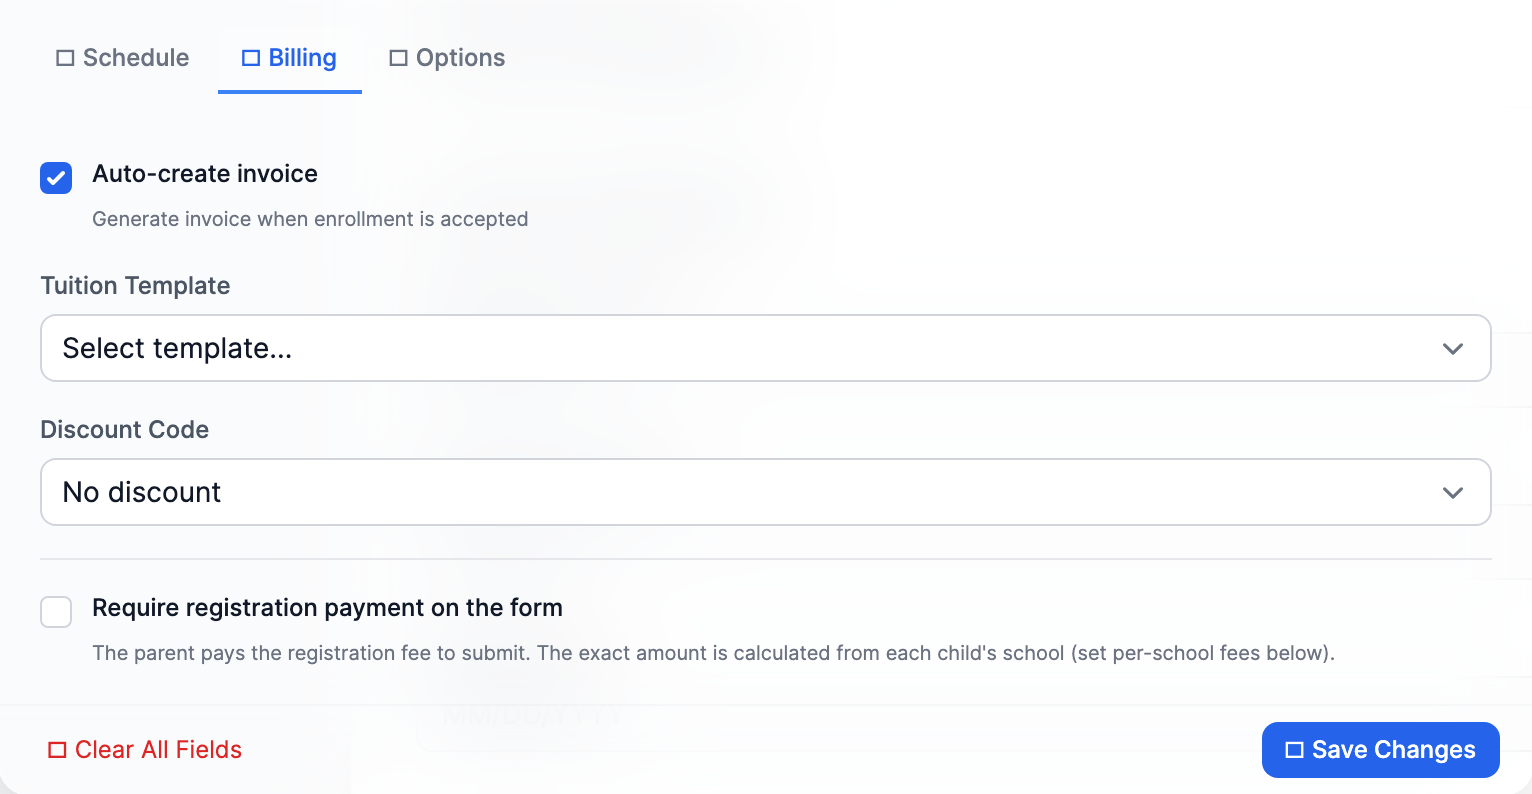
Step 2 — Choose the registration fee
Under Tuition Template, select your registration fee (for example, “Registration Fee”). MarkTrack confirms the amount right below the dropdown — e.g. Amount: $150.00. A one-time fee shows no recurrence pill; a recurring template would show a “Monthly” or “Yearly” tag instead.
Step 3 — Decide when the fee is collected
You have two options, and they’re controlled by two settings on the same tab:
- Collect it when the applicant submits (pay-on-form): turn on “Require registration payment on the form.” The applicant must pay the fee to submit their application.
- Bill it after you accept them: leave that toggle off and keep “Auto-create invoice” on. When an admin accepts the application, MarkTrack automatically creates an invoice for the fee and emails a payment link.
When you’re done, click Save Changes.
Multi-school forms
If a single form serves more than one school or program, a “Per-school registration fee overrides” panel appears below the toggle. Use it to charge a different amount per school, or leave a school blank to fall back to its default fee or the form’s template.
Don’t have a registration-fee template yet?
Create one first, then attach it in Step 2:
- Go to Billing → Tuition.
- Create a new tuition template, name it something like “Registration Fee,” and set the amount.
- Set the recurrence to one-time — that’s what makes it a registration fee rather than recurring tuition.
Heads up: collecting payment needs Stripe
Pay-on-form and emailed invoices only charge once your school’s Stripe account is connected. If you haven’t set that up yet, configure tuition billing first, then turn on the fee.
That’s it — your enrollment form now carries a registration fee. Want to set up the rest of the enrollment flow? See the other guides in Enrollments.
More in Enrollments
Still stuck?
Our team is happy to walk you through it.