Build an enrollment form
An enrollment form is the online application a family fills out to join your school. You build it once, share a link, and the answers flow straight into MarkTrack — no paper, no retyping. This guide walks through every setting in the form builder so you know exactly what each switch does before you publish.
Under the hood, a form is a list of fields (the questions) plus a set of settings (who can apply, whether accounts are created, what happens when you accept someone). You build the questions on a live canvas, and you control everything else from a settings drawer with three tabs: Schedule, Billing, and Options.
Before you start
Decide which school (or schools) the form is for, and whether you want it to create login accounts when you accept people. Both choices are made when you pick a template and in the Options tab. You can always edit later — but accounts only get created on acceptance, so it's worth getting right up front.
Step 1 — Create the form and pick a template
- In the left sidebar, open Enrollments, then click Forms. You'll land on the Enrollment Forms page with tabs for Published, Draft, and Archived.
- Click New Form. A New Form window opens asking you to choose a template.
- Pick the template that matches what you're collecting (the five choices are explained just below).
- Type a Form Name (for example, "Fall 2025 Enrollment") and tick the Schools this form serves — at least one is required.
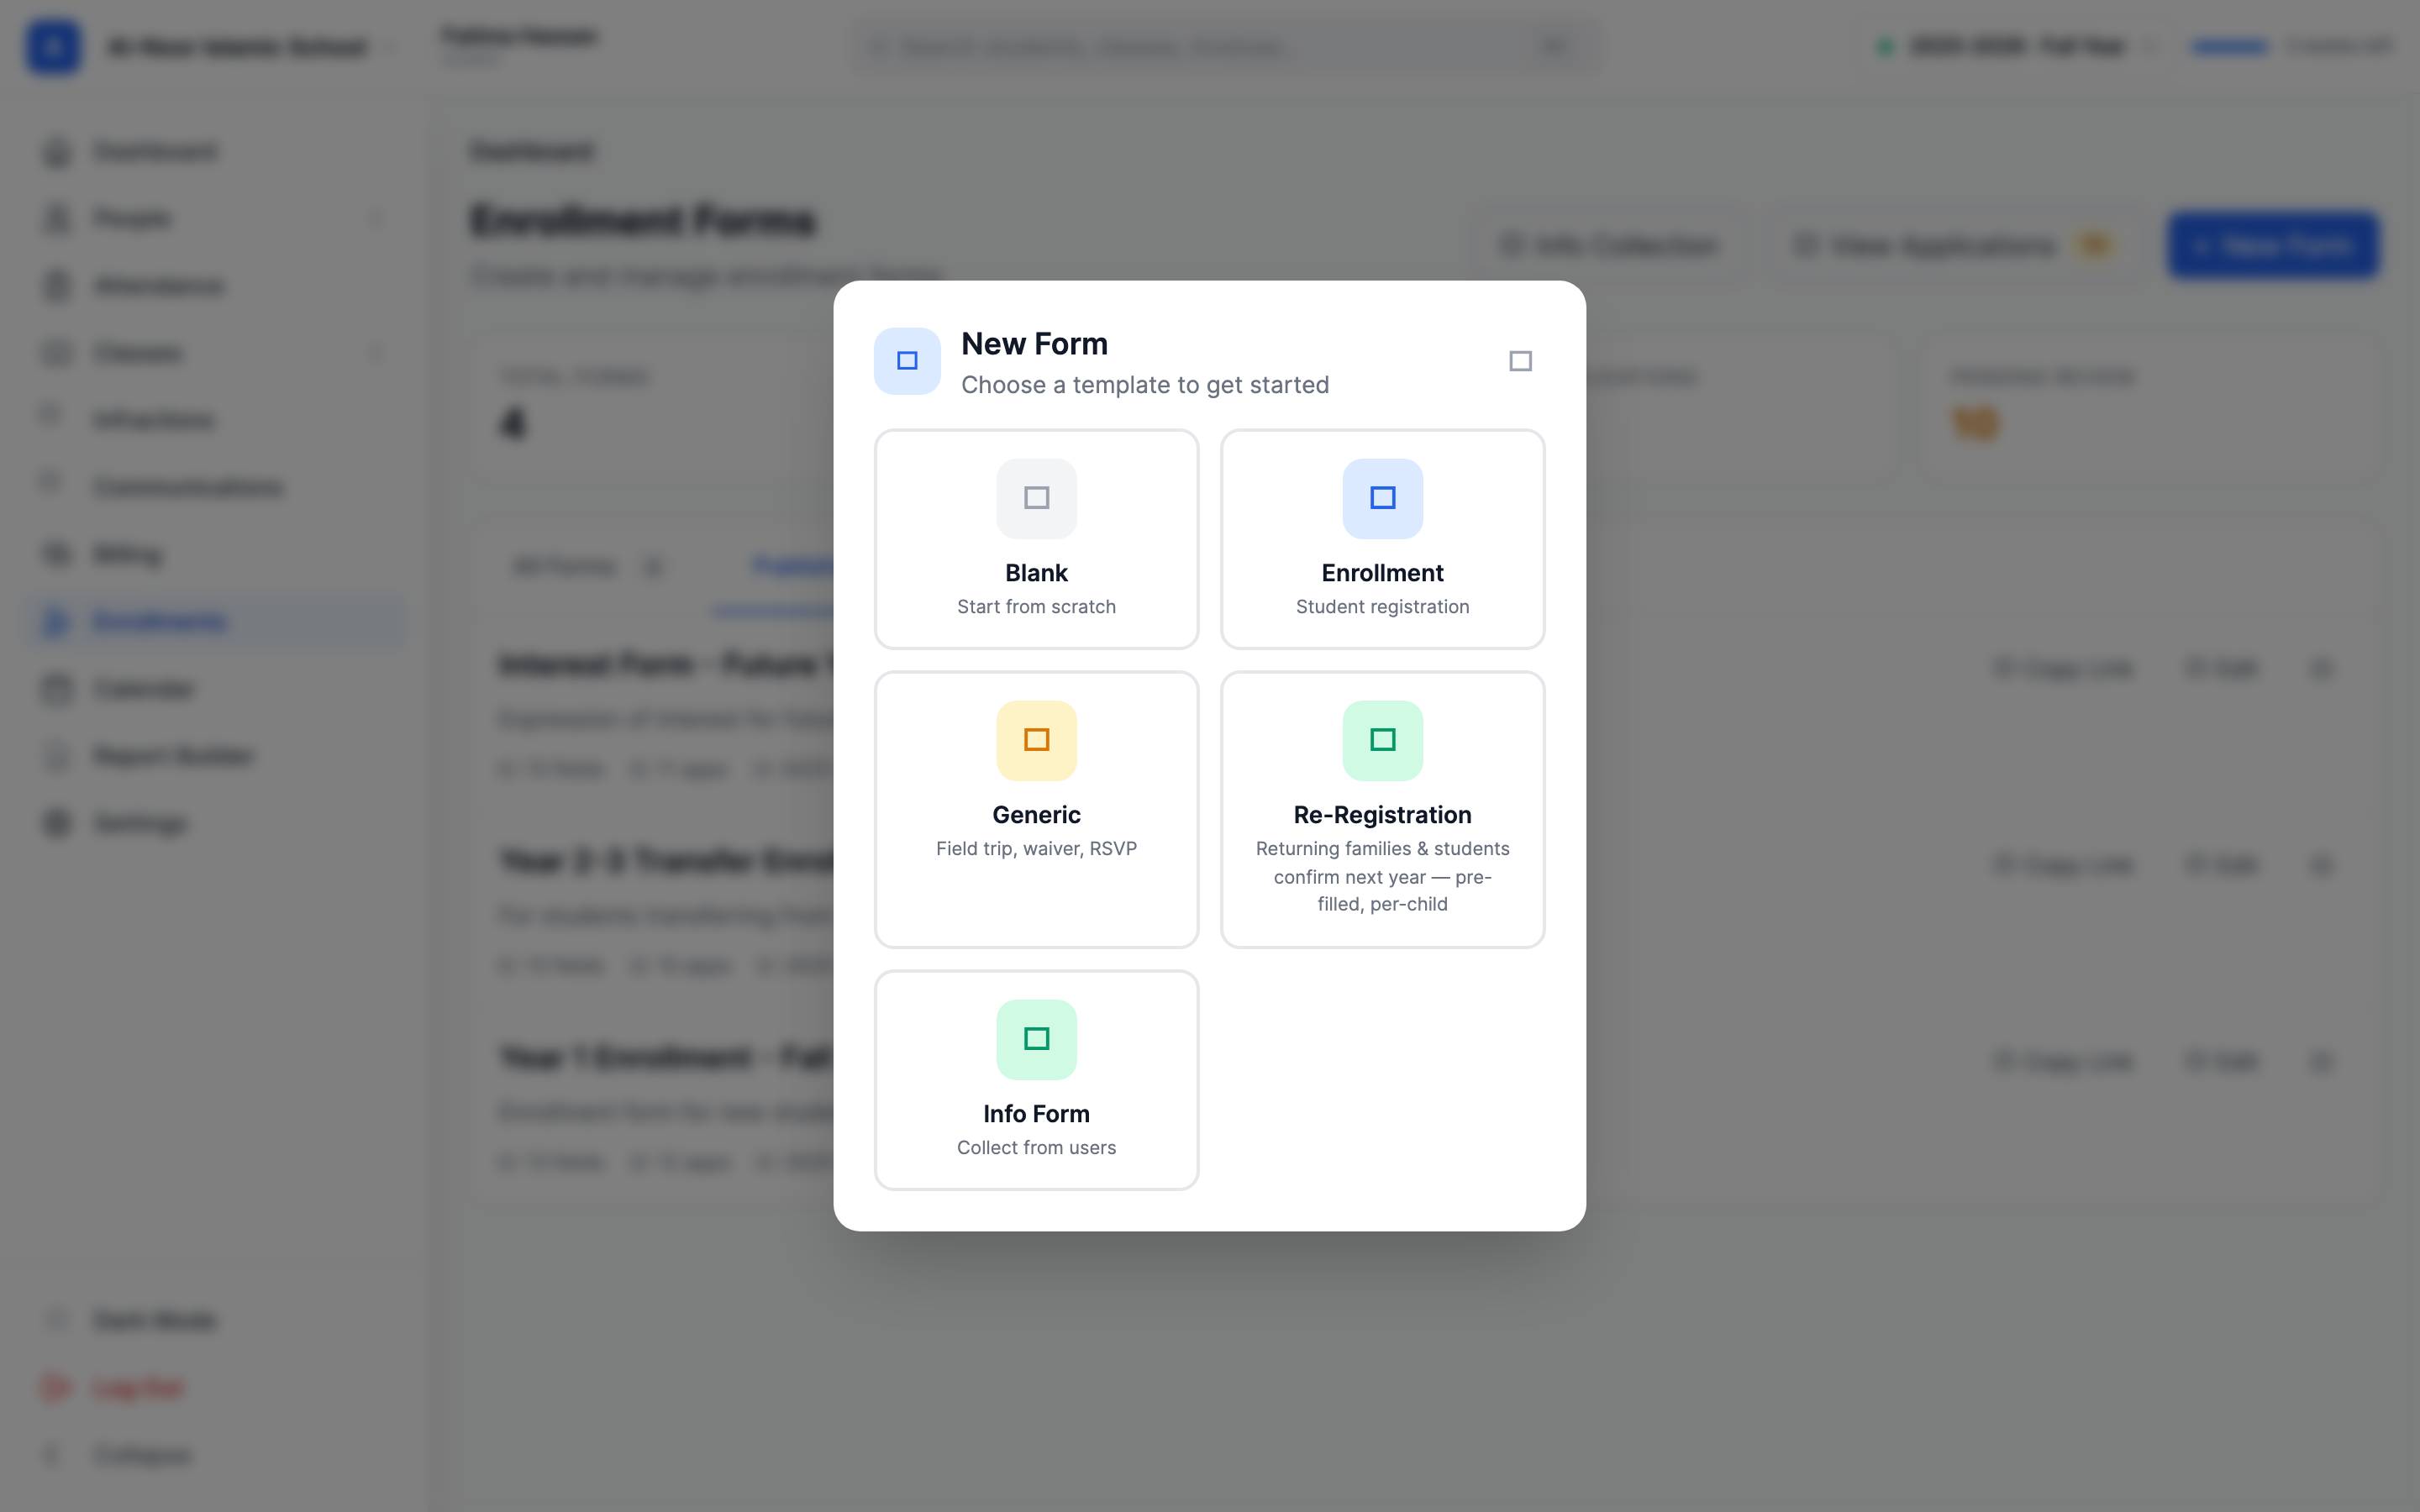
The form types, in plain English
- Enrollment — a full student application. This is the one that does everything: creates parent and student accounts, sends admission offers, and bills registration fees when you accept.
- Interest (an "Info Form" / lead form) — a no-commitment "tell me more" form. Accepting an interest form never creates accounts and never bills anyone; it just collects leads. MarkTrack forces this behavior automatically.
- Generic — a one-off form for a field trip, waiver, or RSVP. It starts with two locked fields, Your Name and Your Email, and is the only type that shows a simple Payment dropdown ("No payment required" or "Email invoice"). Generic forms don't run the full enrollment pipeline.
- Re-Registration — for families who are already with you and need to confirm next year. It's pre-filled and login-gated. This has its own guide; see Re-registration for returning families and students.
- Blank — start from scratch with no fields.
Account creation is locked to the template
Whether a form creates accounts is decided by its type, not a switch you flip. An Enrollment form creates parent + student accounts by default. Interest and Generic forms are permanently set to "no accounts" — accepting them never makes a login. (A student-only mode also exists for adult self-applicants, where the applicant gets their own student login and no parent is created.)
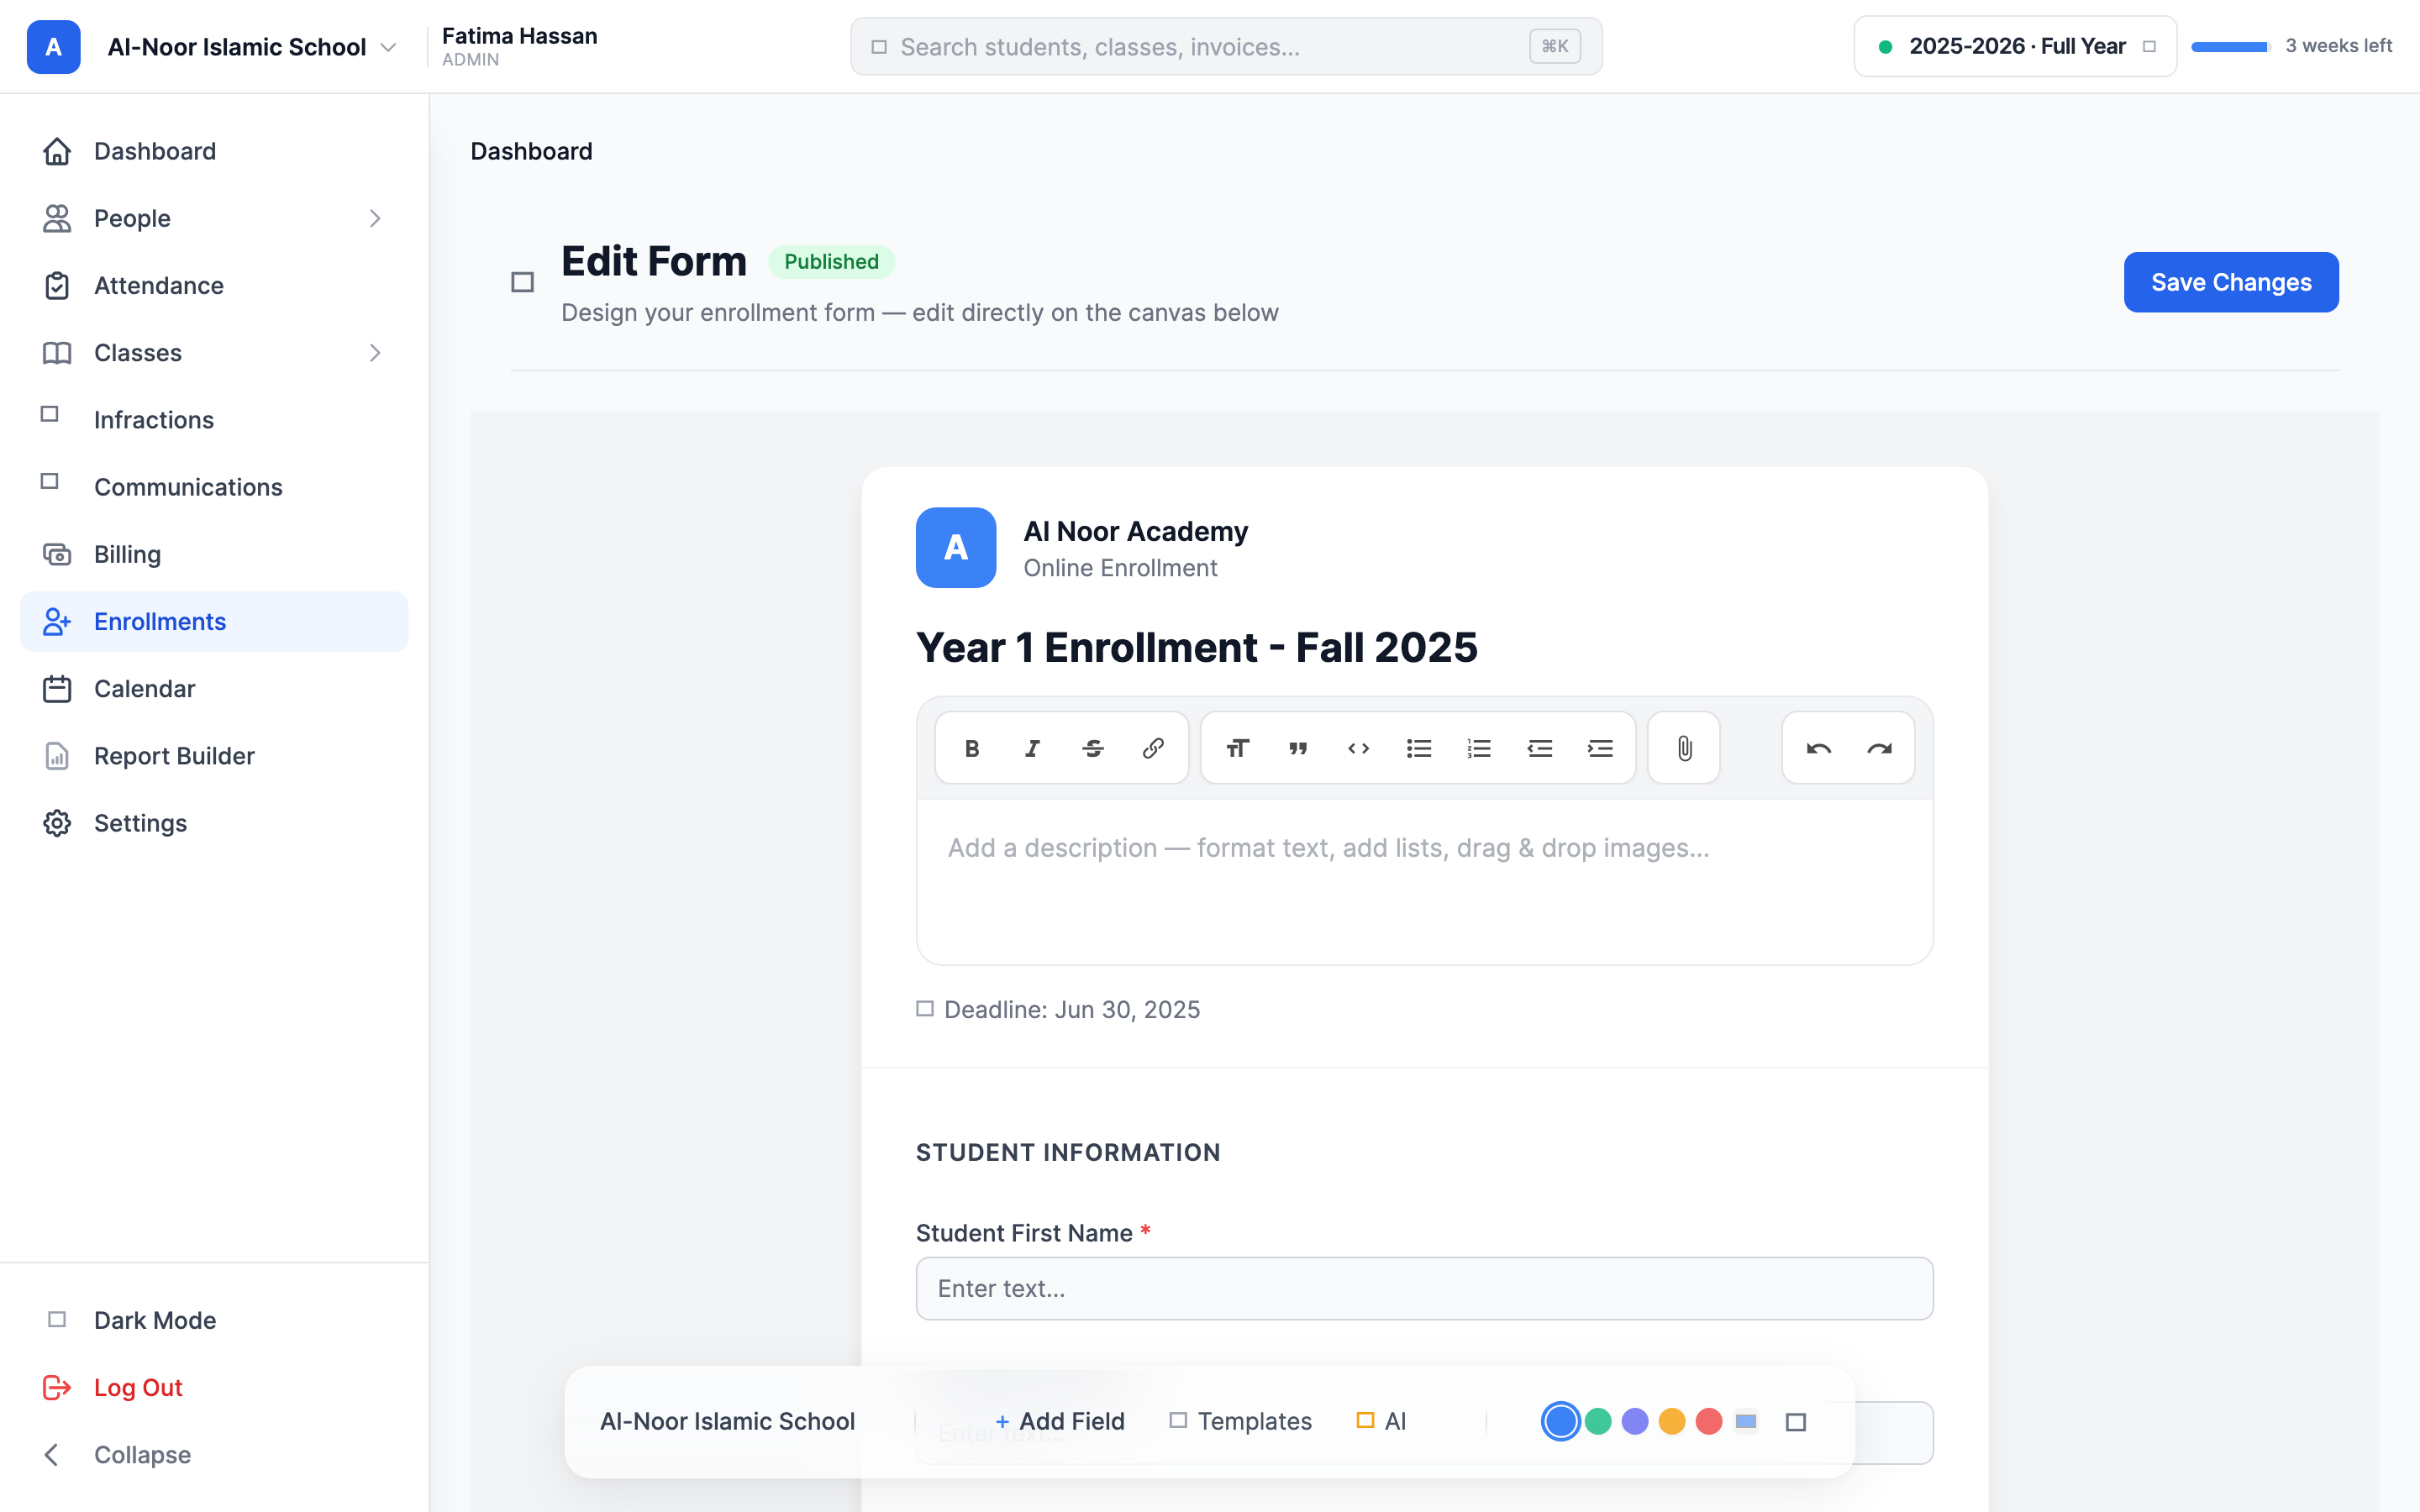
Step 2 — Build the questions on the canvas
After you create the form you land in the builder. The page is a live preview of the form with a floating bar at the bottom holding Add Field, Templates, AI, theme-color dots, and a gear icon (the settings drawer).
- Click Add Field to drop in a blank question, then choose its type.
- Or click Templates to insert a ready-made field (see the list below) — these come pre-labeled and pre-configured.
- Drag fields to reorder them. Click any field to edit its label, mark it required, or add options.
The field types you can add
- Short Text and Long Text — single-line and paragraph answers.
- Email Address and Phone Number — validated contact fields.
- Date and Number — a date picker and a numbers-only field.
- Dropdown, Single Choice (radio), and Multiple Choice (checkboxes) — pick-from-a-list questions. These need options before you can publish.
- File Upload — let applicants attach a document.
- Section Header — a label to group questions; not a real question.
- Children Section, Program Selector, School Selector, and Child's School — special fields tied to family applications, class auto-enroll, and multi-school forms (covered below).
The system field templates
The Templates button inserts the standard application questions so you don't have to label them yourself:
- Student Full Name (required), Date of Birth (required), Student Email, Student Phone.
- Parent/Guardian Name (required), Parent Email (required), Parent Phone (required).
- Parent 2 / Guardian Name, Parent 2 Email, Parent 2 Phone — for a second parent or guardian.
- Home Address.
Step 3 — Schedule tab: when the form is open
Click the gear icon and open the Schedule tab.
- Open Date — when the form starts accepting answers. Defaults to today.
- Close Date — when it stops. Leave blank for no deadline.
- Max Submissions — a seat cap. Leave blank for unlimited. Only live applications count toward the cap — rejected and withdrawn ones release their seat.
- Notify these emails on submission — comma-separated staff emails that get pinged when someone applies. Leave empty for no notifications.
- Email submitter a "Thanks" confirmation — sends the applicant an automatic thank-you. On by default.
"Accepting submissions" is a combination, not one switch
A form only accepts answers when it is Published, today is between the open and close dates, and the seat cap isn't full. If any one of those isn't true, the public link politely turns people away.
Step 4 — Billing tab: fees and discounts
The Billing tab controls registration fees, invoices, and discount codes. Because there's a lot here, it has its own guide: Collect fees and payments on enrollment forms. The short version: pick a Tuition Template for the fee, decide whether to Require registration payment on the form (pay before submitting) or leave Auto-create invoice on (bill after you accept), and optionally attach a Discount Code.
Step 5 — Options tab: who can apply and what happens
Open the Options tab from the gear. This is where the most important behavior lives.
Schools and school choice
- Schools — the pills at the top. Pick which schools this form serves; at least one is required (you can't uncheck the last one).
- Let applicants choose their school — only appears when the form serves two or more schools. Adds a School Selector so the applicant picks where they want to enroll. Without it, a multi-school form enrolls the student into every linked school.
Going multi-school removes the Program Selector
A Program Selector (class picker) only works on a single-school form with no school selector. If you add a second school or a school selector, MarkTrack quietly removes the class picker and shows a warning toast. Re-add your classes after you settle the school setup.
Auto-accept
Auto-accept submissions accepts and enrolls every applicant the instant they hit Submit — no admin review. Combined with Auto-create invoice, the family is created, enrolled, and billed automatically. Leave it off if you want to review applications first (most schools do).
Family Application — one parent, many children
Turn on Family Application to let one parent apply for several children on the same form. It adds an "Add Another Child" section to the public form, and a per-child question builder appears in this tab. Set Maximum children per application (1–50, default 10).
The per-child questions you can collect (some are locked because the system needs them):
- Child's Full Name (required, locked) and Date of Birth (required, locked).
- Gender, Grade, Previous School, and Medical Notes — optional, and you can add your own per-child questions too.
- On a multi-school family form, each child also gets a School picker so siblings can attend different schools.
Auto-enroll to Programs
Auto-enroll to Programs adds a Program Selector so applicants pick which class to join. Check the classes you offer, reorder them, and optionally group them into named Tracks (for example, "Track A — Daytime"). When you accept the application, the student is added to the classes they chose.
Confirmation message
The Confirmation Message textarea is the thank-you text shown on screen right after someone submits (for example, "Thank you for your application!").
How MarkTrack reads parent 1, parent 2, and the student
Here's the part that surprises people. MarkTrack doesn't need you to label fields with secret codes. When an application comes in, it reads your question labels and works out which answers belong to the student, which belong to parent 1, and which belong to parent 2. Understanding the rules helps you write labels that sort correctly every time.
It scans your questions top to bottom and looks for keywords in each label:
- Labels containing student, applicant, child, son, or daughter are treated as the student's answers.
- Labels containing parent, guardian, father, mother, dad, or mom are treated as a parent's answers.
- Labels containing emergency contact are kept separate — they don't get mistaken for a parent.
To decide parent 1 versus parent 2:
- If a label literally says Parent 1 / Primary, it's parent 1. If it says Parent 2 / Secondary, it's parent 2. These explicit labels always win.
- Otherwise, the first parent role MarkTrack sees becomes parent 1. So "Mother's Name" and "Mother's Email" both land on parent 1. If a different role shows up later — say "Father's Name" — that becomes parent 2.
- "Parent" and "Guardian" count as the same generic role, so plain "Parent/Guardian Name" fields all stay on parent 1.
Practical tip for clean labels
If you want two distinct parents, label the second set clearly — either "Parent 2 Name" or by a different role like "Father's Name" when the first set is "Mother's…". If both sets just say "Parent/Guardian," MarkTrack treats them as one and the same parent. The system field templates (Parent/Guardian Name vs Parent 2 / Guardian Name) already label them correctly for you.
One safety rule: an emergency contact is only ever promoted to a parent when the application has no parent answers at all and the applicant has no email of their own. This keeps an adult who applies for themselves from being filed as a child of their emergency contact.
Step 6 — Publish
- When the form is ready, click Publish (the green button).
- MarkTrack checks a few things before it goes live: there's at least one email field, every dropdown/choice question has options, and family forms have a children section. If something's missing you'll see a flash message telling you what to fix.
- From the form's detail page, use Copy Share Link to get the public URL families fill out.
Next, decide how you'll handle money and review: collect fees and payments and review and accept applications. Or browse everything in Enrollments.
More in Enrollments
Still stuck?
Our team is happy to walk you through it.