Collect fees and payments on enrollment forms
MarkTrack can collect a registration fee on any enrollment form, and it gives you two ways to do it: make the family pay before they submit, or send them an invoice after you accept them. This guide explains both, plus per-school fees, discount codes, and the login gate that holds an unpaid family at their billing page.
Start with the basics
There's a short companion guide that covers the simple mechanic of attaching a fee: Add a registration fee to an enrollment form. Read that first if you just need the quick version. This guide goes deeper into when the fee is collected, per-school amounts, discounts, and the login gate.
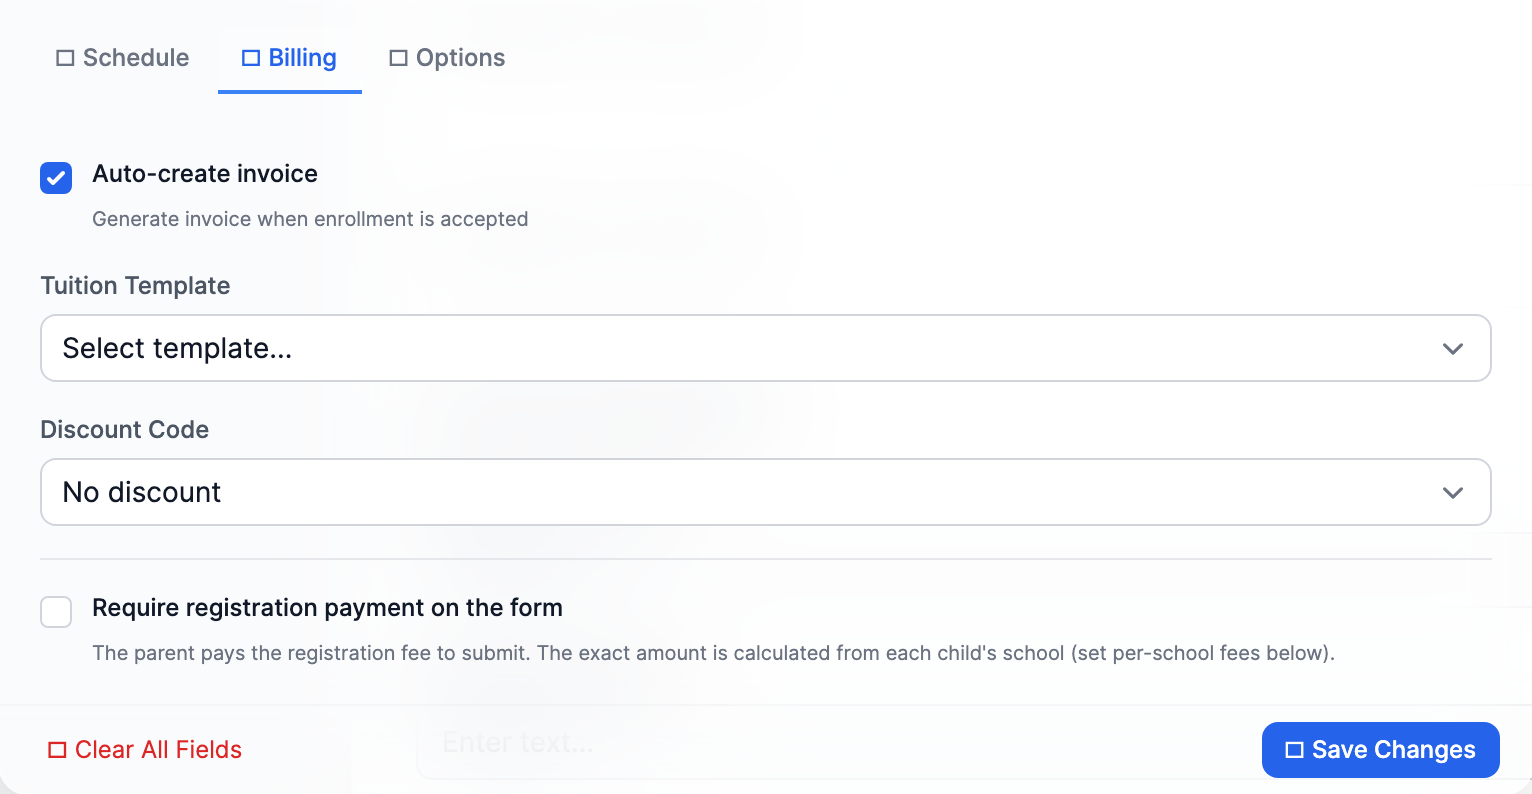
A fee is always a one-time tuition template (the template holds the dollar amount). You attach a template to the form, and then you choose when it gets collected. Both settings live on the Billing tab of the form builder (open the form, click Edit, click the gear icon, then Billing).
The two ways to collect a fee
Option A — Pay-on-form (pay before submitting)
- Turn on Require registration payment on the form.
- The public form now collects a card payment before the application can be submitted. The applicant literally can't finish without paying.
- When the payment succeeds, MarkTrack auto-accepts the application, creates the accounts and enrollments, and marks the fee invoice as paid — all from the payment confirmation, no admin click needed.
Option B — Invoice later (bill after you accept)
- Leave Require registration payment on the form off, and keep Auto-create invoice on.
- The family applies for free. When an admin accepts them (or they confirm by email), MarkTrack builds an invoice for the fee and emails a payment link.
- A family application gets one invoice with one line per child, each priced by that child's school.
Collecting money needs Stripe connected
Both pay-on-form and emailed invoices only charge once your school's Stripe account is connected. If it isn't set up, the public form shows "This school is not set up to accept payments yet." Configure tuition billing first, then turn the fee on.
Per-school registration fees
Each school can have its own default registration fee, set in the school's edit screen. MarkTrack figures out the right amount for any child using this order:
- A per-school override on the form's Billing tab (charge a different amount for one school).
- If there's no override, the school's own default registration fee.
- If neither exists, the form-level Tuition Template.
On a multi-school form, a Per-school registration fee overrides panel appears under the toggle. Set a different amount per school, or leave a school blank to fall back to its default. Because each child can attend a different school, a family invoice prices each child by their own school's fee.
Discount codes on enrollment forms
You can apply a discount two ways:
- A form default — pick a code in the Billing tab's Discount Code dropdown. It's applied automatically to the acceptance invoice.
- An applicant-entered code — the public form shows a "Discount Code (optional)" box that applicants can type into.
The "enter a code" box only shows if a default code is set
This one trips people up. The public discount-code box only appears when the form already has a default discount code selected in the Billing tab. If no default is chosen, applicants can't type a code at all — even if you have active codes elsewhere. So if you want families to enter codes, pick any code as the form default first.
A code the applicant types in wins over the form default. If a code runs out or expires between submission and acceptance, MarkTrack drops it and notes on the invoice that it was issued at full price — it never silently overcharges or breaks. Discount codes are created and managed under Billing → Discount Codes.
The registration fee gate (holding an unpaid family at billing)
Schools that require payment up front can turn on a login gate. This is a per-school setting, not a per-form one, and it lives in the Tuition Billing settings, not the form builder.
- Go to Billing and open the tuition billing dashboard for the school.
- Open Billing Settings and find the Access Control section.
- Turn on Require Paid Registration.
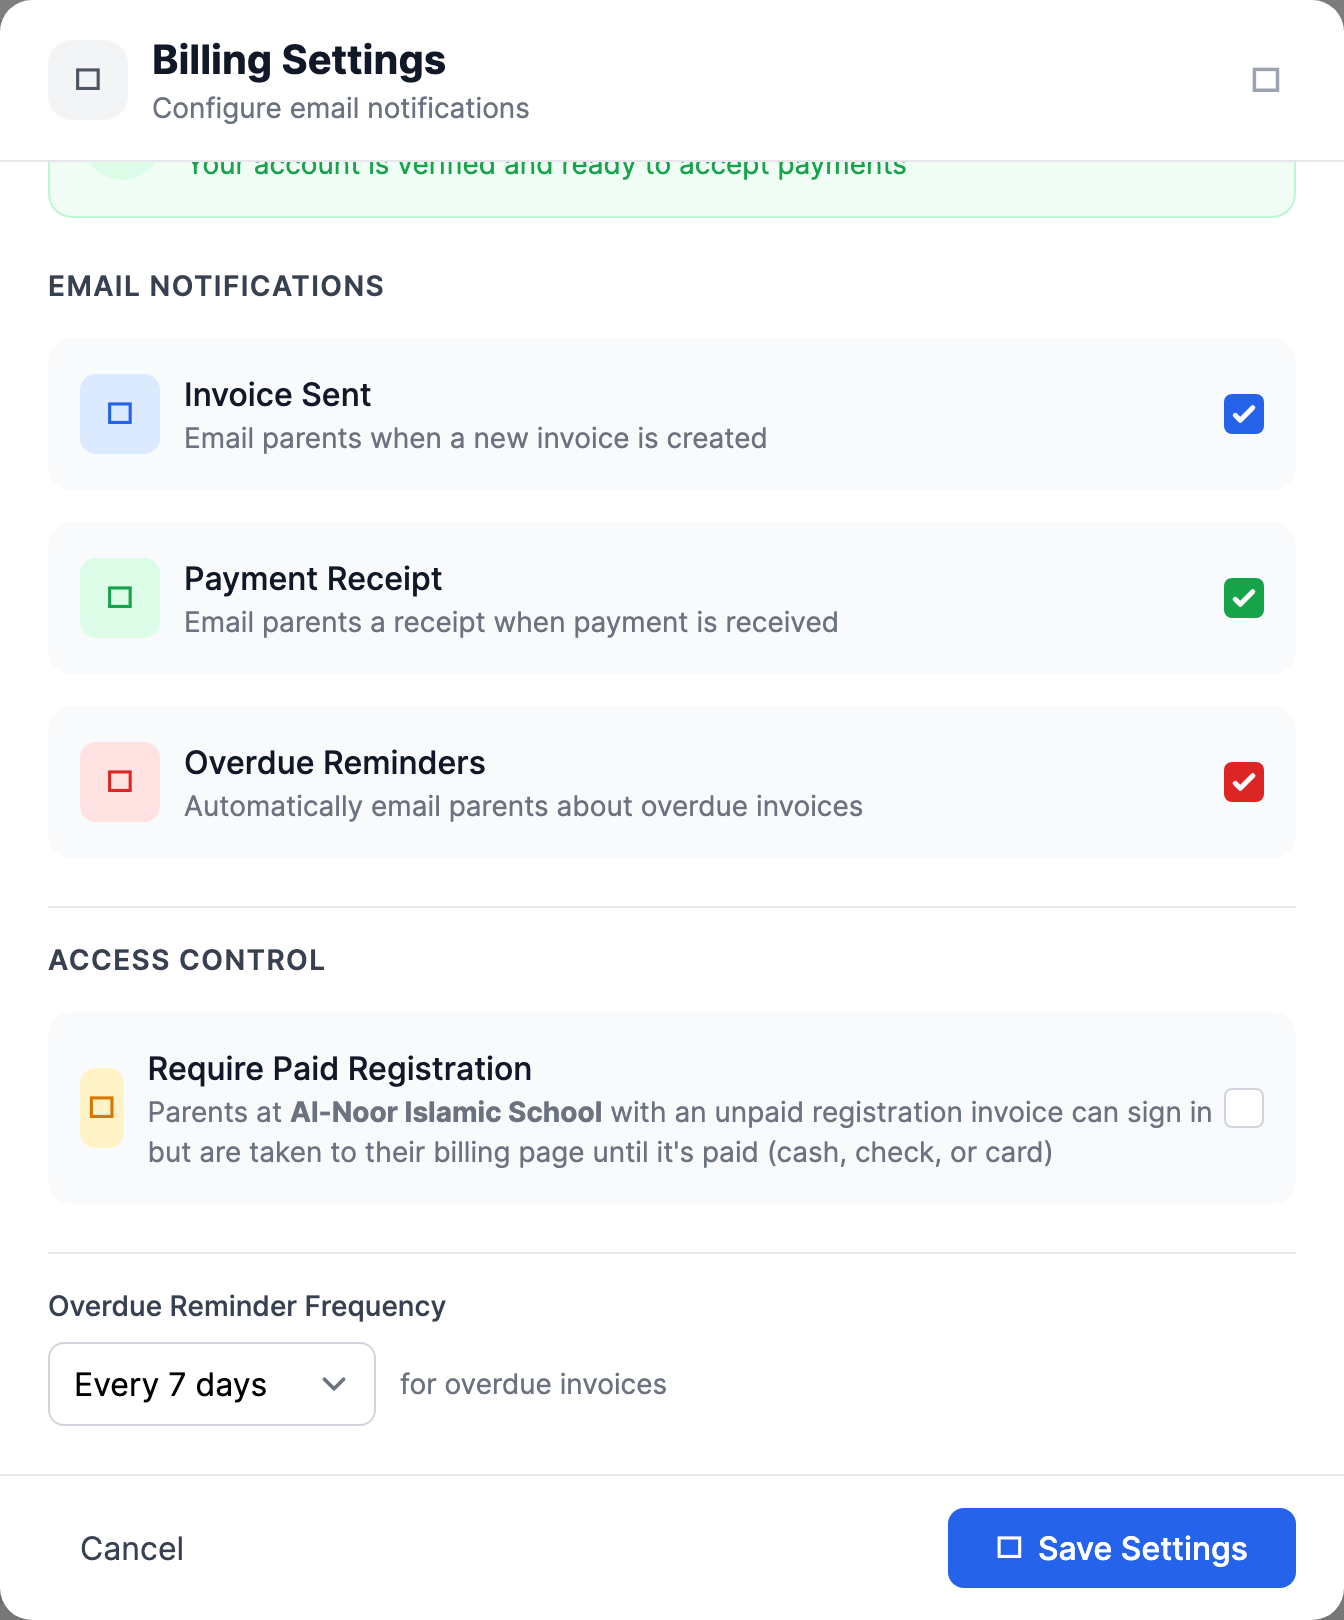
Exactly what the gate does
It does not block login. A parent with an unpaid registration invoice can still sign in — but on every page they're redirected to their billing dashboard with the message "Please pay your registration invoice to access [School]." Once they pay (by card, cash, or check), the gate releases. Invoices where an ACH payment is still in flight are exempt, and the billing, sign-in, and password pages always stay reachable.
Automatic invoice templates
When Auto-create invoice is on, the invoice is built automatically the moment the application is accepted or confirmed, then emailed to the family marked as sent. There's nothing more to click. On a multi-school form, MarkTrack only auto-creates the invoice when it can resolve a fee for the schools involved — if you require payment, every school needs a fee template; if the fee is optional, at least one does.
Now that fees are set up, move on to reviewing and accepting applications, or browse all guides in Enrollments.
More in Enrollments
Still stuck?
Our team is happy to walk you through it.