Add students (child accounts and independent students)
There are two kinds of student accounts in MarkTrack: a child student (no email, no login — their parent manages everything) and an independent student (has an email and their own login). This guide shows every way to add students: one at a time, many at once with a CSV file, and automatically from enrollment applications. It also explains exactly which emails go out, so nobody on your end is surprised.
The child/adult choice matters because it changes what the student can do. A child student can never log in — MarkTrack keeps their login switched off no matter what. An independent student gets a temporary password by email and can sign in right away.
Before you start: parent first, child second
A child student must be linked to a parent, and the parent has to exist before you can add the child. If the family is new, create the parent account first (the Add Student window has a Create parent shortcut for this), then add the child.
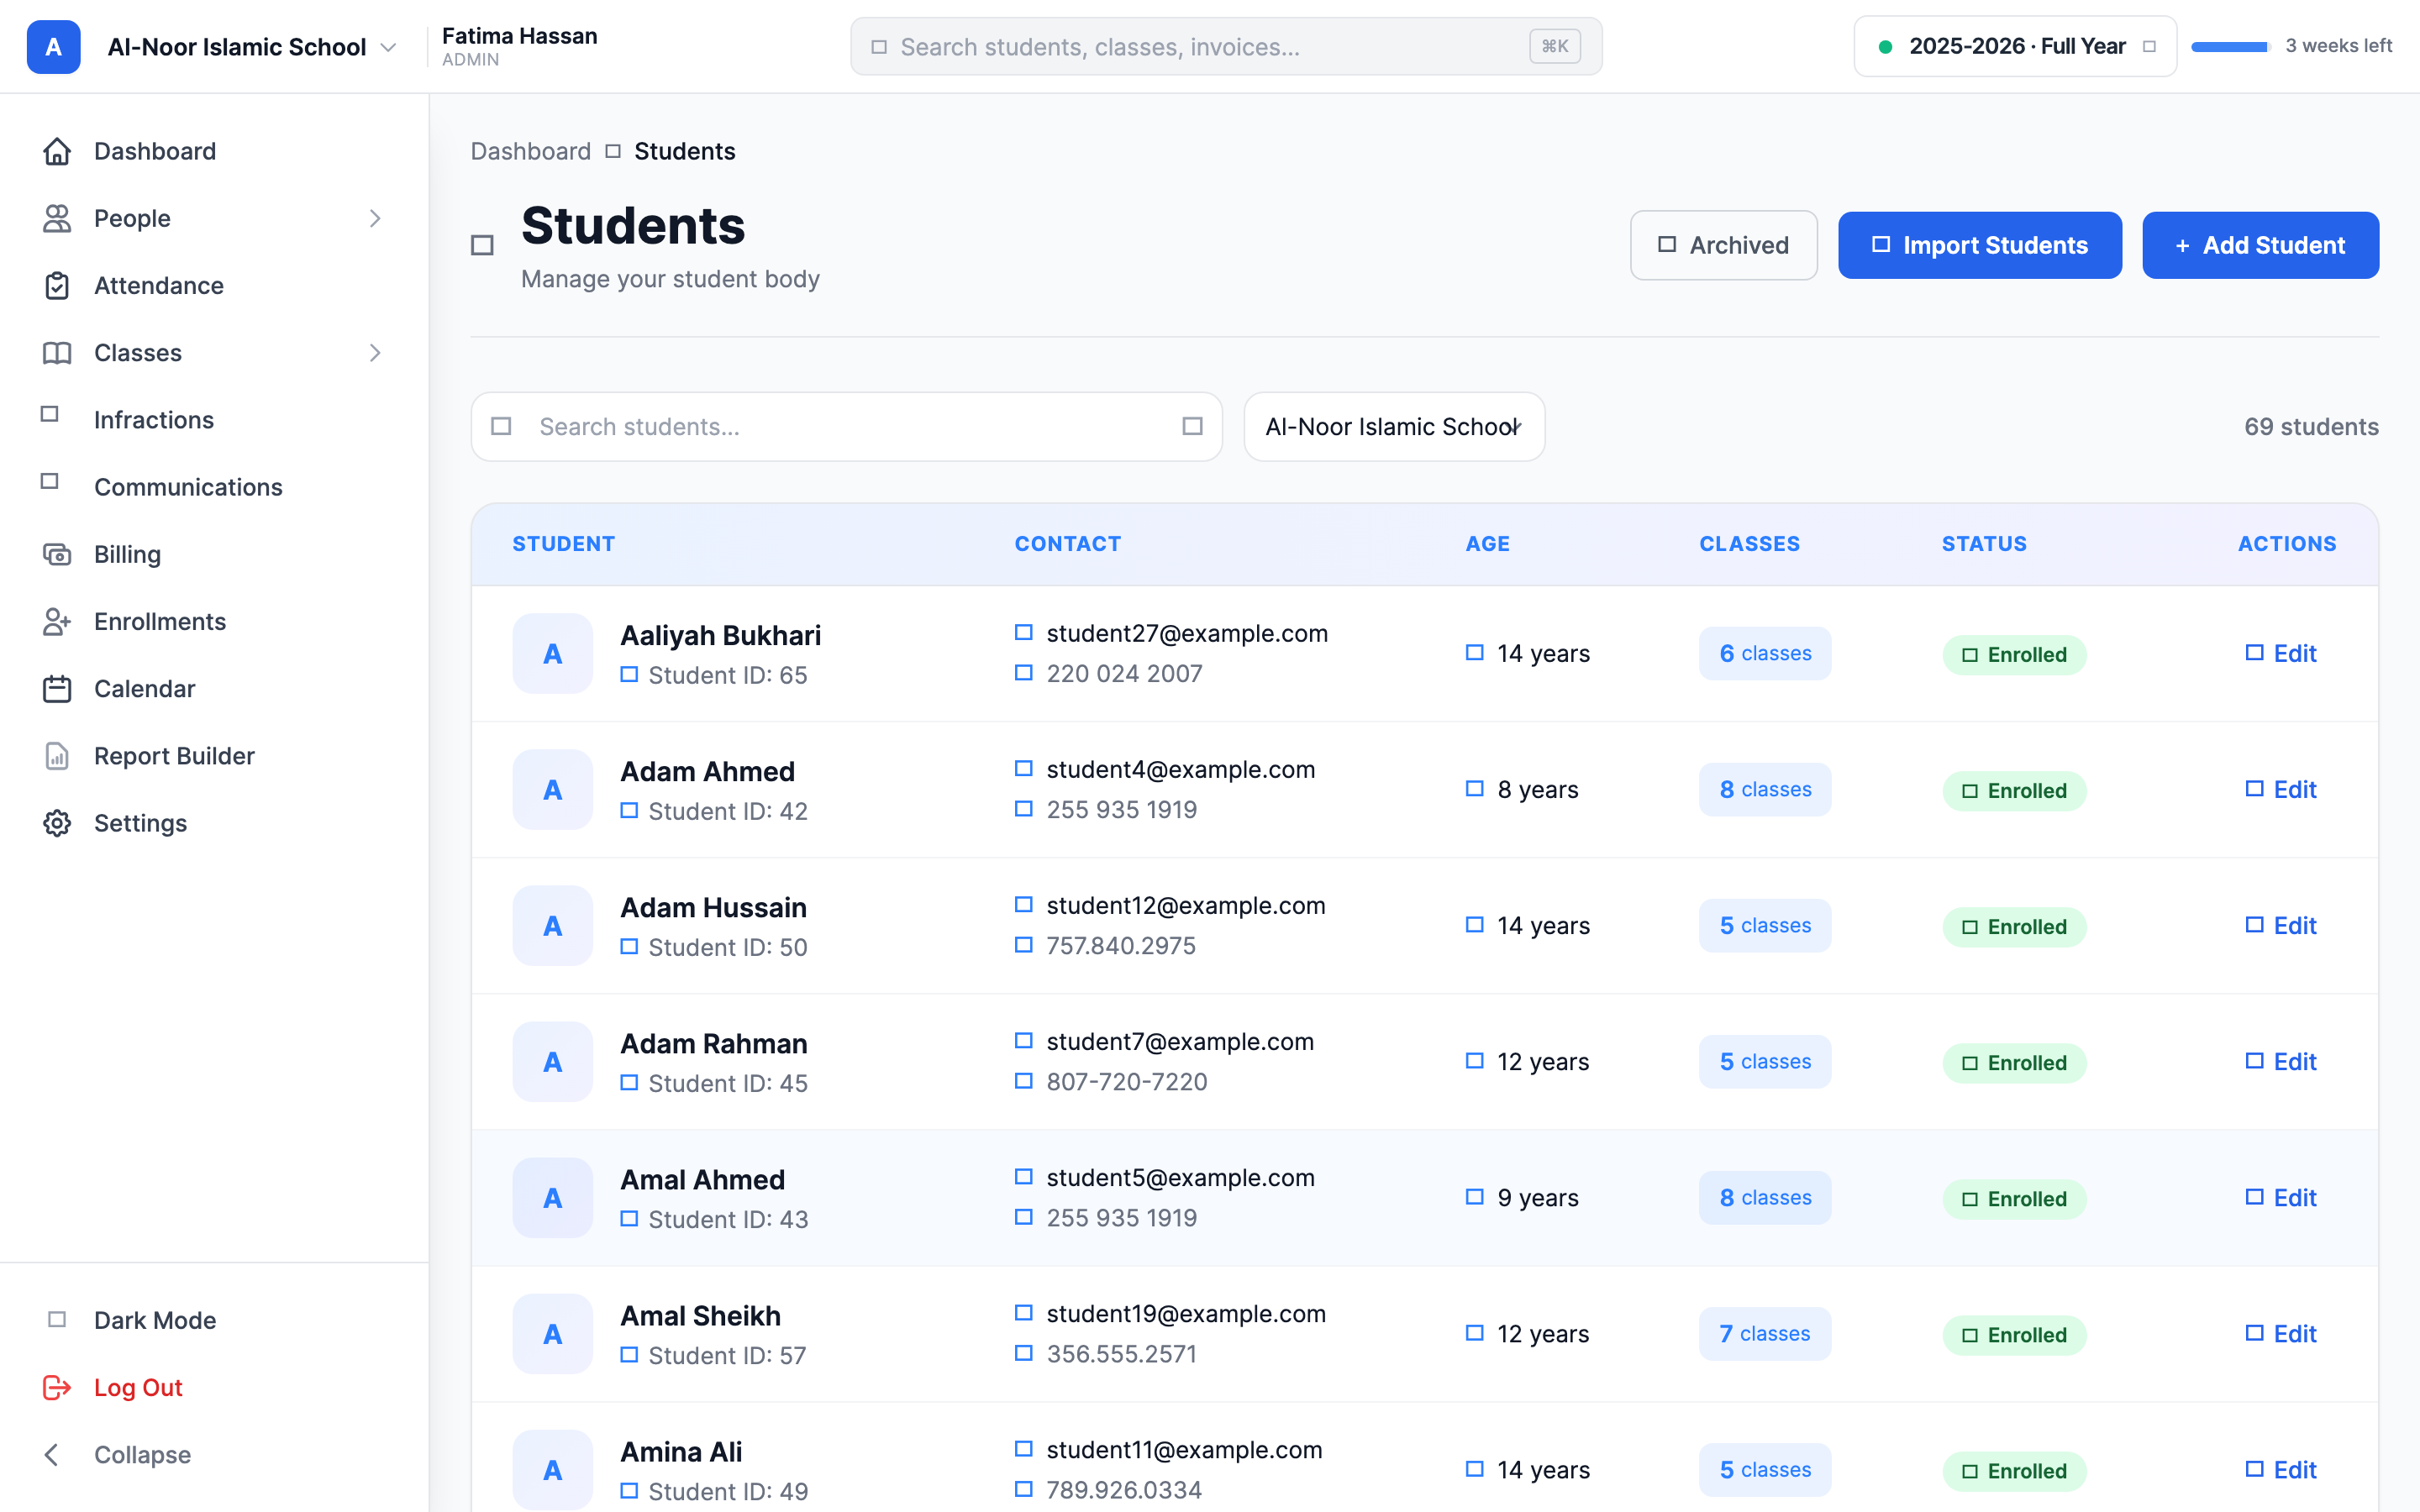
Step 1 — Open the Students page
- In the left sidebar, open People and click Students.
- You'll see three buttons at the top: Send All Credentials, Import Students, and Add Student.
Step 2 — Add one student
- Click Add Student. The Add New Student window opens.
- Type the student's Full Name (required).
- Optionally pick a Date of Birth — the student's age is calculated automatically from it.
- Now decide the account type with the Student is a child (no email/login account) checkbox. It is checked by default.
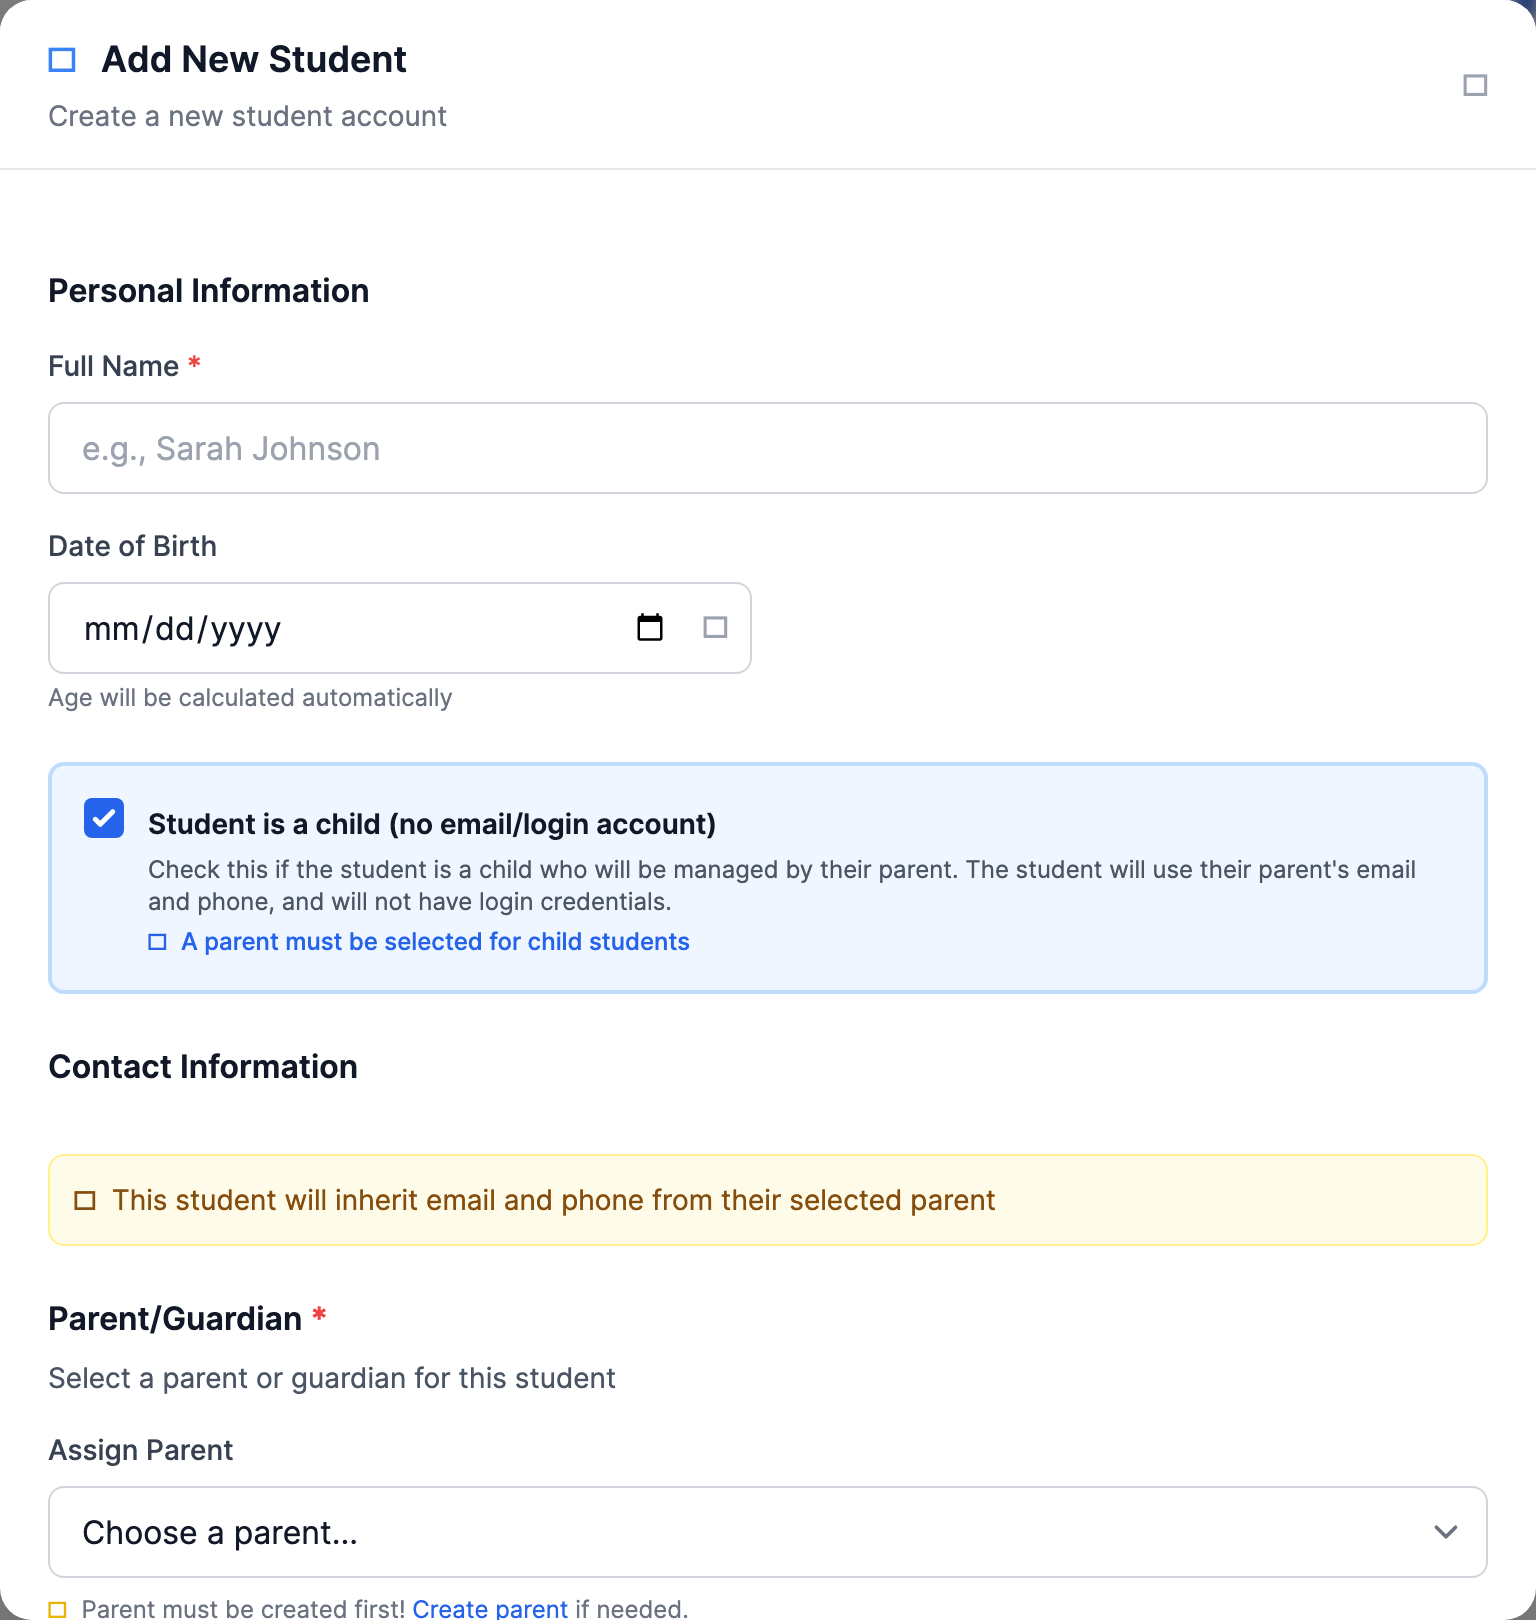
Option A — Child student (checkbox checked)
- The email and phone fields disappear — a child student doesn't need them.
- Parent/Guardian becomes required. Pick the parent from the Choose a parent... dropdown.
- If the parent isn't in the list yet, click the Create parent link, create them, then come back.
- Click Create Student. No email is sent. The student has no password and can never log in — their parent sees their grades, attendance, and billing through the parent account.
What a child inherits from the parent
The form says the child will use the parent's email and phone. In practice the child record copies the parent's phone number only — it does not copy the email, because every email in MarkTrack must be unique to one account.
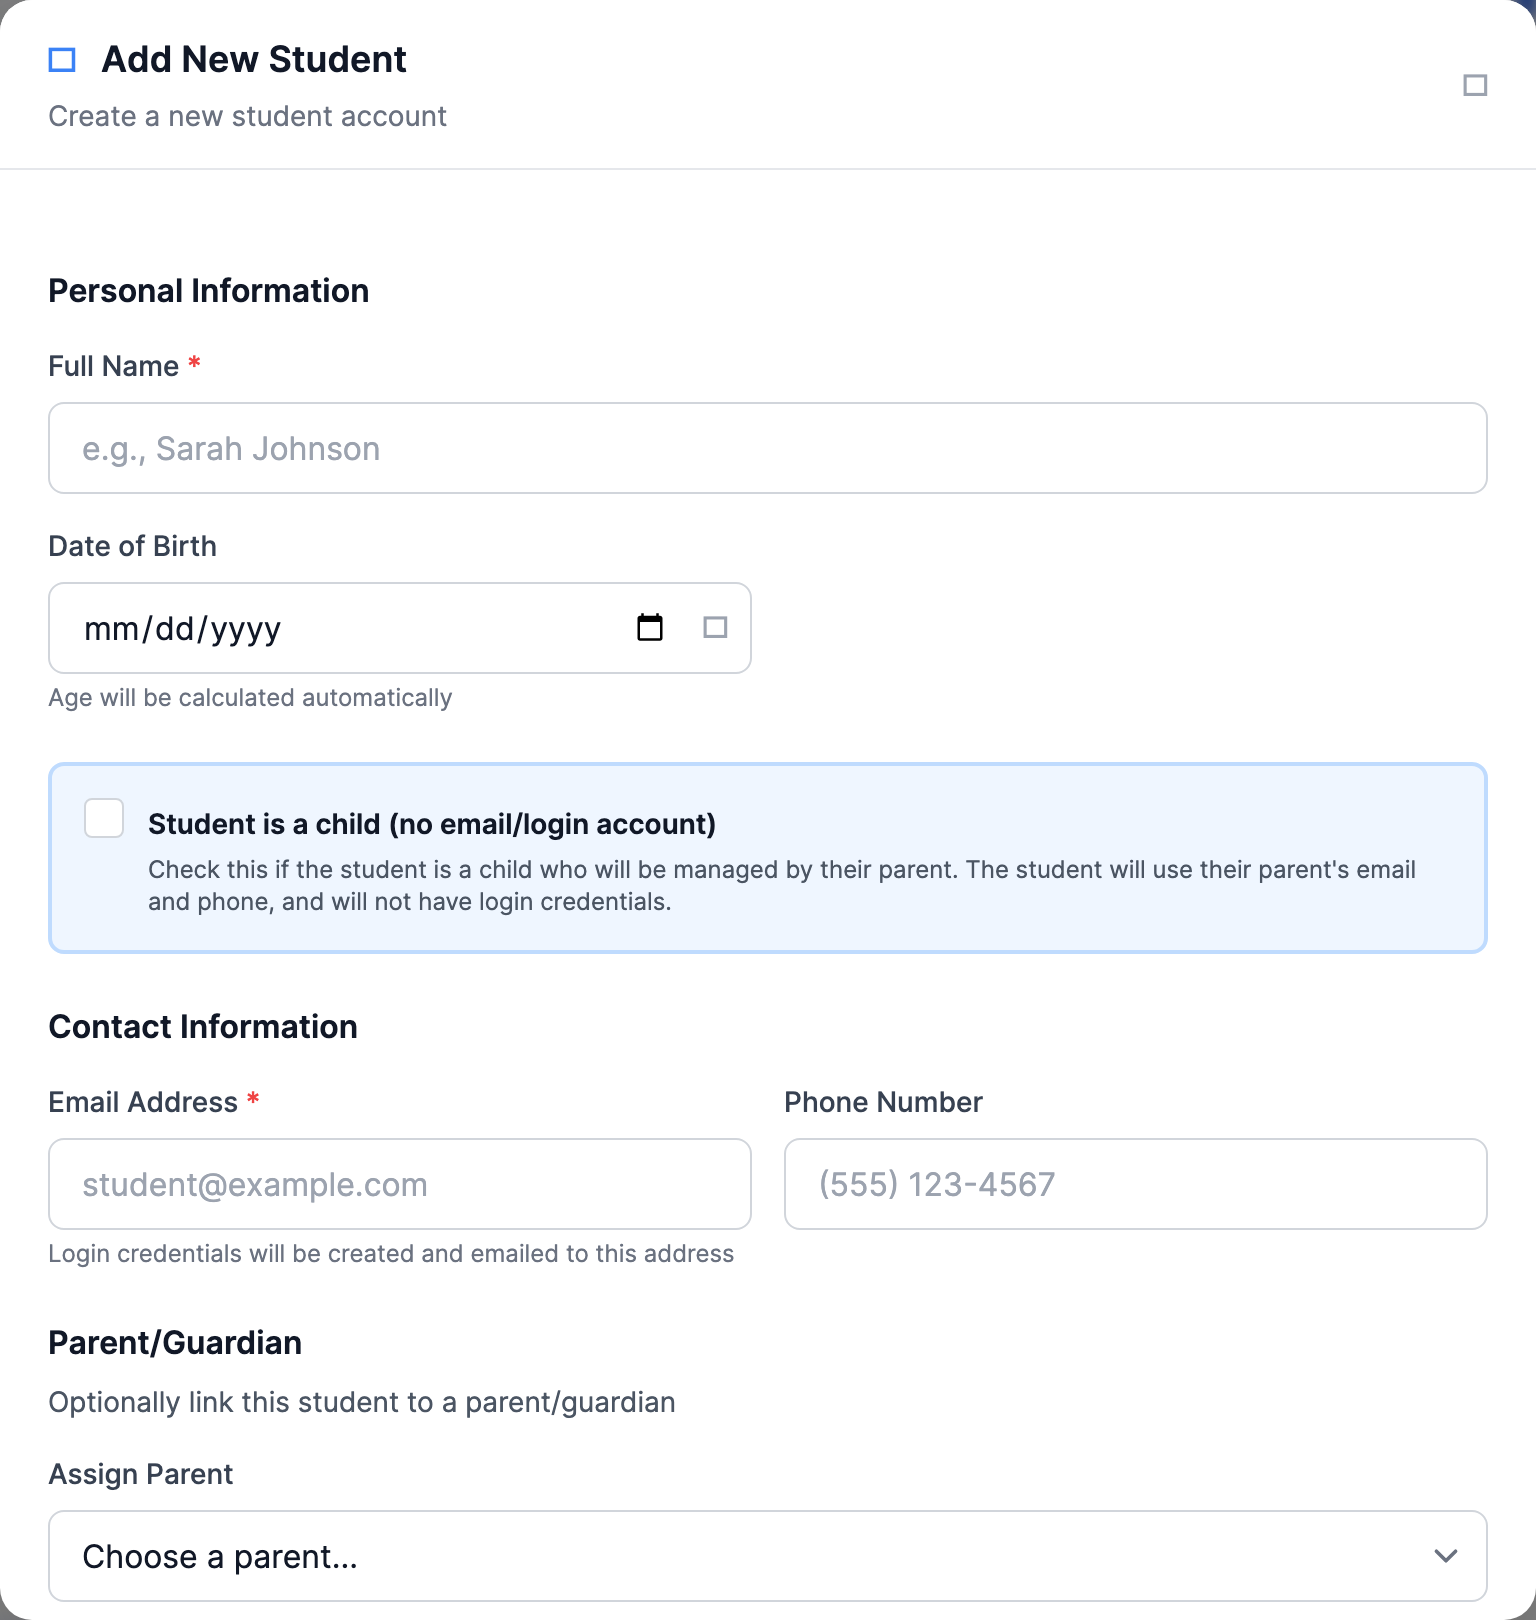
Option B — Independent student (checkbox unchecked)
- Uncheck Student is a child. The form switches: Email Address becomes required, Phone Number is optional, and the parent dropdown becomes optional ("Optionally link this student to a parent/guardian").
- Click Create Student. MarkTrack generates a temporary password and emails it to the student right away (subject: "Welcome to [your organization] - Your Login Credentials").
- You can still link a parent — an independent student with a linked parent sees their own work, but the parent handles the billing. An independent student with no parent linked manages their own invoices and payments.
Either way, the new student is automatically added to the school you're currently viewing. If you opened the Add Student window from inside a class, the student is also enrolled into that class.
Emails are permanent — check the spelling
Every email address in MarkTrack is unique across the whole platform, and it cannot be changed after the account is created. If you typo an email, you'll see "is already linked to an existing account" (if it belongs to someone else) — or worse, the credentials email goes to the wrong address. A typo'd account has to be archived, deleted, and recreated. The one exception: you can add an email to a child student who never had one.
Step 3 — Or import many students with a CSV file
For a whole roster, use the import instead of clicking Add Student fifty times:
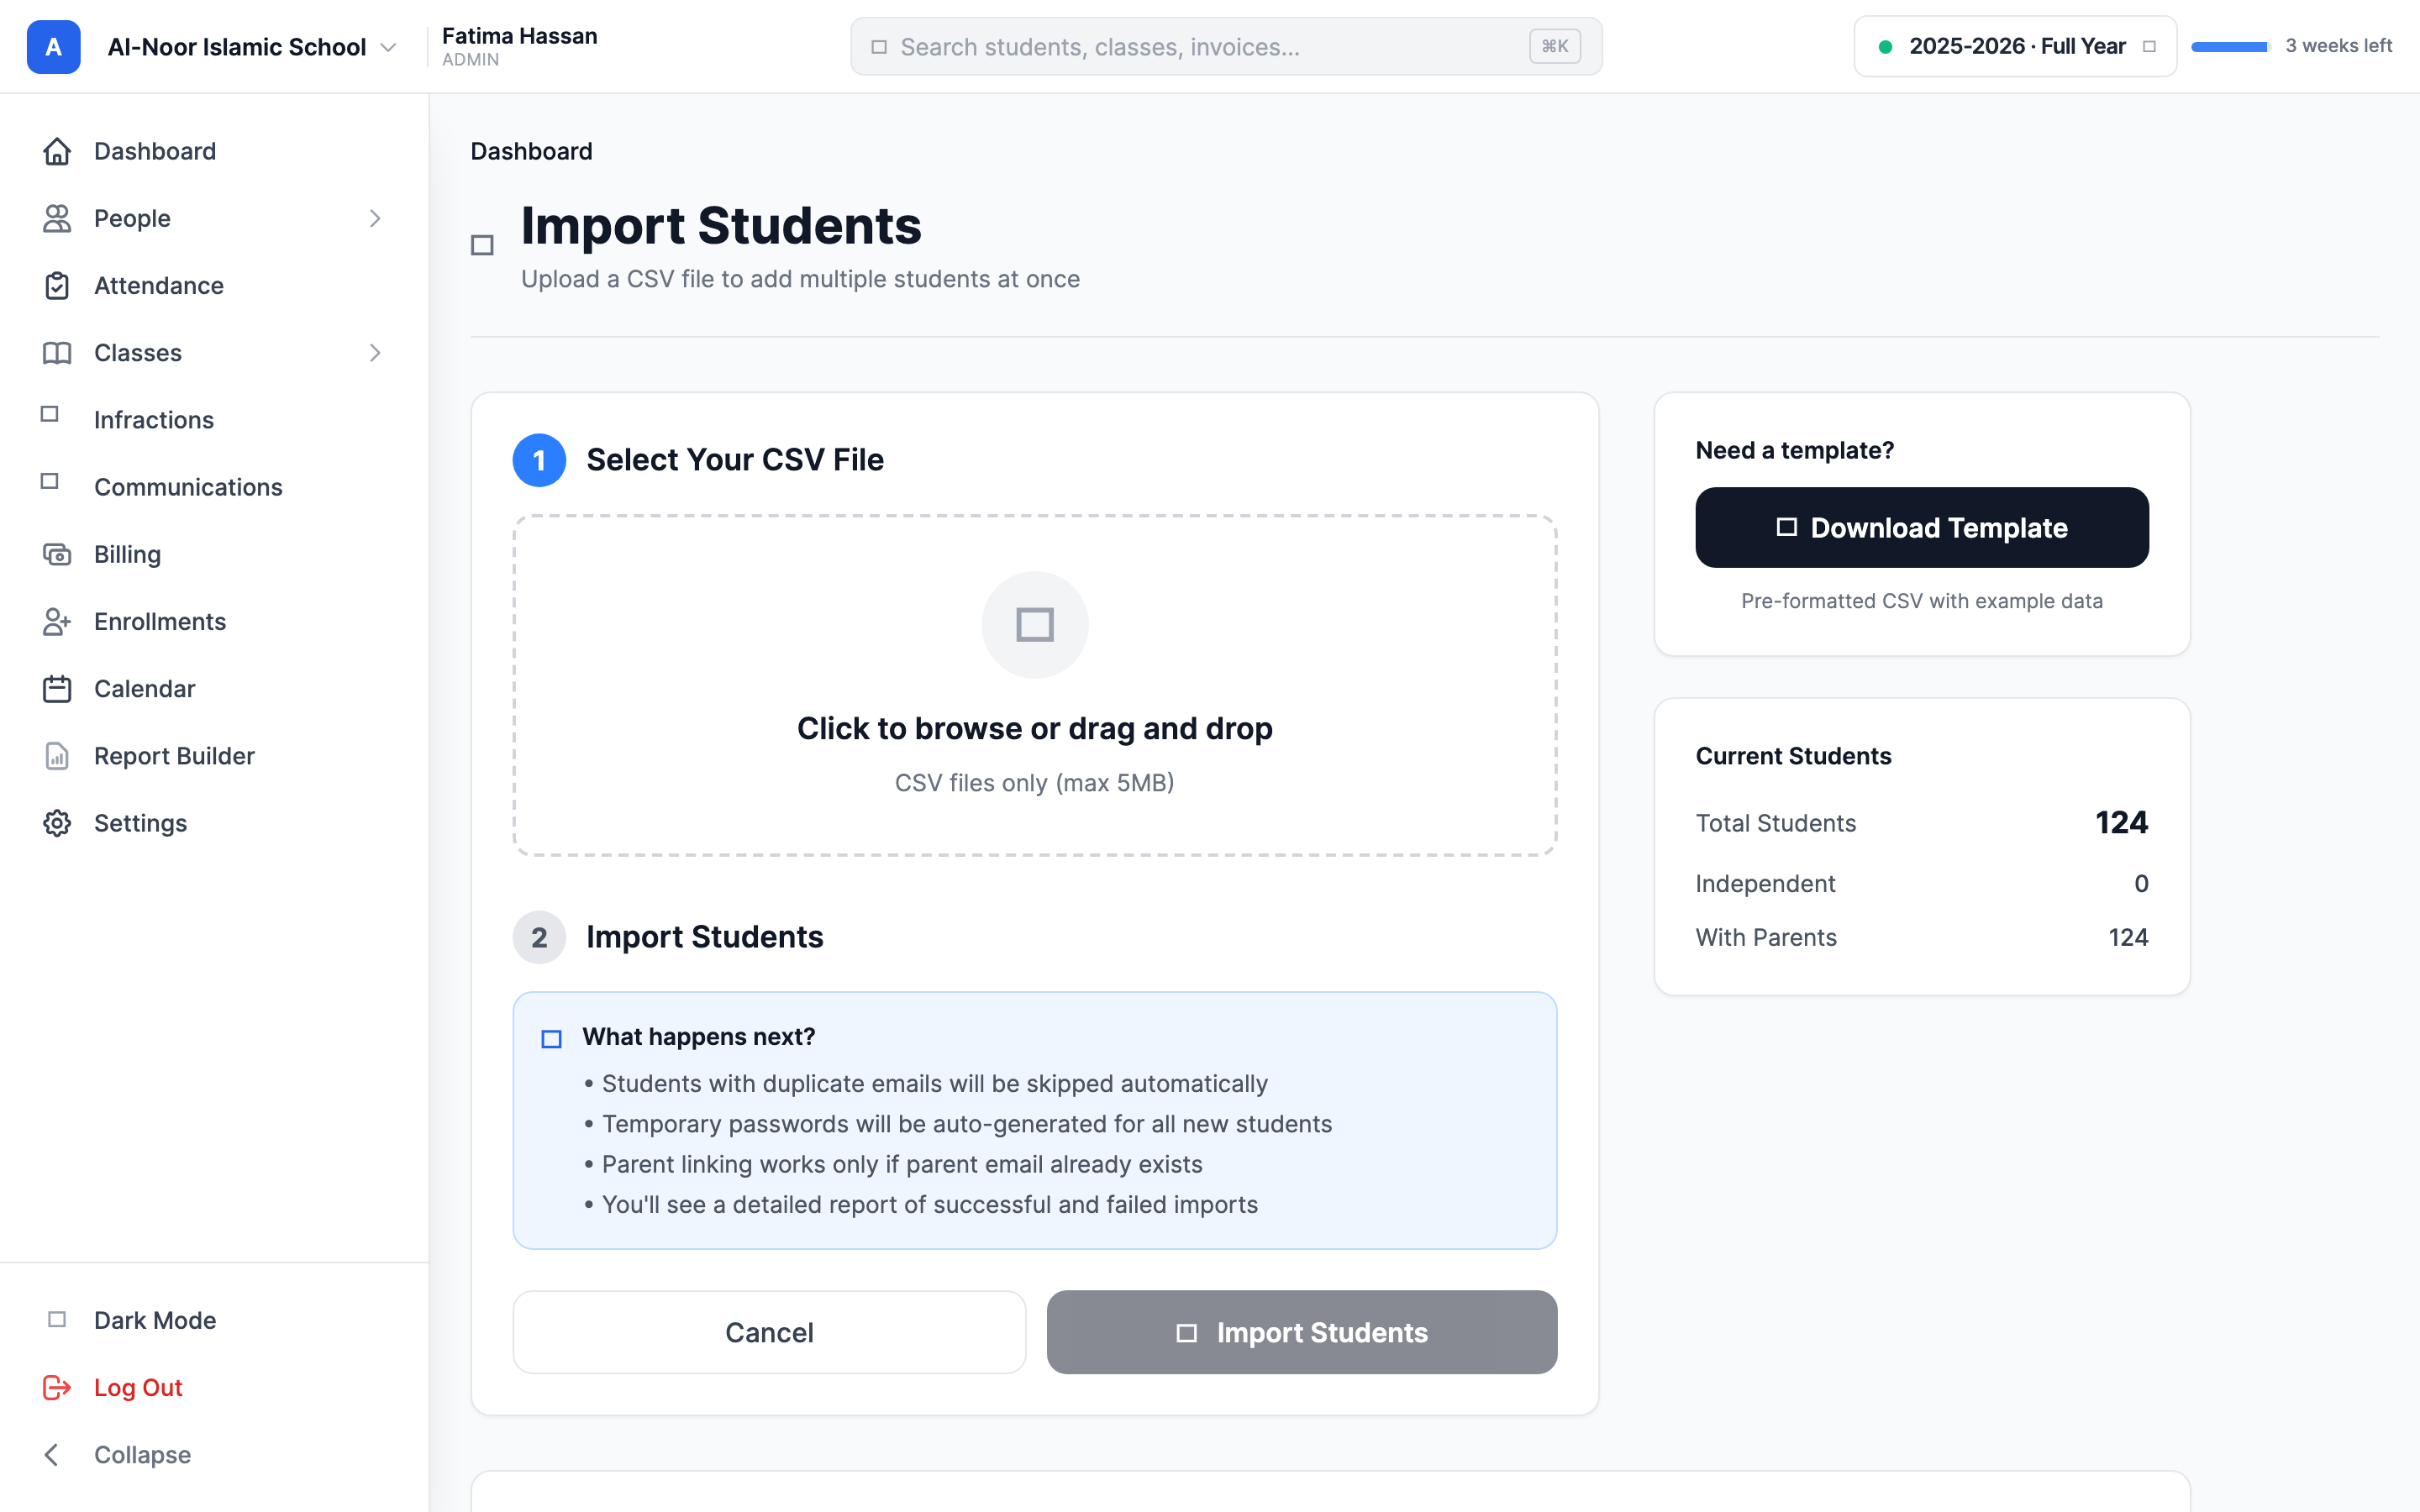
- On the Students page, click Import Students.
- Click Download Template to get a sample CSV you can fill in.
- The columns, in this exact order: name, email, phone, dob (format YYYY-MM-DD), parent_email, and class_names (separate multiple classes with a pipe, like
Math 101|English 9A). Column order matters; a header row is optional. - Upload your file (.csv only, 5 MB max) and run the import.
How each row is handled:
- A row with an email creates an independent student with a login.
- A row with no email but a parent_email creates a child student — and that parent must already exist, or the row fails with "Parent with email X not found. Please create parent first."
- A row whose email already belongs to any account is skipped ("Email already exists").
- class_names enrolls the student into matching classes automatically.
- The results screen shows how many rows were imported, skipped, and failed, with the reason for each problem row.
Three things the import does differently
1) The import sends no emails at all — each new student's temporary password is shown once on the results screen, so copy them before you leave the page (or use Send Credentials later, see below). 2) Imported students are placed in your organization's first school, not necessarily the school you're currently viewing — move them afterwards if needed. 3) Parents referenced by parent_email are never created for you.
Students created from enrollment applications
If a family applied through one of your online enrollment forms, you don't need to retype anything — accepting the application can create the accounts for you. Four ways this happens:
- The parent confirms by email: your acceptance email contains a confirmation link; when the parent clicks it, MarkTrack creates the parent account (if new), the student account(s), and the enrollment, then sends an "Enrollment Confirmed" email.
- Auto-accept: if the form is set to auto-accept, all of that happens the moment the application is submitted.
- The "Create Student" button on a single application's detail page — you create the accounts yourself, instantly. Family applications create every sibling in one go. It's safe to click only once; a second click just tells you "This application has already been converted to a student."
- The bulk "Create accounts for N applicants" button on the Accepted tab of Enrollments → Applications — creates accounts and invoices for every eligible accepted applicant at once and emails the login details. Applicants on pay-on-the-form forms are skipped (they get accounts when they pay). You'll get an in-app notification when the batch finishes, with created/skipped/failed counts.
In all four cases: new parents get a "Your Parent Account Has Been Created" email with their password, children are created as child students (no login), and an adult who applied for themselves gets an independent account plus a "Your Student Account Has Been Created" email. Forms set to "no accounts" (interest forms) never create accounts.
One more path: self-signup with your organization code
If you share your organization code, people can register themselves on the public sign-up page. Self-registered accounts default to a Student account in your organization's first school.
Sending (and resending) login details
Two tools on the Students page handle passwords after the fact:
- Send Credentials (per student, in the table row): generates a fresh temporary password and emails it to that student. After the first send the button reads Resend. It disappears once the student has actually logged in.
- Send All Credentials (N) (top of the page): does the same for every student in the current school who has an email and has never logged in. Child students are skipped — they have no login.
Every send resets the password
Each click generates a new temporary password and the old one stops working. If a student was just emailed a password and you press Send All Credentials again, the password in their inbox is dead — they'll need the newest email.
Want to add the adults too? See Add teachers, admins, and parents, or browse all guides in Users & Accounts.
More in Users & Accounts
Still stuck?
Our team is happy to walk you through it.