Understand multiple schools and what's shared
In MarkTrack your account is one organization — your overall institution. Inside it you can run one or several schools. A "school" here means a program or division: a Weekend Maktab, a Hifz Program, a Full-Time Madrasah, and so on. Each school keeps its own students, teachers, classes, attendance, and billing separate from the others, while a few things stay shared across the whole organization. This guide explains how schools are created, how to switch between them, and exactly which data is kept separate versus shared.
Getting this right matters because most pages in MarkTrack show you one school at a time. If a student or class seems to be "missing," the usual reason is simply that you are looking at the wrong school. The school switcher (covered below) is how you move between them.
One organization, many schools
Think of the organization as the umbrella and each school as a program under it. A student in your Sunday School and a student in your Hifz Program are completely separate rosters, even though they live in the same organization.
How schools get created
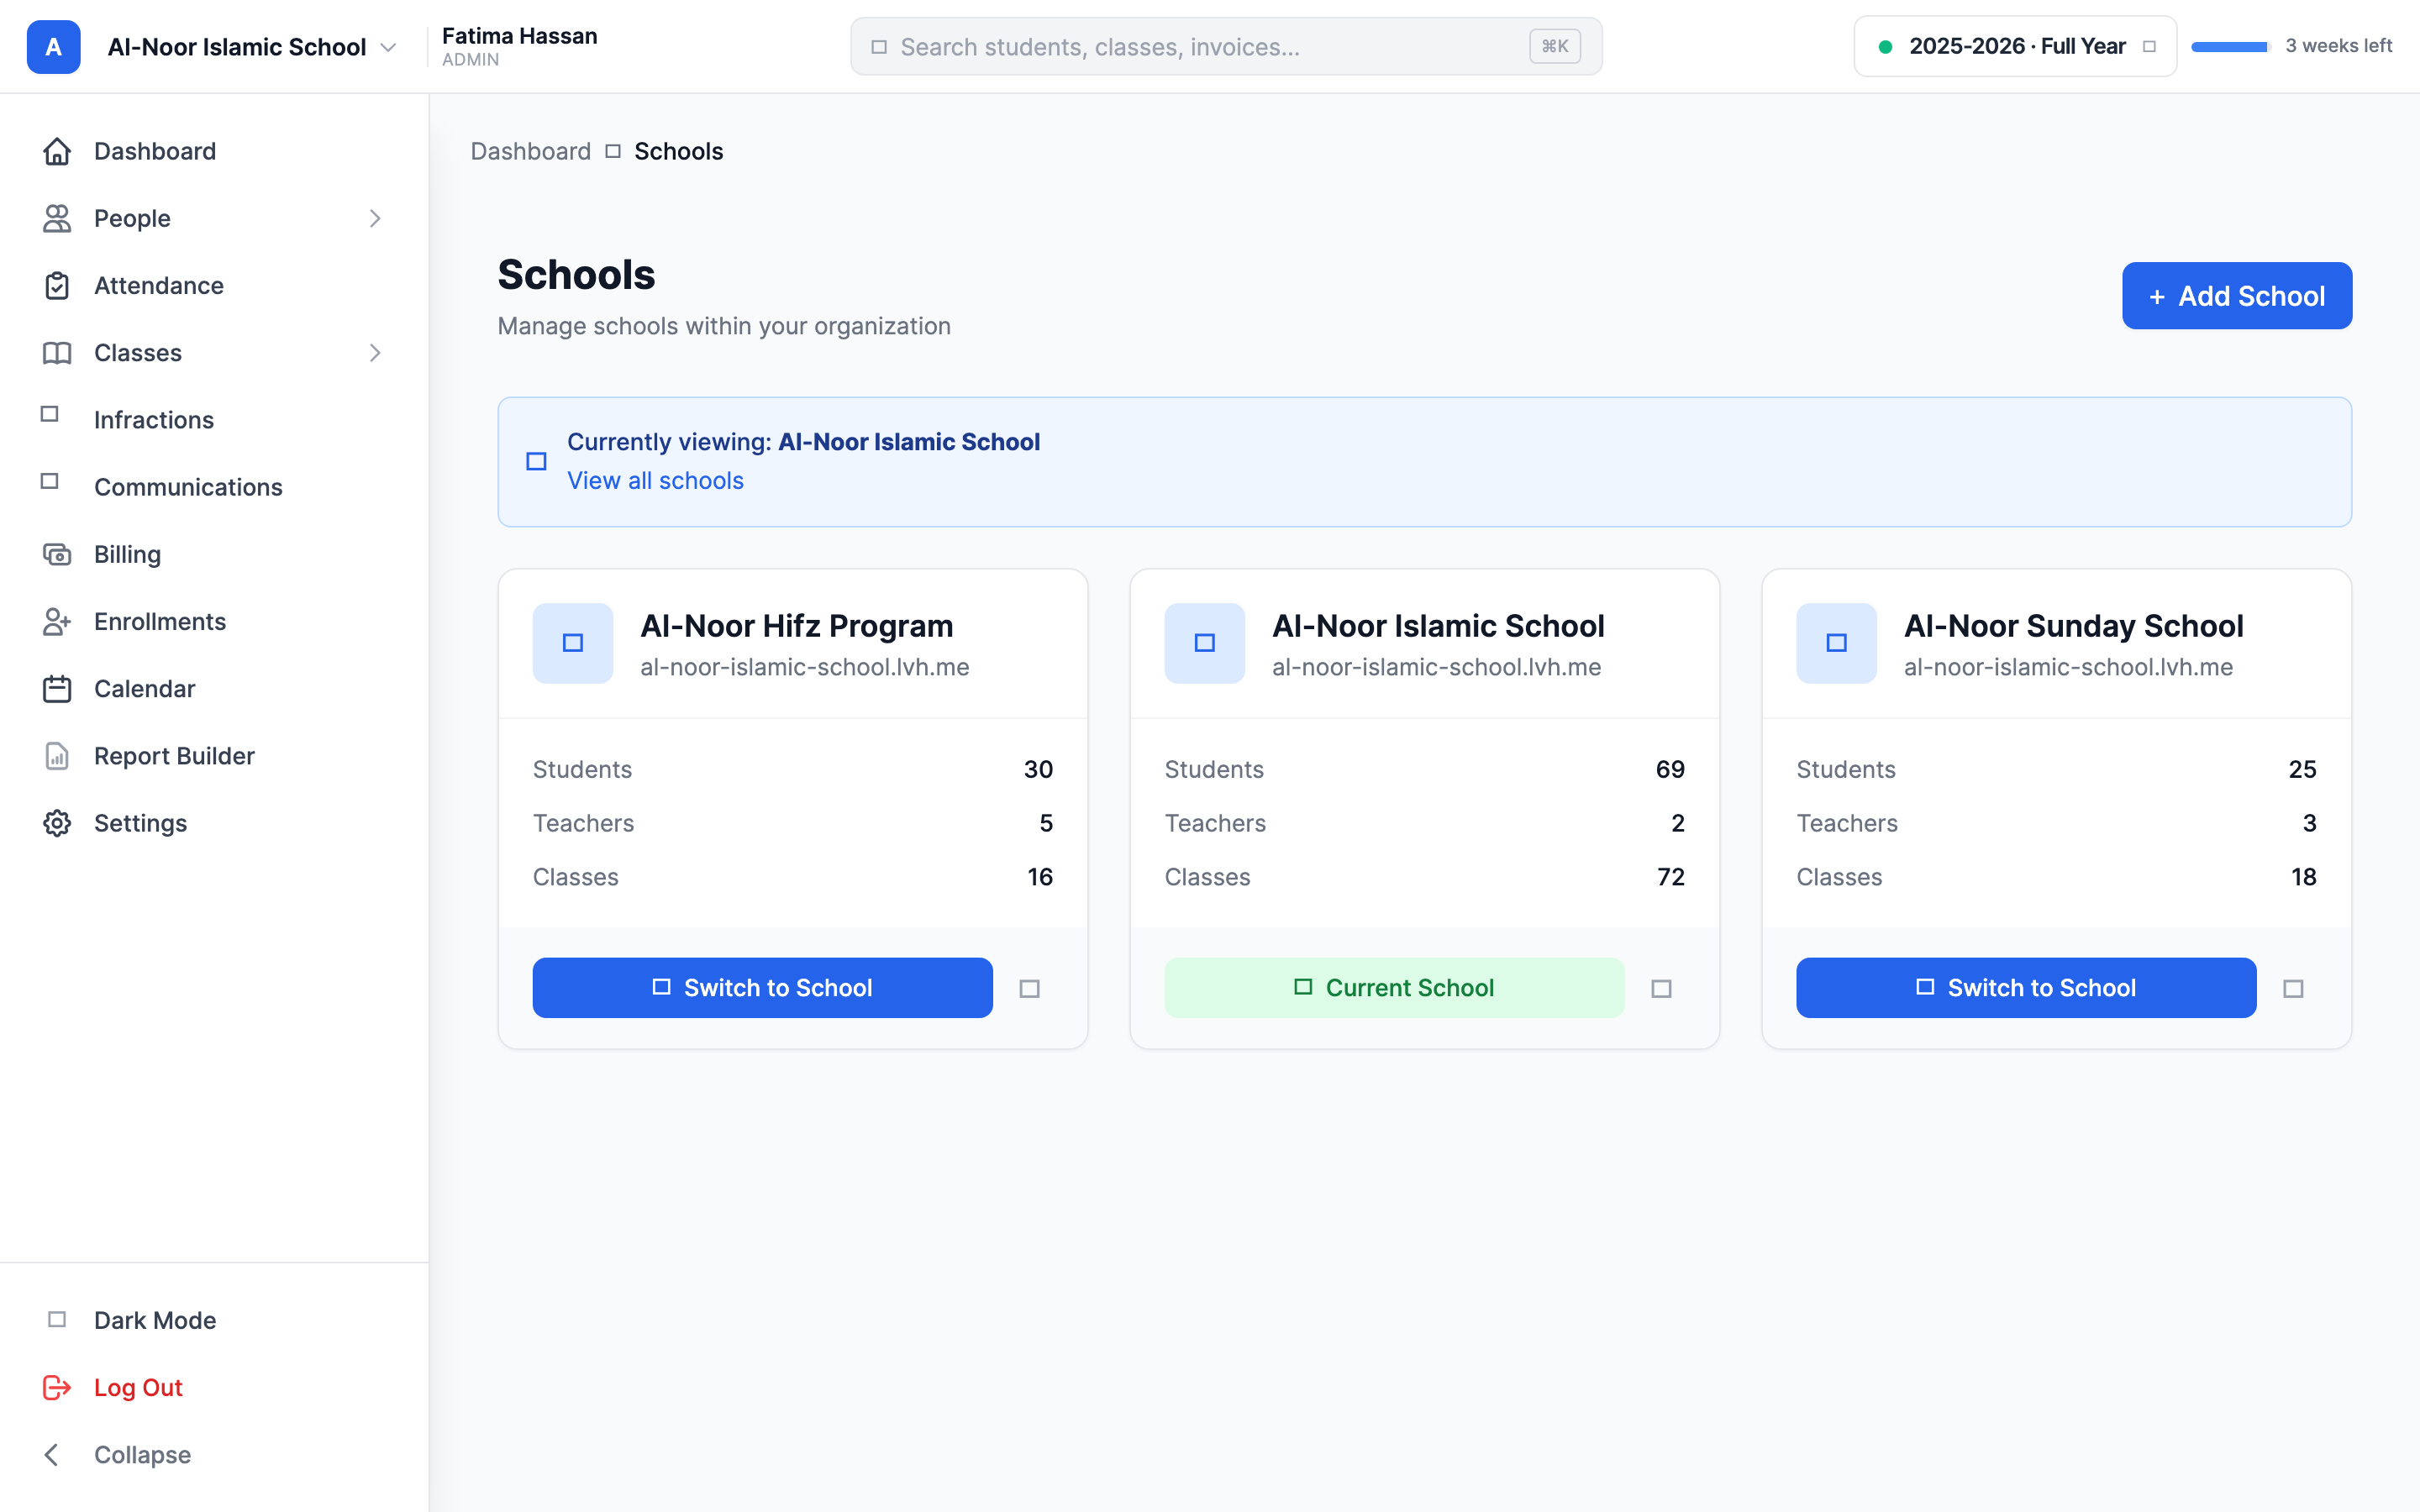
Your first school is created for you. When you finish signing up, MarkTrack automatically creates one school named after your organization and makes you its super admin. If you ever land in the app with no school at all, a window titled Create Your First Program blocks the screen until you make one — type a Program / School Name (for example "Weekend Maktab" or "Hifz Program") and continue.
To add more schools later, open the Create New School window from any of these three places:
- The school switcher in the top bar — open it and click Add School at the bottom.
- The admin dashboard — in the Schools table, click the Add School button.
- The Manage Schools page at /schools — click Add School.
In the window, type the school Name and optionally upload a Logo, then click Create School. MarkTrack adds you to the new school, switches you into it, and drops you on its dashboard.
Only the super admin can add the second school onward
Any admin can create the very first school. After that, the Add School button still shows for every admin, but only the organization's super admin can actually create a new one. A regular admin who tries will see "Access denied. Super administrator privileges required."
The school switcher
The school switcher lives on the left side of the top bar. It shows the current school's logo (or its initial) and name, with a small caret. Open it to see every school you can access, each with its student count; the school you're in is check-marked.
- Click the school name in the top bar to open the switcher.
- Click any other school in the list to switch to it.
- A brief Switching to… overlay appears, then you land on that school's dashboard with a "Switched to [name]" message.
If you can only access one school, the switcher just shows that school's name with no dropdown — there is nothing to switch to. Teachers, parents, and students who belong to more than one school get the switcher too.

"All Schools" (super admin only)
Super admins get one extra choice at the top of the switcher: All Schools. Picking it removes the single-school filter so org-level pages show data from every school at once. This is useful on pages like /settings and the Manage Schools page.
"All Schools" doesn't stick on regular pages
"All Schools" only really holds on organization-level pages such as Settings and Manage Schools. The moment you open any normal school page — students, classes, attendance, billing — MarkTrack re-pins you to a specific school. So "All Schools" is a view for org-wide screens, not a permanent mode.
What is kept separate per school, and what is shared
This is the most important idea in this guide. Most day-to-day data is school-scoped — it belongs to one school and is only visible when that school is selected. A smaller set of data is organization-wide — shared across every school.
Kept separate (school-scoped)
- Classes — subjects, levels, and the actual class instances belong to one school.
- Attendance — every attendance record is tied to a school.
- Grades and gradebooks — assignments, grades, quizzes, and report-card templates.
- Billing invoices and payments — each invoice carries a school tag (see the shared-money note below).
- Enrollment forms and applications — though one form can be set to serve several schools.
- Announcements — created in the current school and sent to that school's roster.
- Hifz records, infractions, calendar events, lunch menus, class modules, and more.
- School-level settings — the grading scheme, the time zone, the logo, and the "Require Paid Registration" toggle are all per school.
Shared (organization-wide)
- User accounts — every person has one account in your organization. Belonging to a school is just a membership; the account itself is shared.
- Tuition templates and discount codes — these are defined once for the whole organization and are available in every school.
- Programs and your organization logo.
- The Stripe payment account — there is one per organization (see below).
- SMS / texting settings and your platform subscription.
Money is tagged per school but pooled per organization
Every invoice carries the school it was raised in, and your billing pages filter by the current school. But there is only one Stripe payment account for the whole organization — tuition from all your schools lands in the same place. Tuition templates and discount codes are also shared across schools, not per school.
A few things sit in between
Academic years and holidays can be set organization-wide (inherited by every school) or overridden for a single school — a school sees the org-wide ones plus its own. Your chosen academic year and term are remembered separately for each school.
What each role sees per school
- Super admin — can access every school in the organization, gets the All Schools option, and is the only role allowed to create new schools after the first.
- Admin — sees and manages only the schools they have been added to. Switching, rosters, and reports are all limited to those schools.
- Teacher — sees only their assigned schools and the classes within them. With more than one school, they get the switcher too.
- Parent — follows their children. They see each school their children belong to.
- Student — sees the school (or schools) they are enrolled in.
On every list — students, teachers, classes — a person sees strictly the roster of the school currently selected. To find someone, make sure you're in the right school first.
Web addresses: subdomains and slugs
Each school has two web identities:
- A subdomain derived from your organization name (for example,
your-org.marktrack.com). This is the same for every school in the organization. - A slug derived from the school name. It's the path that appears in the address bar for that school's pages, like
/al-noor-sunday-school/….
Both can only contain lowercase letters, numbers, and hyphens. If a person opens a school they don't belong to, MarkTrack shows "You don't have access to this school." and sends them back to their own.
Renaming a school changes its web address
Because the slug comes from the school name, renaming a school changes its slug — and therefore every link under it. Old bookmarks and shared links to that school's pages will break. The organization subdomain does not change when you rename a school; only the school's path does. Rename deliberately.
Finding your school
If someone forgets your web address, the public Find School page at /find-school lets them search by school name, organization name, or your organization code, and sends them to the right place. If nothing matches they'll see "No school found" — double-check the code or name.
Next, learn how people move between schools in Attach and remove students and teachers from a school, or browse all guides in Settings.
More in Settings
Still stuck?
Our team is happy to walk you through it.